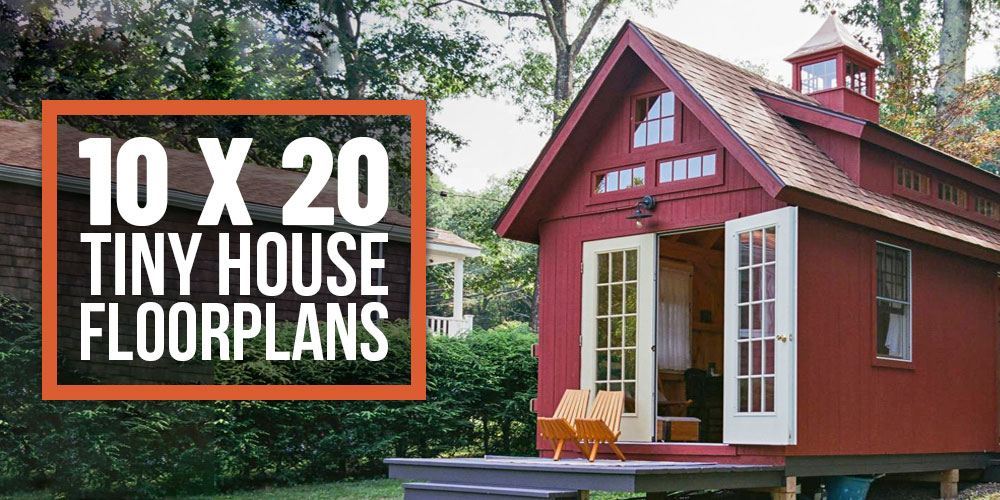

If you’re drawn to the tiny house lifestyle but aren’t sure how to maximize a 10×20 footprint, you’re not alone. This compact size is popular among homesteaders and DIY builders because it’s large enough for comfortable living yet small enough to be affordable and mobile. Understanding the key design principles, common floor plan layouts, and realistic cost breakdowns will help you decide if this size works for your needs and budget.
Key Concepts for 10×20 Tiny House Planning
Before diving into specific floor plans, understanding these foundational design principles will help you evaluate options and make decisions that work for your lifestyle.
Key Concepts
- Square footage reality: 200 total square feet means approximately 160-180 usable square feet after accounting for walls and structural elements
- Vertical space utilization: loft bedrooms, wall-mounted storage, and high ceilings create the illusion of more space
- Multi-functional furniture: pieces that serve dual purposes (storage benches, fold-down desks, murphy beds) are essential
- Natural light and windows: strategically placed windows and skylights make tiny spaces feel larger and more livable
- Foundation type options: permanent foundations, trailers, or skids affect both cost and mobility
Design Principles
Assess Your Daily Activities
Determine which activities happen most frequently in your tiny home. Do you work from home? Cook elaborate meals? Host guests? Your answers drive the floor plan layout. A work-from-home lifestyle prioritizes a separate office nook, while frequent entertaining might favor an open-concept living and kitchen area. This prioritization helps you allocate your 200 square feet strategically rather than trying to fit everything equally.
Plan the Sleeping Area
The bedroom typically consumes 25-40% of your tiny home footprint. Most 10×20 designs feature an elevated loft bedroom (8×10 or 10×10) accessed by stairs or a ladder. This vertical approach frees up ground-floor space for living areas. Consider headroom height, ventilation, and whether you need guest sleeping capacity to determine if a ground-floor bedroom or loft setup works better for you.
Design the Kitchen-Living Interface
In a 10×20 home, kitchen and living areas often blend together. An open floor plan with a galley kitchen along one wall maximizes the living space while keeping cooking functional. Alternatively, a partial wall or peninsula can create definition between zones. Position your kitchen to take advantage of natural light and ensure good airflow from cooking activities to prevent humidity buildup in this compact environment.
Maximize Storage Solutions
Storage makes or breaks tiny house living. Beyond traditional closets, incorporate under-stair drawers, wall-mounted shelving, kitchen pantry cabinets, and bedroom storage into your floor plan. Plan for 10-15% of your square footage to be dedicated storage. Built-in benches with hidden compartments and vertical shelving systems turn dead space into functional storage without consuming usable floor area.
Select Your Utility Layout
Cluster wet utilities (bathroom, kitchen) on the same wall to reduce plumbing costs and complexity. A single wall approach simplifies construction and reduces material waste. If budget allows, position utilities on an exterior wall to simplify water and waste connections. This strategic placement can save $2,000-$5,000 in construction costs while improving the flow of your remaining living space.
Calculate Real Construction Costs
Budget typically breaks down as: foundation/trailer $3,000-$8,000, framing and structure $5,000-$10,000, roofing $2,000-$4,000, utilities $3,000-$6,000, interior finishes $4,000-$8,000, and appliances/fixtures $2,000-$4,000. Total DIY builds range from $20,000-$35,000, while hiring contractors can reach $40,000-$50,000. Your specific costs depend on material choices, regional labor rates, and whether you’re doing single-wide or multi-story construction.
Account for Building Codes and Permits
Tiny house regulations vary dramatically by location. Some jurisdictions require minimum square footages (which 10×20 may not meet for permanent residence), minimum ceiling heights, specific loft sizes, or egress window requirements. Research your local building codes before finalizing your design. Some builders position tiny homes as RVs or ADUs (Accessory Dwelling Units) to navigate code restrictions, which affects your layout and foundation options.
- Use a floor planning app or graph paper to test multiple layouts before committing to construction. Digital mockups reveal flow problems and furniture placement challenges that seem invisible on paper.
- Visit or tour completed 10×20 tiny homes if possible. Understanding how others navigate daily routines in this footprint provides invaluable practical insights that plans alone cannot convey.
- Budget an extra 15-20% contingency for unexpected costs. Tiny home construction often reveals surprises during building, and having financial cushion prevents half-finished projects.
What to Look For in Tiny House Planning Tools & Resources
- 3D Floor Planning Software: Digital tools that let you visualize your 10×20 space with accurate measurements, furniture placement, and perspective views. Look for software that supports drag-and-drop functionality, building code templates, and the ability to test multiple layouts before construction.
- Detailed Cost Estimator Templates: Spreadsheets or calculators that break down material costs, labor, and permits by category. Quality estimators adjust for regional pricing variations and help you identify which elements consume the most budget, enabling smarter trade-off decisions.
- Building Code Reference Materials: Region-specific guides that outline minimum square footage, ceiling height, egress window, and loft requirements. This research prevents costly design mistakes and ensures your plans will pass inspection in your jurisdiction.
- Design Inspiration Collections: Pinterest boards, photo galleries, or books showcasing completed 10×20 tiny homes. Real-world examples reveal practical storage solutions, layout flow, and design choices that work in actual daily living rather than theory.
Roomsketcher Home Design Software Premium Subscription
Best for: DIY builders planning detailed floor layouts before construction
RoomSketcher provides professional-grade 3D floor planning with accurate dimension tools, furniture libraries, and multiple viewing angles. The software lets you test various 10×20 configurations, add appliances and fixtures to scale, and visualize how different layouts flow. Premium access includes building material costs tracking and the ability to generate material lists directly from your floor plan design.
Check Current Price on Amazon →Floorplanner Free to Premium Access
Best for: Budget-conscious builders wanting basic 3D visualization
Floorplanner offers a free tier adequate for simple 10×20 sketches plus affordable premium options. The drag-and-drop interface requires no design experience, and 3D preview helps you understand spatial relationships. While less feature-rich than professional tools, it covers essential planning needs and includes measurement verification to catch scaling errors before construction begins.
Check Current Price on Amazon →Tiny House Design: Construction and Costs Workbook by Derek Diedricksen
Best for: First-time tiny home builders needing structured planning guidance
This practical workbook walks through 10×20 specific considerations with worksheets for cost estimation, material lists, and design decisions. Diedricksen’s designs are tested and proven, reducing the guesswork in layout planning. The book includes actual floor plan examples, cost breakdowns by region, and step-by-step building sequences that demystify the construction process for beginners without engineering backgrounds.
Check Current Price on Amazon →Tiny House, Big Living: Practical Design Solutions for Modern Living Spaces
Best for: Builders wanting to compare multiple floor plan approaches and design philosophies
This comprehensive book showcases 40+ completed tiny house projects with varying footprints, styles, and cost points. Multiple 10×20 examples demonstrate how different design choices affect livability and expense. Side-by-side comparisons reveal how loft versus ground-floor bedrooms, open versus compartmentalized spaces, and material choices impact both aesthetics and budget in real-world builds.
Check Current Price on Amazon →SketchUp Pro with Tiny House Libraries
Best for: Advanced builders wanting professional CAD capability and contractor-grade plans
SketchUp Pro offers professional-level 3D modeling with extensive pre-built component libraries and the ability to generate precise construction drawings. This tool bridges the gap between visualization and actual contractor specifications, letting you create detailed material lists and structural details. The learning curve is steeper, but output quality rivals professional architect drawings at a fraction of the cost.
Check Current Price on Amazon →Tiny House Cost Estimator Excel Spreadsheet by Mobile Loam
Best for: Builders needing detailed, region-adjustable cost breakdowns
This Excel-based estimator provides line-item cost tracking with adjustable pricing for different geographic regions. It covers all major construction categories from foundation through finishes, helping identify cost drivers and opportunities for savings. The spreadsheet automatically calculates totals and highlights areas consuming disproportionate budgets, enabling strategic decision-making about where to invest versus economize.
Check Current Price on Amazon →Graph Paper Sketch Pads and Scale Ruler Set
Best for: Budget builders wanting low-tech planning before committing to digital tools
Sometimes the best tool is the simplest: quality graph paper with precise scale rulers lets you manually sketch and test 10×20 configurations without software learning curves or subscriptions. This tactile approach forces careful measurement thinking and works perfectly for sketching alternatives before digital refinement. A pack of sketch pads and architect’s scales costs under $20 and remains useful throughout construction.
Check Current Price on Amazon →Custom Consultation with Tiny House Architect (Virtual)
Best for: Builders wanting personalized professional guidance specific to their situation
Companies like Tiny House Design and Brilliant Dwellings offer virtual consultations where licensed architects review your 10×20 plans, identify code compliance issues, and suggest optimizations for your climate and lifestyle. A 2-3 hour consultation costs $300-$600 but prevents costly mistakes and accelerates your design timeline. This investment often saves multiples of its cost by avoiding structural problems or inefficient layouts discovered late in construction.
Check Current Price on Amazon →Your 10×20 Tiny House Design Starts With Planning
A 10×20 floor plan delivers surprising livability when designed thoughtfully around your specific lifestyle. The key is prioritizing ruthlessly: determine which activities matter most to you, allocate your 200 square feet accordingly, and commit to multi-functional design. Using planning tools–whether sophisticated software or simple graph paper–to test multiple configurations before construction prevents costly mid-build changes and ensures your finished home feels spacious rather than cramped. Start with your activity priorities, sketch several layout options, research your local building codes, and run detailed cost estimates before breaking ground.
The tiny house movement succeeds not because 200 square feet is objectively comfortable, but because deliberate design transforms compact space into exactly what you need. A 10×20 home can be a full-time residence, a vacation retreat, a homestead workspace, or a mobile adventure vehicle depending on how you plan it. Invest in understanding your local requirements, explore completed 10×20 examples to see real-world solutions, and use planning resources to stress-test your design before construction. The upfront planning effort translates directly into a home that works beautifully for your lifestyle while keeping costs within reach for most DIY builders.
Frequently Asked Questions
What is a realistic total cost to build a 10×20 tiny house?
Most DIY builds cost $20,000-$35,000, while hiring contractors typically runs $40,000-$50,000+. This range covers foundation, framing, roofing, utilities, interior finishes, and basic appliances. Your specific cost depends on material quality choices, whether it’s mobile or permanent, regional labor rates, and how much work you do yourself versus contracting out.
Can a 10×20 tiny house meet standard building codes for a primary residence?
This varies significantly by jurisdiction. Many municipalities require minimum square footage (typically 400+) for primary residences, which a 200 sq ft home won’t meet. However, some areas allow tiny homes as ADUs (Accessory Dwelling Units), on specific foundation types, or if registered as RVs. Always research your local building code before finalizing design plans to ensure compliance.
Is a loft bedroom or ground-floor bedroom better for a 10×20 layout?
Loft bedrooms are more space-efficient, freeing valuable ground-floor square footage for living and kitchen areas. However, ground-floor bedrooms work better if you have mobility concerns, prefer privacy separation, or want flexible furniture arrangements. Most successful 10×20 designs use loft bedrooms to maximize the living experience in the limited footprint, though personal lifestyle should drive this choice.
How much should I budget for utilities (plumbing, electrical, HVAC) in a 10×20 build?
Budget $3,000-$6,000 for complete utility installation including electrical wiring, plumbing for kitchen and bathroom, water heater, and basic HVAC or ventilation systems. This represents roughly 10-15% of total construction cost. Clustering utilities on one wall reduces materials and labor, while off-grid systems (solar, composting toilet, water catchment) add significant cost but appeal to homesteaders.
Should I design for a permanent foundation or a mobile trailer base?
Permanent foundations ($3,000-$8,000) provide legal primary residence status in most jurisdictions but reduce flexibility if you relocate. Trailer bases ($2,000-$5,000) maintain mobility and sidestep some code issues but may restrict where you can legally park. This choice depends on your long-term plans, local zoning, and whether you value the option to move your home in the future versus establishing permanent roots.
As an Amazon Associate, Build & Bloom earns from qualifying purchases. We only recommend products we genuinely think are useful. Prices and availability vary; check Amazon for the latest.
Leave a Reply