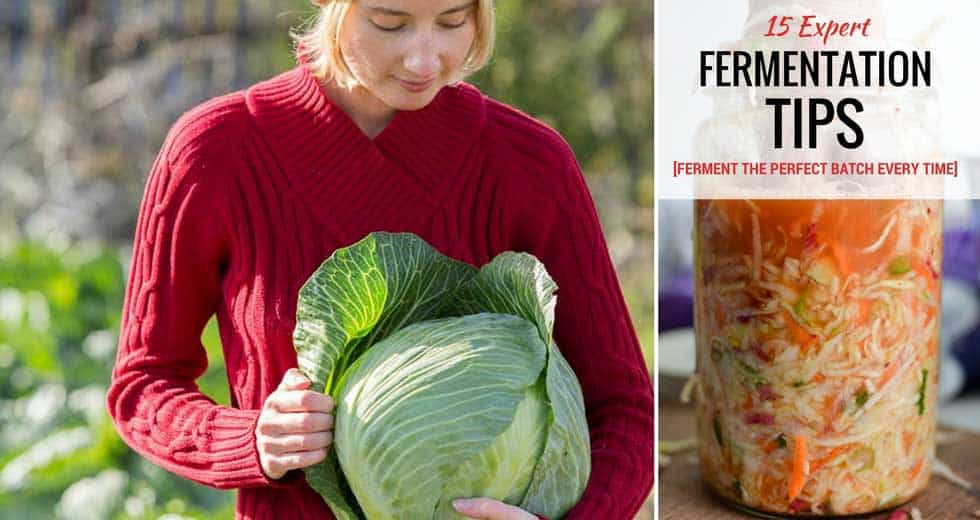

Whether you’re fermenting vegetables, creating probiotic-rich sauerkraut, or brewing kombucha, the difference between a crisp, tangy masterpiece and a mushy disappointment often comes down to understanding fermentation science. Many home fermenters struggle with soft vegetables, mold growth, or unpredictable timelines because they’re missing key principles that professional fermenters have perfected. Learning these 15 expert tips will give you the confidence and knowledge to produce reliably delicious ferments every single time.
15 Expert Principles for Successful Fermentation
Fermentation is both art and science. These core principles address temperature, salt, oxygen, monitoring, and timing—the five pillars of fermentation success.
Key Concepts
- Salt understanding: non-iodized salt at 2-5% of vegetable weight creates the optimal brine environment
- Temperature awareness: fermentation speed and flavor profile vary significantly between 55-75°F (cooler = slower, more complex flavor)
- Oxygen exclusion method: keeping vegetables submerged beneath brine prevents mold and ensures anaerobic conditions
- Monitoring tools: visual observation, smell testing, and taste sampling at regular intervals
- pH knowledge: fermentation typically brings pH below 4.6 for safety within 3-7 days depending on conditions
Core Principles
Calculate Your Salt Ratio Precisely
Weigh your vegetables and calculate 2-5% salt by total weight. For example, 1000g of cabbage requires 20-50g of salt. This creates a hypertonic environment that inhibits harmful bacteria while allowing beneficial lactobacillus to thrive. Too little salt risks spoilage; too much slows fermentation and creates an unpleasantly salty product.
Control Your Fermentation Temperature
Warmer environments (68-75°F) accelerate fermentation to 3-5 days but may produce softer vegetables and less complex flavor. Cooler spaces (55-65°F) slow fermentation to 1-4 weeks but develop deeper, more sophisticated taste profiles. Choose your location based on desired timeline and flavor goals, keeping temperature as consistent as possible throughout fermentation.
Keep Vegetables Completely Submerged
Any vegetable matter exposed to air will develop mold, ruining your batch. Use a weight, glass jar divider, or folded cabbage leaf to hold everything beneath the brine surface. Check daily and press down any floating pieces. Submerged vegetables ferment anaerobically, producing the correct bacterial cultures and preventing surface contamination.
Create an Airlock System for Gas Escape
As beneficial bacteria consume sugars, they produce carbon dioxide gas. Allow gas to escape while preventing oxygen from entering by using a loose lid, cheesecloth cover, or commercial airlock lid. This balance prevents pressure buildup while maintaining anaerobic conditions essential for proper fermentation and flavor development.
Observe Visual and Aromatic Changes Daily
Successful fermentation produces visible bubbles within 24-48 hours, cloudiness in the brine from bacterial growth, and a pleasantly sour aroma. Watch for these positive signs and note any alarming odors (putrid, rotten) or visible mold growth (fuzzy patches). Daily observation helps you catch problems early and understand your fermentation timeline.
Use Quality Water and Vegetables
Chlorinated tap water can inhibit beneficial bacteria; use filtered or dechlorinated water instead. Select fresh, firm vegetables without bruises or soft spots, as damage introduces unwanted microorganisms. The quality of your ingredients directly impacts fermentation success and final flavor complexity.
Taste Test Starting Around Day Three
Begin sampling on day three to establish your preference baseline. Fermentation develops continuously, so taste every 1-2 days until you reach your desired sourness level. This practice teaches you to recognize fermentation stages and helps you understand how time and temperature affect flavor development in your specific environment.
Store Finished Ferments in Cool Conditions
Once fermented to your preference, move jars to refrigeration or a cool pantry (50-60°F) to dramatically slow bacterial activity and halt flavor development. Ferments continue to develop slowly even when cold, so flavor will deepen over months. Proper storage extends shelf life and allows you to enjoy peak flavor at your preferred point.
- Start with simple recipes like basic sauerkraut or cucumber pickles to master fermentation fundamentals before experimenting with complex vegetable combinations or spice additions.
- Keep a fermentation journal tracking temperature, salt percentage, vegetable type, and timeline to identify patterns in your specific kitchen environment and replicate successes.
- Taste ferments from different fermentation durations in the same batch to discover your personal preference window—some prefer tangy at day 5, others prefer complex at day 21.
What to Look For in Fermentation Equipment
- Glass Jar Selection: Wide-mouth jars (32-64 oz) allow easy packing and removal of vegetables. Clear glass lets you monitor fermentation visually without opening the jar. Look for jars with measurement markings for consistent brine ratios across batches.
- Weight System: Effective weights keep vegetables submerged while allowing gas escape. Options include glass weights, ceramic weights, or folded cabbage leaves. The weight must fit inside your jar without cracking the bottom and shouldn’t alter brine chemistry.
- Airlock or Lid Design: Choose between traditional cloth covers, plastic airlock lids, or specialty fermentation lids that let CO2 escape while preventing oxygen entry. Airlocks reduce monitoring frequency and prevent contamination better than open covers.
- Salt and pH Testing: Non-iodized salt is essential; avoid table salt with anti-caking agents. Optional pH strips or hydrometers help track fermentation progress scientifically, reducing guesswork and improving consistency across batches.
Bormioli Rocco Fido Glass Jar 67.75 oz
Best for: All fermentation skill levels
The gold standard for home fermentation, this Italian glass jar features an airtight swing-top mechanism that allows CO2 to escape while preventing oxygen entry—exactly what fermentation requires. The wide 3.25-inch mouth opening makes packing and retrieving vegetables effortless, while thick glass withstands temperature changes and occasional pressure buildup. Clear glass and measurement markings let you monitor progress without opening the jar. At 2-liter capacity, it’s ideal for family-sized batches of sauerkraut, kimchi, or pickles. Thousands of fermenters consider this their go-to vessel for consistent, reliable results.
Check Current Price on Amazon →Ball Wide Mouth Mason Jar Quart 32 oz
Best for: Beginners and small batches
The humble mason jar remains a fermentation classic, offering affordability and universal availability. These 32 oz wide-mouth jars cost under five dollars and work perfectly for small ferment batches or testing new recipes. You’ll need to use cloth covers and weights instead of specialized lids, adding slightly more hands-on management. Despite simplicity, countless home fermenters rely on mason jars and produce excellent results. Perfect for starting your fermentation journey without significant investment.
Check Current Price on Amazon →Ferment’N Ease Fermentation Jar Kit
Best for: First-time fermenters seeking guidance
This complete kit includes a 1-liter glass jar, built-in airlock lid, glass weight, and instruction booklet—everything beginners need to start immediately. The integrated airlock eliminates guesswork about oxygen exposure, while the included weight keeps vegetables perfectly submerged. Simplified design focuses on the essential components without overwhelming options or complex mechanics. The instruction guide walks through salt ratios, temperature ranges, and timeline expectations. Priced as a complete system, it’s excellent value for someone wanting to test fermentation before investing in multiple jars.
Check Current Price on Amazon →Mortier Pilon Glass Fermentation Jar 4L Deluxe
Best for: Serious fermenters and large batches
This Canadian-designed, borosilicate glass jar represents the premium fermentation vessel, built for batch sizes that feed families and provide gifts. The 4-liter (135 oz) capacity handles 4-5 pounds of vegetables with optimal brine coverage, while professional-grade borosilicate glass resists thermal shock and lasts decades. The included dual-chamber airlock system provides superior gas management, and the wide mouth (3.5 inches) accommodates large vegetable pieces. Premium ceramic weight ensures vegetables stay submerged throughout fermentation. Investment-quality construction appeals to serious gardeners and homesteaders managing multiple simultaneous ferments.
Check Current Price on Amazon →Master Fermentation Through Understanding
The 15 expert principles shared above represent decades of collective fermentation knowledge distilled into actionable guidelines. The beauty of fermentation lies in its simplicity: salt, temperature, oxygen exclusion, and patience naturally transform ordinary vegetables into probiotic-rich delicacies. By understanding the ‘why’ behind each principle—why salt ratios matter, why temperature affects timeline, why submersion prevents mold—you stop following recipes blindly and start thinking like a fermentation expert. You’ll troubleshoot problems confidently, adapt to your unique kitchen environment, and create ferments that taste exactly how you prefer them.
Your fermentation journey begins with a single jar and these foundational concepts. Start with simple sauerkraut or basic cucumber ferments to develop intuition without overwhelming complexity. Invest in quality jars and weights that will serve you reliably for years, then adjust your approach based on daily observation and taste testing. Keep notes of temperature, salt percentage, and timeline results so you recognize patterns in your space. Within a few batches, you’ll move beyond beginner uncertainty to confident mastery. The 15 expert tips above represent your complete roadmap to transforming fermentation from intimidating food science into your reliable kitchen skill.
Frequently Asked Questions
How long does fermentation typically take?
Fermentation timelines vary by temperature and personal preference. Most ferments develop noticeable tang within 3-7 days at room temperature (65-75°F), while cooler conditions (55-65°F) extend the timeline to 2-4 weeks for deeper flavor development. You control the finish point by tasting regularly and moving jars to cold storage when satisfied.
Is the white film (kahm yeast) on top dangerous?
Kahm yeast, a harmless white surface film, appears on some ferments and doesn’t spoil the batch. Simply skim it off with a spoon or knife—it won’t harm you but tastes unpleasant. True mold appears fuzzy and green or black; discard any ferment showing genuine mold growth. Preventing kahm yeast starts with keeping vegetables fully submerged.
Can I use iodized table salt for fermentation?
No—iodized salt and salt with anti-caking agents inhibit beneficial bacteria and cloud your brine. Use non-iodized sea salt, pickling salt, or canning salt instead. These pure salts support fermentation chemistry and won’t interfere with bacterial growth. The mineral content of sea salt adds subtle flavor complexity.
What does successful fermentation smell like?
Healthy ferments develop a pleasantly sour, tangy aroma similar to yogurt or vinegar—you’ll recognize it instinctively. Alarming smells include putrid (rotten egg), ammonia-like, or vinegary odors that suggest bacterial contamination. If your ferment smells genuinely unpleasant rather than pleasantly sour, discard it and review temperature or salt ratio in your next batch.
How do I know when fermentation is complete?
Fermentation completes when you achieve your preferred sourness level—there’s no fixed ‘done’ point. Ferments become progressively tangier over time; taste regularly starting on day three until satisfied, then refrigerate to dramatically slow further development. Some fermenters prefer mild tang at day 5; others want complex sourness at day 21. Your preference determines completion timing.
As an Amazon Associate, Build & Bloom earns from qualifying purchases. We only recommend products we genuinely think are useful. Prices and availability vary; check Amazon for the latest.
Leave a Reply