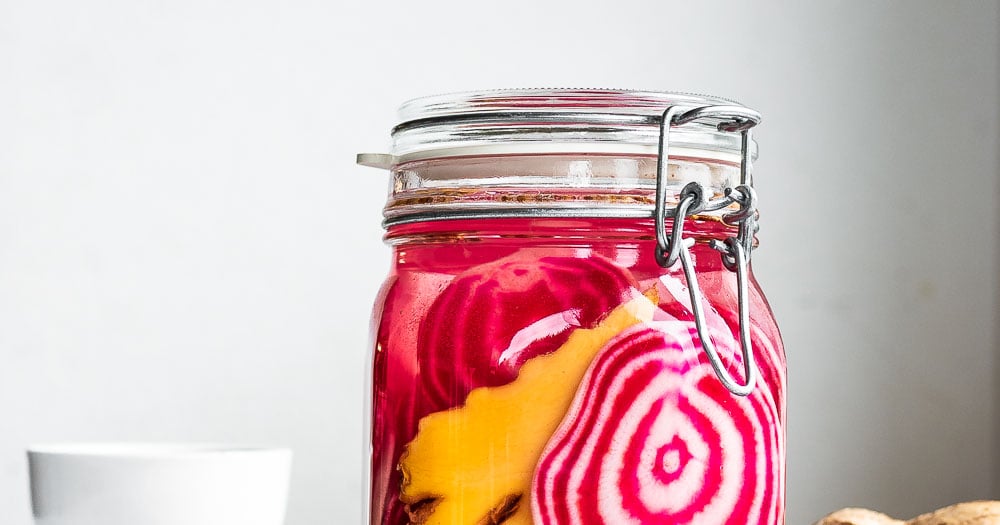

If you’ve clicked through looking for fermented vegetable recipes, you probably already know these foods are gut-friendly powerhouses. But making them at home isn’t mysterious or complicated—it’s actually one of the easiest preservation methods in the kitchen. All you need is fresh vegetables, salt, water, and a jar. In this guide, we’ll walk you through the fermentation process with three foundational recipes you can adapt to whatever produce you have on hand.
How to Ferment Vegetables: The Basic Method
The fermentation process relies on naturally occurring lactobacillus bacteria to preserve your vegetables while creating beneficial probiotics. Here’s how to make a batch that will last weeks in your refrigerator.
Ingredients
- 2-3 pounds fresh vegetables (cabbage, carrots, cucumbers, green beans, or mixed)
- Sea salt or pickling salt (non-iodized), approximately 2-3% of vegetable weight by volume
- Filtered or dechlorinated water at room temperature
- Optional: spices like dill, mustard seeds, peppercorns, garlic cloves, or fresh ginger
- Optional: whey or existing fermented brine as a starter culture
Method
Prepare and Cut Your Vegetables
Wash your fresh vegetables thoroughly under cool water. Remove any bruised or damaged sections. Cut vegetables into uniform pieces—roughly 1/4-inch thick for faster fermentation, or leave smaller items like green beans whole. Keep vegetables crisp by using them the same day you harvest or purchase them. Discard any wilted outer leaves.
Mix Your Salt Brine
Dissolve salt into room-temperature water at a ratio of approximately 2-3 teaspoons per quart. A good starting point is 2% salinity by weight. Stir until salt is completely dissolved. This brine should taste noticeably salty but not unpleasantly so—comparable to ocean water. If using tap water, let it sit uncovered for 24 hours to allow chlorine to dissipate.
Pack Your Fermentation Vessel
Choose a clean glass jar with a wide mouth for easy packing and monitoring. Layer your prepared vegetables with any optional seasonings, pressing down firmly as you go. The vegetables should be tightly packed to minimize air pockets. Leave about 2 inches of headspace at the top of the jar for expansion and brine overflow.
Submerge All Vegetables Below the Brine
Pour your prepared brine over the packed vegetables until they are completely covered. Vegetables exposed to air are susceptible to mold contamination. Use a fermentation weight, a small jar filled with brine, or even a clean cabbage leaf to keep vegetables submerged. The weight should sit below the brine surface and hold everything down.
Cover and Maintain the Environment
Place a cloth, coffee filter, or fermentation lid over the jar opening to keep dust and insects out while allowing gases to escape. Secure it loosely with a rubber band or jar ring—do not seal tightly, as pressure will build during fermentation. Keep the jar at room temperature (65-75°F is ideal) away from direct sunlight.
Monitor Fermentation Progress
Check your jar daily. You should see bubbles rising through the brine within 24-48 hours, and the brine will become cloudy as bacteria multiply. This is completely normal. Taste a piece daily starting around day 3 to assess flavor development. The vegetables will transform from raw and crunchy to softer and distinctly tangy.
Determine Doneness and Store
Fermentation typically completes in 3-14 days depending on temperature and your taste preference. Cooler environments ferment more slowly and develop deeper flavors. Warmer conditions speed the process. Once vegetables reach your desired tanginess, transfer the entire jar to cold storage. Properly fermented vegetables will keep refrigerated for at least 3-4 months.
- Start with cabbage or carrots if you’re new to fermentation—they’re forgiving and ferment reliably without special care.
- Keep fermentation jars away from direct sunlight and heat sources; consistent cool temperatures prevent spoilage and allow for slower, more flavorful fermentation.
- Save your fermentation brine after eating the vegetables—use it to start new batches or drizzle on salads and grain bowls for a probiotic boost.
What to Look For in Fermentation Equipment
- Jar Capacity and Mouth Size: Choose wide-mouth glass jars in 1-quart to 2-quart sizes for easy packing and ingredient removal. Wide openings make layering vegetables and inserting weights much simpler than narrow-necked bottles.
- Weight System: A reliable weight keeps vegetables submerged throughout fermentation. Purpose-built fermentation weights, glass marbles, or even smaller jars filled with brine all work well. Avoid plastic weights that may leach chemicals.
- Breathable Covering: Cloth, coffee filters, or specialty fermentation lids allow carbon dioxide to escape while preventing contamination. Avoid tight seals that trap pressure or allow mold spores to enter.
- Non-Iodized Salt and pH Testing: Use pickling or sea salt only—iodized table salt can cloud brine and inhibit fermentation. Optional pH strips help confirm fermentation has reached proper acidity for food safety.
Weck Mold Jar 1-Liter (Model 766)
Best for: Serious home fermenters
The Weck mold jar is the gold standard for fermentation with its wide mouth, straight sides for easy packing, and elegant European design. The 1-liter capacity is perfect for small-batch fermentation. These jars are made of borosilicate glass and rated for both fermentation and canning. The classic aesthetic means your ferments look beautiful on display. Weck jars are durable enough to last decades with proper care.
Check Current Price on Amazon →Ball Wide Mouth Quart Mason Jars (Set of 12)
Best for: Beginners and budget-conscious fermenters
These classic Ball mason jars are the most affordable entry point into fermentation. Wide-mouth quart jars are perfect for vegetable ferments and readily available at any grocery or hardware store. The set includes 12 jars, giving you plenty to experiment with multiple ferments simultaneously. While not specifically designed for fermentation, they work reliably when used with proper weights and breathable covers.
Check Current Price on Amazon →Fermentology Complete Fermentation Kit
Best for: First-time fermenters wanting all-in-one solution
This comprehensive kit includes a 2-quart jar, glass weights, cloth cover with rubber band, and instruction booklet tailored for beginners. Everything you need arrives in one package with no additional shopping required. The included guide walks through the exact fermentation process with timing recommendations and troubleshooting tips. Reviewers consistently praise how the kit removes guesswork and builds confidence.
Check Current Price on Amazon →Kilner Fermentation Jar with Glass Weight (1000ml)
Best for: Experienced fermenters seeking premium quality
Kilner’s fermentation jar is purpose-built with an integrated glass weight system that sits inside the jar lid, keeping vegetables submerged without fuss. The high-quality borosilicate glass resists thermal shock and cloudiness. The sealed system with airlock valve lets gas escape while preventing contamination. This is an investment piece that performs flawlessly and becomes heirloom-quality equipment.
Check Current Price on Amazon →Anchor Hocking Heritage Hill Glass Jars 2-Quart (4-Pack)
Best for: Bulk fermenters making multiple batches
These durable Anchor Hocking jars offer excellent value when purchasing the four-pack. Two-quart capacity means you’re fermenting serious quantities while maintaining the wide mouth essential for packing. The glass is thick and reliable, and the price per jar is significantly lower than specialty fermentation brands. Many experienced fermenters keep a fleet of these for batch production.
Check Current Price on Amazon →Mortier Pilon Glass Fermentation Weights (Set of 4)
Best for: Anyone with jars needing reliable submersion
These Canadian-made glass weights are the most versatile submersion solution available. Each weight fits snugly inside mason and wide-mouth jars to hold vegetables below the brine. The set of four means you can ferment multiple jars simultaneously. Unlike plastic alternatives, these won’t leach chemicals or degrade over time. They’re the most purchased weight option by serious home fermenters.
Check Current Price on Amazon →Emile Henry Fermentation Crock 2-Liter
Best for: Space-conscious fermenters with limited cabinet room
This French ceramic crock is compact and beautiful enough to keep on your countertop as a design element. The 2-liter capacity is sufficient for single-batch ferments without taking up excessive storage space. The thick ceramic maintains stable temperature better than glass, promoting even fermentation. The integrated water seal lid is elegant and functionally superior to cloth covers.
Check Current Price on Amazon →PicklePebble Fermentation Jar System 2-Quart with All Accessories
Best for: Premium fermenters who want everything included
This all-inclusive system includes the 2-quart jar, multiple glass weights, specialized airlock lid, cloth covers, and access to the PicklePebble online fermentation community. The airlock lid is the standout feature, allowing CO2 to escape while maintaining an anaerobic environment that prevents mold. This is the most technologically advanced home fermentation system available for vegetable ferments.
Check Current Price on Amazon →Start Your Fermentation Practice Today
Fermented vegetables are one of the most rewarding kitchen projects you can undertake. The learning curve is genuinely gentle—most first-time batches succeed beautifully. You’ll taste the difference between homemade ferments and store-bought versions immediately, and your digestive system will notice the shift to living foods filled with natural probiotics. The equipment investment is minimal, and everything you buy will serve you for decades.
Begin with a single jar of fermented cabbage or mixed vegetables. Follow the salt ratio, keep everything submerged, and let time do the work. After your first successful batch, you’ll feel confident experimenting with different vegetables, spice combinations, and fermentation lengths. Soon you’ll understand why fermentation has been humanity’s most important preservation method for thousands of years. The combination of simplicity, nutrition, and flavor is hard to beat.
Frequently Asked Questions
How do I know if my fermented vegetables have spoiled?
Properly fermented vegetables should smell pleasantly sour and tangy. Discard the batch if you see fuzzy mold on the surface (white film underneath the brine is harmless), detect an unpleasant rotten or fishy smell, or notice the brine has become slimy. A healthy ferment smells vinegary and looks clear or cloudy, never murky.
Can I ferment without added salt?
Salt is critical—it prevents harmful bacteria from growing while allowing beneficial lactobacillus to thrive. Unsalted fermentation risks pathogenic contamination. The 2-3% salt ratio is the safe standard developed through centuries of fermentation practice. Low-salt ferments (under 2%) may succeed but carry higher contamination risk.
Why is my fermentation jar producing so many bubbles?
Vigorous bubbling is a sign of healthy, active fermentation. Lactobacillus bacteria are rapidly metabolizing sugars in your vegetables and producing carbon dioxide gas. More bubbles typically indicate warmer fermentation temperature and higher bacterial activity. This is completely normal and desirable.
How long do fermented vegetables last once opened?
Properly fermented vegetables stored in the refrigerator keep for 3-4 months minimum. The cold temperature and acidic brine preserve them indefinitely, though flavor may gradually mellow. Use a clean utensil to remove portions to prevent introducing contamination. The brine itself stays usable for months and becomes more potent over time.
Can I ferment vegetables in plastic containers?
Glass is recommended because it’s inert and won’t leach chemicals into your brine. Plastic may degrade or release compounds, particularly with acidic fermentation conditions over months. If using plastic, choose food-grade containers and expect shorter shelf life. Glass jars are affordable and more reliable for long-term fermentation storage.
As an Amazon Associate, Build & Bloom earns from qualifying purchases. We only recommend products we genuinely think are useful. Prices and availability vary; check Amazon for the latest.
Leave a Reply