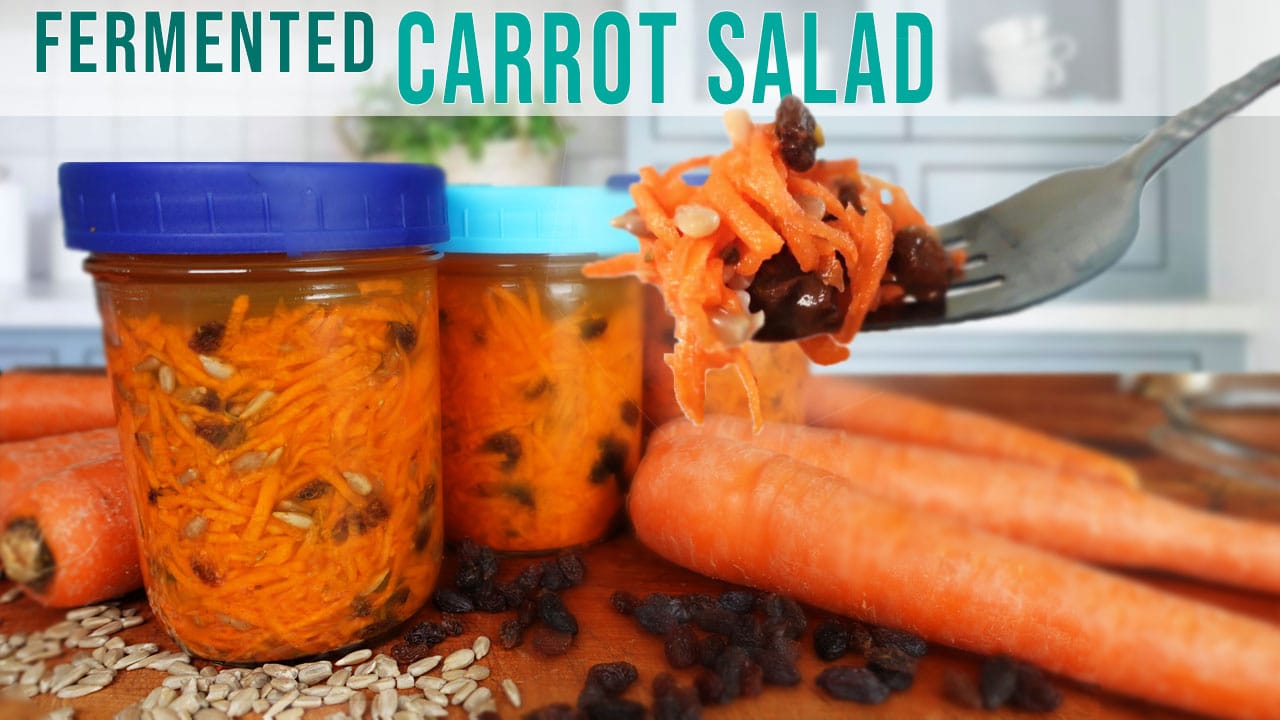

If you’re looking to boost your gut health and add more probiotics to your diet, fermented vegetables are one of the easiest ways to start. This 48-hour fermented carrot salad is ready in just two days, requires minimal equipment, and tastes surprisingly good alongside almost any meal. Unlike store-bought probiotic supplements, you’ll know exactly what’s going into your food, and the live cultures will be at their peak freshness.
How to Make 48-Hour Fermented Carrot Salad
This simple fermentation recipe uses salt brine to create an environment where beneficial lactobacillus bacteria thrive, transforming raw carrots into a tangy, probiotic-rich condiment.
Ingredients
- 2-3 pounds fresh carrots, peeled and shredded or julienned
- 2 tablespoons sea salt or kosher salt (non-iodized)
- 2 cups filtered or dechlorinated water
- Optional seasonings: 1 tablespoon fresh ginger, 2-3 garlic cloves, 1 teaspoon turmeric, or 1/2 teaspoon red pepper flakes
- 1 teaspoon caraway seeds or dill (optional for flavor variation)
Method
Prepare your carrots
Wash and peel your fresh carrots thoroughly under running water. Using a box grater or food processor, shred the carrots into thin, uniform pieces. If you prefer a crunchier texture, use a vegetable peeler or mandoline to create thin ribbons instead. Place all shredded carrots into a clean mixing bowl.
Make the salt brine
Combine filtered water with salt in a separate container, stirring until the salt completely dissolves. Use exactly 2 tablespoons of non-iodized salt per 2 cups of water, as this ratio (about 5% salt concentration) creates the ideal environment for fermentation without encouraging harmful bacteria growth.
Add optional seasonings
If desired, mince your garlic and ginger and add them along with any other seasonings to the bowl of shredded carrots. Stir well to distribute the seasonings evenly throughout. The compounds in garlic and ginger actually enhance fermentation and add antimicrobial properties to support the process.
Pack your fermentation vessel
Transfer the carrot mixture into a clean glass jar, pressing down gently with the back of a spoon to compact the vegetables. Pour the prepared salt brine over the carrots until they are completely submerged, leaving about 1-2 inches of headspace at the top of the jar.
Keep vegetables submerged
Vegetables that float above the brine line can mold, so use a fermentation weight, a small jar filled with brine, or even a small piece of cabbage leaf to hold the carrots under the liquid. The key is ensuring nothing is exposed to air during the fermentation period.
Seal and set aside
Cover your jar with a loose lid or use an airlock lid designed for fermentation if you have one. Place the jar in a cool, dark location away from direct sunlight, ideally between 65-75 degrees Fahrenheit. A kitchen cabinet or basement shelf works perfectly.
Monitor fermentation
After 24 hours, you’ll likely notice bubbles rising through the brine and the liquid becoming slightly cloudy—these are signs of active fermentation. This is normal and desirable. After 48 hours, taste a small spoonful. The carrots should taste tangy and slightly sour with a pleasant fermented flavor.
Transfer to storage
Once fermentation has reached your preferred tanginess level at 48 hours, seal the jar tightly and move it to cold storage in your refrigerator. Cold temperatures dramatically slow fermentation, preserving the carrots for 2-3 months. Serve as a side dish, topping, or condiment with any meal.
- Use filtered or dechlorinated water because chlorine can interfere with beneficial bacteria growth. If you only have tap water, let it sit uncovered overnight to allow chlorine to evaporate.
- Keep your fermentation jar out of direct sunlight, as light can degrade the quality of the ferment. A kitchen cabinet, pantry shelf, or opaque container works best.
- If white film (kahm yeast) appears on the surface, it’s not dangerous but affects flavor—simply skim it off and ensure vegetables stay submerged going forward.
What to Look For in Fermentation Equipment
- Glass Jar Quality: Choose jars made from borosilicate glass, which withstands temperature changes and won’t leach chemicals. Avoid thin glass that can break during fermentation expansion. Wide-mouth jars are easier to pack and clean than narrow-neck designs.
- Airlock Lid System: Airlock lids allow gases produced during fermentation to escape while preventing outside oxygen and contaminants from entering. This is more reliable than traditional sealed lids, which can pop off or trap too much pressure.
- Fermentation Weights: A dedicated weight keeps vegetables submerged without requiring improvisation. Glass weights are non-reactive and durable, though ceramic or silicone alternatives also work well and won’t affect flavor.
- Grater or Shredder: A quality box grater or food processor saves significant prep time and produces uniform shreds that ferment consistently. Hand-shredded vegetables work fine but require more effort and patience.
Bormioli Rocco Fido Jar with Ceramic Top
Best for: Serious fermenters wanting reliable results
This 34-ounce Bormioli Rocco glass jar features a ceramic and glass lid with an airtight rubber gasket designed specifically for fermentation. The wide mouth makes packing and cleaning effortless, while the borosilicate glass won’t degrade over repeated ferments. The secure seal prevents contamination while its clear glass lets you monitor progress without opening the jar. Trusted by fermentation enthusiasts for years, this jar will last decades with proper care.
Check Current Price on Amazon →Ball Wide Mouth Mason Jar 32 oz
Best for: Budget-conscious beginners
The affordable Ball wide-mouth mason jar works perfectly for fermentation when paired with a basic weight or cloth cover. At just a few dollars per jar, you can start fermenting without major investment. The standard mason jar lid isn’t ideal for fermentation since it seals too tightly, but many fermenters use a piece of cheesecloth secured with a rubber band instead, allowing gases to escape while keeping dust out.
Check Current Price on Amazon →Fermentation Crock Kit with Airlock Lid
Best for: First-time fermenters wanting guaranteed success
This complete kit includes a ceramic crock, airlock lid, and glass weights, eliminating guesswork for beginners. The ceramic material won’t leach chemicals, and the airlock valve makes fermentation foolproof by automatically venting gases. The included weights keep vegetables perfectly submerged. At a mid-range price point, this kit provides everything needed to start fermenting confidently without purchasing items separately.
Check Current Price on Amazon →Kilner Clip Top Jar Set
Best for: Design-conscious home fermenters
These beautiful British-made Kilner jars combine functionality with aesthetic appeal. The glass lids and metal clip closures are specifically designed for fermentation and food preservation. Available in various sizes, they double as attractive kitchen storage and serving vessels. The robust construction and timeless design make these heirloom-quality pieces that will ferment countless batches over a lifetime.
Check Current Price on Amazon →Oxo Good Grips Box Grater
Best for: Prepping large batches of vegetables
This four-sided box grater from OXO features sharp, efficient blades and a comfortable ergonomic handle that makes shredding 3 pounds of carrots quick and painless. The non-slip base keeps it stable while grating, and the fine shredding surface creates ideal texture for fermented carrot salad. Easy to clean and dishwasher safe, this grater becomes an essential tool in any fermentation kitchen.
Check Current Price on Amazon →Glass Fermentation Weights 4-Pack
Best for: Keeping vegetables submerged consistently
These hand-blown glass weights fit inside jars to hold vegetables below the brine surface, preventing mold and ensuring even fermentation. The four-pack provides backup weights for multiple jars or batches. Non-reactive glass won’t affect flavor, and they last indefinitely. At an affordable price, these are an essential upgrade over improvised methods like stuffing extra vegetables on top.
Check Current Price on Amazon →Microplane Premium Grater
Best for: Fine grating for garlic and ginger additions
While the box grater handles main carrot shredding, this specialized microplane grater excels at mincing garlic and ginger for your ferment additions. The razor-sharp blade creates fine, consistent pieces that distribute evenly throughout the batch. Professional chefs and home cooks alike appreciate this tool’s precision and durability. It transforms optional seasonings into perfectly textured additions.
Check Current Price on Amazon →Weck Jar Fermentation Starter Set
Best for: Enthusiasts wanting German engineering
This premium German-made Weck jar set represents the gold standard in fermentation vessels. The precise rubber seals and glass lids are engineered for perfect fermentation conditions. The beautiful aesthetic design makes these jars equally at home on a shelf or dining table. While expensive, Weck jars represent a lifetime investment that produces superior fermentation results and serves as functional kitchen decor.
Check Current Price on Amazon →Start Your Fermentation Journey Today
Fermented carrot salad is one of the easiest and most rewarding fermentation projects for beginners. With just carrots, salt, water, and a clean jar, you’ll create a living probiotic food that supports gut health while adding incredible tangy flavor to any meal. The 48-hour timeline means you can go from raw ingredients to finished ferment in just two days—no special skills or expensive equipment required. Even a simple mason jar with a cloth cover works perfectly if you don’t have specialized fermentation gear.
The key to success is understanding that fermentation is a natural process that has fed humans for thousands of years. Once you taste your first batch of homemade fermented carrots, you’ll likely want to expand into other vegetables and flavor combinations. Start with one jar, keep detailed notes on what works for your kitchen environment, and soon fermentation will become as routine as making salad. Your gut health will thank you for the boost of beneficial bacteria, and your taste buds will celebrate the complex, tangy flavors that store-bought versions simply cannot match.
Frequently Asked Questions
Can I use iodized salt for fermentation?
No, avoid iodized salt because iodine inhibits beneficial bacteria growth and can turn your ferment dark. Use kosher salt, sea salt, or pickling salt instead. Ensure the salt is non-iodized by checking the label.
What if my fermented carrots taste too salty?
You likely used too much salt or didn’t rinse the finished ferment before eating. Try reducing salt to 1.5 tablespoons per 2 cups water next time, or rinse a spoonful of fermented carrots before tasting. The brine serves a preservation purpose but isn’t meant to be consumed directly.
How long do fermented carrots last in the refrigerator?
When stored in an airtight jar in the fridge, fermented carrots remain safe and flavorful for 2-3 months. The cold temperature dramatically slows fermentation. Taste occasionally and discard if you notice any off-smells or mold.
Can I ferment other vegetables the same way?
Absolutely. This same method works for cabbage, cucumbers, green beans, beets, and most other vegetables. Fermentation times may vary slightly based on size and density, but the principle remains identical.
Will my fermented carrots have living probiotics if I cook with them?
Cooking kills beneficial bacteria, so use fermented carrots fresh and unheated to maximize probiotic content. Add them to finished dishes, salads, or side plates to preserve the live cultures that support digestive health.
As an Amazon Associate, Build & Bloom earns from qualifying purchases. We only recommend products we genuinely think are useful. Prices and availability vary; check Amazon for the latest.
Leave a Reply