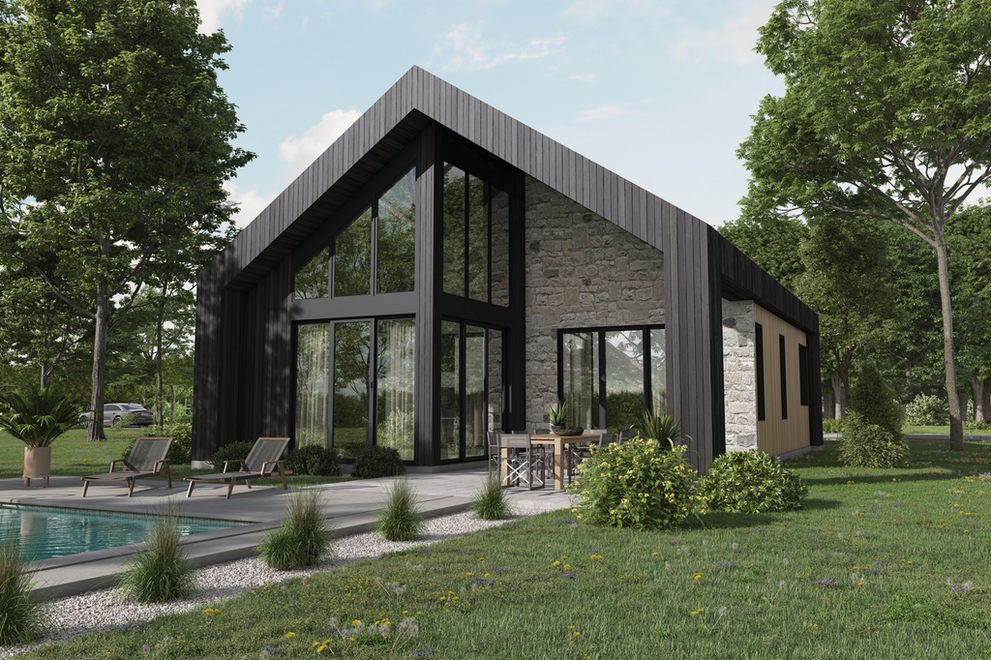

A-frame tiny houses have surged in popularity as homesteaders and DIY builders seek affordable, stylish alternatives to traditional housing. But understanding what makes an A-frame work—structurally, aesthetically, and functionally—requires more than admiring Pinterest photos. Whether you’re drawn to minimalist living, seeking a guest house solution, or planning your first off-grid shelter, knowing the core design principles will help you evaluate plans, anticipate challenges, and create a space that truly fits your lifestyle.
Key Design Principles for A-Frame Tiny Houses
A-frame architecture offers specific structural and spatial advantages. Understanding these five core principles will guide your evaluation of plans and your own design decisions.
Key Concepts
- Structural integrity – the peaked roof design naturally sheds water and snow while the wide base distributes weight efficiently, reducing foundation and framing costs
- Vertical space utilization – tall peak ceilings create usable square footage without expanding the ground footprint, essential for compact living
- Weather resilience – steep roof angles and aerodynamic shape resist wind and shed precipitation, making A-frames ideal for diverse climates
- Material efficiency – fewer walls, simplified framing, and reduced exterior surface area lower building material costs and thermal load
- Design flexibility – the simple geometric form adapts to multiple aesthetic styles from rustic cabin to modern minimalist
Principles
Evaluate Roof Pitch and Interior Ceiling Height
The angle of your roof directly impacts usable interior space. Steeper pitches (45-60 degrees) create taller peak ceilings but reduce floorspace at ground level; gentler pitches (35-45 degrees) offer more headroom in living areas. For a tiny house, calculate the ceiling height at key zones—sleeping loft, kitchen, main living area—ensuring each meets your minimum comfort requirements. A 24-foot-wide base with 50-degree pitch typically yields 10-12 feet peak height, ideal for bedroom lofts.
Plan Vertical Living Zones to Maximize Square Footage
A-frames thrive when you stack living zones vertically rather than spreading horizontally. Position sleeping or storage in the peak loft, living and kitchen in the mid-height zone, and utilities (bathroom, mechanical) in the narrower corners. This strategy transforms a 400-square-foot footprint into 600+ usable square feet. Ensure loft access is safe and convenient—stairs or a ladder positioned away from main traffic patterns work best.
Choose Wall Placement for Load-Bearing Stability
Unlike boxy homes, A-frames require interior walls to support the roof load. Position vertical support walls strategically: typically one central beam runs the length of the house, or exterior walls bear the full load. Open-concept living remains possible with proper beam sizing and support columns. Understand your plan’s load-bearing design before modifying layouts, as removing walls can compromise structural integrity.
Address Thermal Efficiency and Ventilation
The large roof surface area in A-frames can create thermal challenges—heat rises into poorly insulated peaks, and cross-ventilation becomes tricky with triangular end walls. Specify high R-value insulation in roof cavities, install ridge and soffit venting to prevent moisture buildup, and consider operable roof windows or clerestory vents for summer cooling. Proper insulation is more critical in A-frames than traditional homes due to increased surface-area-to-volume ratio.
Select a Complementary Aesthetic Within Your Style
A-frame geometry suits multiple design languages: rustic cabin (wood siding, large windows, stone accents), modern minimalist (metal siding, clean lines, minimal ornamentation), or cozy cottage (board-and-batten, window boxes, complementary trim). Your aesthetic choice affects material selection, window placement, deck design, and overall visual impact. Sketch elevation views in 2-3 style options before finalizing plans to ensure your A-frame reflects your vision.
- Study prevailing winds and sun orientation for your specific location; A-frame orientation affects natural heating, cooling, and structural stress from weather
- Budget 15-20% extra for a structural engineer review—A-frame designs require precise calculations, and professional input prevents costly framing errors
- Include large, strategic windows in front-facing triangle walls to visually enlarge interior space and maximize natural daylighting in compact layouts
What to Consider When Choosing A-Frame Tiny House Plans
- Structural Drawings and Load Calculations: Professional plans must include detailed roof pitch specifications, load-bearing wall locations, beam sizing, and foundation design. Verify the plans are engineered for your local building codes and soil conditions, and include calculations that prove the structure’s integrity.
- Livable Square Footage vs. Ground Footprint: Compare actual usable interior space to the footprint size. A 400-square-foot A-frame might yield only 300 square feet of comfortable living space if ceiling height is insufficient. Look for plans that clearly differentiate full-height vs. sloped-wall zones.
- System Integration (Plumbing, HVAC, Electrical): Plans should show realistic routing for utilities through the peak structure. Tight A-frames present challenges for ductwork, water lines, and wiring; ensure the plan addresses these or anticipate custom solutions.
- Window and Door Placement Strategy: Evaluate how windows are positioned relative to roof pitch, loft placement, and sun exposure. Plans with clerestory or roof windows, plus strategic wall openings, offer better natural light and ventilation than poorly designed alternatives.
Bosch Power Tools 4-Piece Drill Driver and Impact Driver Combo Kit
Best for: DIY A-frame builders tackling framing, fastening, and interior finish work
This cordless combo kit delivers the two essential power tools for any tiny house build: a drill-driver for pilot holes and fastening, and an impact driver for structural bolts and heavy fastening tasks. The compact, lightweight design suits working in confined A-frame spaces and at height on lofts. Includes two batteries and charger, giving you continuous operation across multiple work days. Professional-grade performance at mid-range pricing makes this the single most versatile power tool investment.
Check Current Price on Amazon →DeWalt DW6110 Random Orbit Sander
Best for: First-time builders finishing interior surfaces and siding prep
A random orbit sander streamlines surface preparation for interior walls, ceilings, and exterior trim—critical tasks in A-frame builds where visual finishes matter. This DeWalt model balances power and control, with dust collection that keeps work areas manageable. Perfect for flattening drywall seams, prepping wood siding, and smoothing trim pieces before staining or painting. Its forgiving motion pattern suits beginners while delivering professional results.
Check Current Price on Amazon →Stanley FatMax Tape Measure 25-Foot
Best for: Daily measurement and layout work across all building phases
Measuring accuracy determines whether your A-frame components align correctly. This Stanley tape measure features a 25-foot reach ideal for interior dimensions and wall layouts, with a reinforced blade that resists kinking in tight spaces. The bright-colored casing and bold markings enhance visibility in dusty work environments. Rugged construction withstands repeated job-site drops, and the reasonable price point lets you afford multiple units for different team members.
Check Current Price on Amazon →Makita 5007MG Circular Saw
Best for: Continuous framing, decking, and structural lumber cuts
Framing an A-frame requires hundreds of precision cuts in dimensional lumber, plywood, and trim. This Makita circular saw delivers consistent, straight cuts with minimal tearout, and the 7.25-inch blade handles standard 2x lumber in single passes. The electric motor provides sustained power through long cutting sessions without cordless battery degradation. Lightweight design reduces fatigue when making overhead cuts on roof components.
Check Current Price on Amazon →Planning Your A-Frame Tiny House Build
A-frame tiny houses represent a compelling fusion of affordability, durability, and distinctive style. Success requires moving beyond visual inspiration to understand the structural and spatial principles that make A-frames function. Steep roofs, vertical space utilization, strategic wall placement, and thoughtful system integration aren’t just design features—they’re the framework that transforms a simple shape into a genuinely livable home. By studying these core principles before committing to specific plans, you’ll make informed decisions about roof pitch, window placement, and material choices that directly impact both construction cost and long-term satisfaction.
Whether you’re a first-time builder or an experienced DIYer, the right tools and plans streamline the journey from concept to move-in. Invest in quality fundamentals—accurate measurement, precise fastening, proper structural support—and your A-frame will deliver the efficiency and character that made you drawn to this design in the first place. The steep roofline, the soaring interior space, the weather-resistant form: these features reward careful planning and deliberate construction. Start with solid plans, understand why each design choice matters, and approach your build with both respect for the geometry and confidence in your ability to execute it well.
Frequently Asked Questions
What is the minimum square footage for a livable A-frame tiny house?
Most building codes require 400 square feet minimum for a residential dwelling, though some jurisdictions allow 300-350 for accessory dwellings. However, effective usable space in an A-frame depends heavily on ceiling height and loft configuration. A 400-square-foot footprint might yield only 280 truly comfortable square feet if peak height is limited.
How much does an A-frame tiny house cost to build?
Budget $80-150 per square foot for DIY builds using conventional materials and methods, totaling $32,000-60,000 for a 400-square-foot A-frame. Professional builds or premium finishes run $150-250 per square foot. Costs vary significantly based on site location, foundation type, insulation level, and whether you’re building from scratch or using a kit.
Do A-frame houses require special permits or zoning approval?
A-frames are subject to standard building codes and zoning restrictions for your location. Some jurisdictions classify tiny houses as ADUs (accessory dwelling units) with specific setback, size, and parking requirements. Check with your local building department before purchasing plans to ensure your desired design complies with local regulations.
What climate is best for A-frame construction?
A-frames excel in diverse climates. Steep roofs shed snow effectively in cold regions, while the shape resists wind and provides natural cooling through vertical airflow. The main consideration is insulation—ensure R-value matches your climate zone, as the high roof-to-volume ratio increases thermal demand in extreme temperatures.
Can I add a loft or second story to an existing A-frame plan?
Modifying structural plans requires engineering review, as lofts affect load distribution and roof integrity. Most A-frame plans include loft design calculated for specific roof pitch and dimensions. Adding or enlarging a loft without professional verification risks structural failure; budget for an engineer’s assessment if you’re changing the original design.
As an Amazon Associate, Build & Bloom earns from qualifying purchases. We only recommend products we genuinely think are useful. Prices and availability vary; check Amazon for the latest.
Leave a Reply