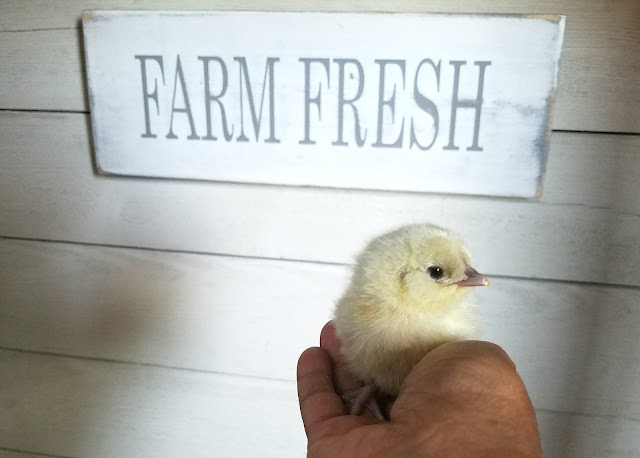

Nothing’s more disappointing than opening your incubator after three weeks to find most of your eggs didn’t develop. Whether you’re a backyard chicken keeper or scaling up your flock, poor hatch rates waste time, money, and hope. The good news: most hatching failures come down to five controllable factors that experienced keepers have perfected over years of trial and error. Master these techniques, and you’ll dramatically improve your success rate.
5 Proven Methods to Increase Your Hatch Rate
Successful hatching depends on consistency and attention to detail. These five practices form the foundation of reliable, high-percentage hatches.
What You Will Need
- An incubator with reliable temperature control and built-in thermometer
- A hygrometer to measure and monitor humidity levels throughout incubation
- A candling light or bright flashlight for checking embryo development
- Clean, fertile eggs from healthy birds, stored at 55-65 degrees before setting
- A turning mechanism (automatic or manual) if incubating beyond 3 days
- Water containers or humidity adjustment supplies for the incubator
Steps
Maintain Precise Temperature Control
Temperature consistency is absolutely critical during the entire 21-day incubation period. Set your incubator to 99.5 degrees Fahrenheit for a forced-air model (or 101-102 degrees for still-air incubators). Check the thermometer twice daily and allow 24 hours for the incubator to stabilize before adding eggs. Small temperature fluctuations cause developmental delays, while sustained overheating or underheating results in weak chicks or complete embryo failure.
Manage Humidity at the Right Levels
Humidity requirements change throughout incubation. Days 1-18 should maintain 40-50% humidity (wet bulb reading of 86-88 degrees Fahrenheit). Days 19-21 (lockdown) require 65-75% humidity to prevent chicks from drying out during hatch. Use your hygrometer to monitor levels carefully, and adjust water surface area in the incubator accordingly. Too-dry conditions result in chicks stuck to shells; too-wet conditions promote bacterial growth and incomplete hatches.
Turn Eggs Regularly Until Day 18
Eggs must be turned at least 5-7 times daily until day 18 of incubation to prevent embryos from sticking to the shell membrane. If using manual turning, rotate eggs end-to-end with an odd number of turns daily so eggs aren’t left on the same side overnight. Automatic turners handle this mechanically, but you’ll still need to verify they’re functioning properly. On day 19, stop turning completely and move to lockdown mode for the final hatch.
Ensure Proper Air Circulation and Ventilation
Developing embryos require oxygen throughout incubation, and carbon dioxide must be removed. Your incubator’s ventilation holes should remain unblocked, and forced-air models should have fans running continuously. Avoid placing the incubator in drafty locations or sealed, unventilated spaces. Stagnant air leads to poor oxygen exchange and weak chick development. Check that vents aren’t accidentally covered by debris or condensation buildup.
Candle Eggs to Identify Non-Viable Embryos
Candling involves holding a bright light against the egg to see inside, revealing whether embryos are developing normally. Perform your first candling on day 7 to remove clear eggs (non-fertile). Candle again on day 14 to check progress and remove any eggs showing signs of infection or death. A final optional candling on day 18 confirms viable embryos before lockdown. Removing non-developing eggs prevents them from contaminating the incubator and consuming valuable humidity.
Use Clean, Fertile Eggs from Healthy Stock
Success begins before eggs enter the incubator. Collect eggs daily, store them in a cool location at 55-65 degrees with the pointed end down, and don’t wash them (unless visibly soiled, then use only dry cloth). Hatch only eggs from healthy birds with a proven laying record. Eggs older than 10 days have declining fertility rates. Very old, cracked, or misshapen eggs should never be incubated, as they waste space and increase contamination risk.
Achieve Lockdown and Prepare for Hatch
On day 19, stop turning eggs and increase humidity to hatch levels (65-75%). This final ‘lockdown’ period allows chicks to position themselves inside the shell for internal pipping. Keep the incubator closed and undisturbed during days 19-21 (except for humidity checks). Resist the urge to open the incubator, as this causes temperature and humidity swings that can kill developing chicks. Most chicks will pip externally on day 20-21 and emerge within 24 hours of the first pip.
- Keep detailed records of each hatch: setting date, temperature, humidity, candling results, and hatch date. Over time, you’ll identify patterns unique to your specific incubator and conditions.
- Invest in a reliable hygrometer early–humidity is the second-most common reason for poor hatches, and guessing leads to disaster. Digital hygrometers with memory functions help track trends.
- Never help chicks hatch unless they’ve been pipped for 24+ hours with no progress. ‘Assisted hatches’ often result in dead chicks; strong chicks will zip and emerge on their own timeline.
What to Look For in an Incubator
- Temperature Control Type: Forced-air incubators use a fan to circulate heat evenly and maintain more consistent temperatures, making them more forgiving for beginners. Still-air incubators rely on natural convection and require more precise placement but work well for small batches. Forced-air is generally recommended for reliable, higher hatch rates.
- Capacity and Size: Small incubators (12-24 eggs) suit hobbyists, while larger models (50-130+ eggs) work for serious keepers or breeding programs. Consider your current needs and future scaling plans. Larger capacity doesn’t automatically mean better hatch rates if you can’t maintain consistency.
- Built-in vs. Add-on Features: Look for models with integrated thermometers, hygrometer ports, and automatic egg turners to reduce guesswork and labor. Some basic models require you to purchase these separately, adding to total cost. Automatic turning is worth the investment if you’re hatching regularly.
- Build Quality and Insulation: Heavy-duty construction with good insulation holds temperature more steadily, especially in variable room conditions. Cheap incubators struggle with temperature swings that reduce hatch rates. Read user reviews specifically mentioning temperature stability and durability over multiple hatches.
Brinsea Ova-Easy 190 Advance Automatic Egg Incubator
Best for: Serious backyard keepers wanting excellent hatch rates with minimal fuss
The Brinsea Ova-Easy 190 combines forced-air heating, automatic egg turning, and reliable temperature control in a compact footprint. Its advanced humidity management system and intuitive display make it ideal for keepers who want professional-grade results without constant monitoring. With capacity for approximately 190 quail eggs or 40 chicken eggs depending on configuration, this incubator has earned consistent praise for high hatch rates and consistent performance across seasons.
Check Current Price on Amazon →Magicfly 36-Egg Automatic Incubator
Best for: First-time hatchers on a tight budget
The Magicfly 36-egg incubator delivers dependable forced-air performance at an accessible price point. This model includes automatic turning and a digital display with temperature adjustment, making it genuinely functional rather than a toy incubator. While it lacks some premium features of expensive models, users consistently report solid hatch rates in the 70-80% range. Ideal for testing your commitment to hatching before investing in expensive equipment.
Check Current Price on Amazon →GQF Manufacturing Hova-Bator 1588 Automatic Incubator
Best for: New hatchers who want forgiving equipment and good support
The GQF Hova-Bator is a trusted name in poultry incubation with decades of proven reliability. This still-air model holds 50 chicken eggs and features automatic turning with a simple, intuitive control panel. While not as temperature-stable as forced-air models, the Hova-Bator is remarkably forgiving of beginner mistakes and includes excellent customer support from a company deeply experienced in poultry equipment. Many small hatcheries still rely on Hova-Bators as backup incubators.
Check Current Price on Amazon →Rcom Max 20 Advance Automatic Incubator
Best for: Professional breeders and high-performance hobbyists
The Rcom Max 20 represents the pinnacle of automatic incubation technology with independent humidity and temperature zones, motorized egg turning, and Wi-Fi connectivity for remote monitoring. While expensive, this incubator achieves hatch rates consistently above 90% due to its precise microprocessor control and advanced humidity management. The compact design fits 20 chicken eggs but delivers results comparable to much larger commercial incubators.
Check Current Price on Amazon →Start Your Next Hatch with Confidence
The difference between a disappointing 40% hatch rate and an excellent 85%+ rate often comes down to mastering these five practices. Temperature control, humidity management, proper turning, adequate ventilation, and strategic candling are the pillars of successful incubation. They’re not complex or expensive–they simply require consistency and attention. Armed with the right incubator and these proven techniques, you’ll turn fertile eggs into healthy chicks with remarkable reliability.
Your success also depends on having equipment you trust. Whether you’re starting with a budget incubator to test your commitment or investing in a premium model for serious breeding, the incubators listed above have earned their reputations through years of real-world use. Pick one that matches your capacity needs and experience level, implement these five strategies faithfully, and you’ll join the ranks of experienced keepers who hatch with confidence. Your next hatch rate could easily jump by 20-30%.
Frequently Asked Questions
What’s the difference between forced-air and still-air incubators?
Forced-air incubators use a fan to circulate warm air evenly throughout the chamber, maintaining more stable temperatures and achieving higher hatch rates. Still-air models rely on natural heat convection, making them more sensitive to room temperature and placement. Forced-air is recommended for beginners and reliable hatching.
Can I hatch eggs from my backyard flock, or do they need to be from a hatchery?
Backyard eggs work perfectly fine if they come from healthy birds with proven fertility. Fertile eggs from your own flock often hatch just as well as hatchery eggs. Collect eggs daily, store them properly (55-65 degrees, pointed end down), and avoid using very old or visibly damaged eggs.
How do I know if an egg is fertile before I start incubating?
You can’t definitively tell by appearance alone. Candling on day 7 of incubation is the reliable method–fertile eggs show blood vessels and a dark spot (the embryo), while clear eggs contain no development. This is why many keepers incubate all available eggs and remove the clears at the first candling.
What should I do if my hatch rate suddenly drops in the middle of the season?
Sudden drop-offs usually indicate a problem with temperature stability, humidity control, or egg quality. Check your thermometer and hygrometer accuracy, verify ventilation isn’t blocked, and inspect your eggs for cracks or contamination before setting. Also consider whether your flock’s fertility has declined due to flock stress or rooster issues.
Should I try to help chicks that are struggling to hatch?
Generally, no. Chicks that pip internally on day 20 and externally on day 21 should hatch naturally within 24 hours. Helping too early can result in dead chicks with incomplete blood vessel absorption. Only assist chicks that have been visibly pipped for over 24 hours with no progress, and even then, proceed cautiously and minimally.
As an Amazon Associate, Build & Bloom earns from qualifying purchases. We only recommend products we genuinely think are useful. Prices and availability vary; check Amazon for the latest.
Leave a Reply