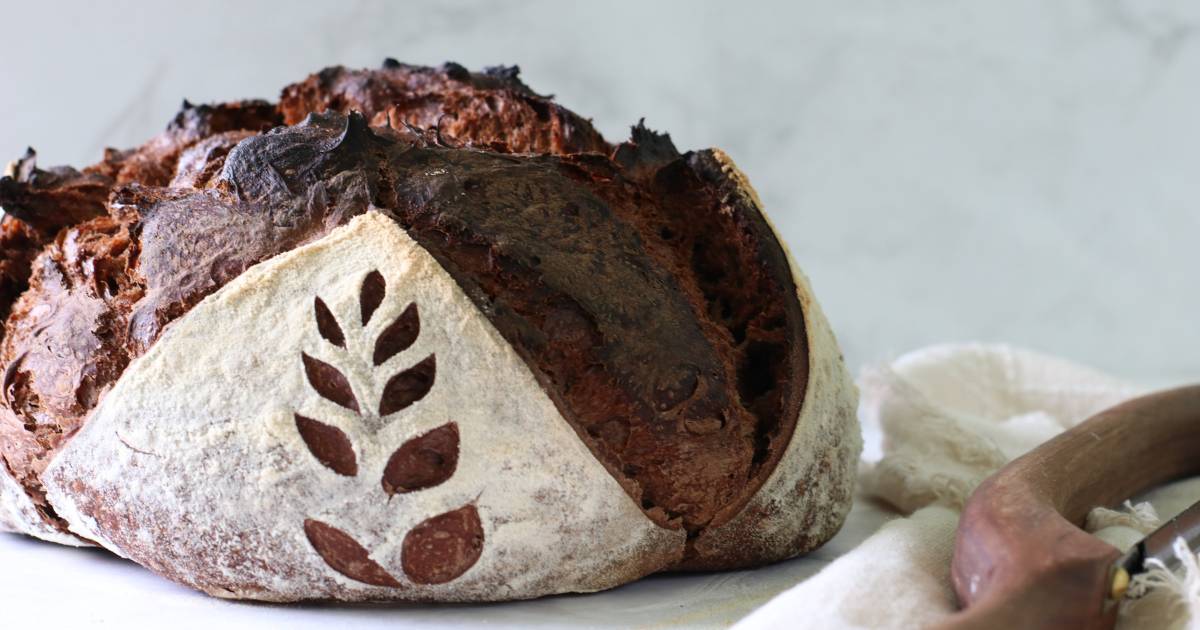

Homemade chocolate sourdough is the perfect intersection of advanced baking technique and decadent flavor—but it doesn’t require commercial equipment or years of experience. Whether you’re a seasoned sourdough baker looking to expand your repertoire or someone curious about adding chocolate to your starter-based baking, this guide walks you through the entire process from mixing through that perfect crusty-outside, tender-inside first slice. The key is patience, a reliable sourdough starter, and understanding how chocolate affects fermentation and texture.
How to Make Artisan Chocolate Sourdough Bread
This recipe yields one large artisan loaf with a deep chocolate flavor balanced by sourdough’s natural tang. The total timeline spans 3-4 days, though most of that is passive fermentation.
Ingredients
- 500g bread flour (or all-purpose flour)
- 350ml water, divided (some at room temperature, some warm)
- 100g active sourdough starter, fed 4-8 hours prior
- 10g fine sea salt
- 25g unsweetened cocoa powder
- 100g chopped dark chocolate (70% cacao or higher)
Method
Mix Your Dough Base
Combine 350ml water with your active starter in a large mixing bowl, stirring until mostly incorporated. Add flour and cocoa powder, mixing by hand until all flour is hydrated and no dry bits remain. Let this mixture rest for 30-60 minutes (called autolyse). This resting period allows the flour to fully absorb moisture and begins developing gluten naturally.
Incorporate Salt and Chocolate
After autolyse, sprinkle salt evenly over the dough. Wet your hand and pinch and fold the salt into the dough for 1-2 minutes until fully integrated. Then gradually work in the chopped chocolate pieces using the same pinching and folding motion, distributing them evenly throughout. The dough will be sticky and that’s correct.
Bulk Fermentation with Stretch and Folds
Let the dough rest for 30 minutes, then perform a set of stretch and folds: wet your hand, grab one side of the dough, stretch it up and fold it over itself, rotate the bowl 90 degrees, and repeat 4 times total. Perform three total sets of stretch and folds at 30-minute intervals. Between sets, let the dough rest undisturbed. After the final set, cover the bowl and let ferment at room temperature for 4-6 hours until the dough has increased in volume by about 50% and shows visible bubbles.
Shape the Dough
Turn the fermented dough out onto a lightly floured surface. Gently pre-shape it into a round, let it rest for 20 minutes, then perform a final shape by folding the edges toward the center and rolling it toward you to create tension on the surface. Place seam-side up in a flour-dusted banneton or bowl lined with a kitchen towel.
Cold Fermentation Overnight
Cover your shaped dough and refrigerate for 12-18 hours. This long, cold fermentation develops flavor complexity and makes scoring easier. It also allows you to bake fresh bread on your schedule without rushing.
Preheat and Score
Remove dough from refrigerator and preheat your oven with a covered baking vessel inside to 450°F (230°C) for at least 45 minutes. Carefully turn the cold dough onto parchment paper. Using a sharp blade, score the top with a confident slash about 1/4-inch deep. This controls where the loaf expands.
Bake Covered, Then Uncovered
Transfer the parchment with dough into the preheated covered baking vessel. Bake covered for 20 minutes to trap steam, which creates that coveted crispy crust. Remove the cover and bake for another 25-30 minutes until the crust is deep brown and the loaf sounds hollow when tapped on the bottom.
Cool Before Slicing
Remove the finished loaf and let it cool on a wire rack for at least 1-2 hours before slicing. This allows the crumb structure to set properly. Slicing too early will result in a gummy interior. Once fully cooled, your chocolate sourdough is ready to enjoy.
- Feed your starter 4-8 hours before mixing so it’s at peak activity (bubbly and at its highest point). A sluggish starter produces a sluggish dough.
- Chocolate can inhibit gluten development slightly, so don’t skip the stretch and folds—they’re essential for building structure.
- If your kitchen is cool, fermentation will take longer. Conversely, a warm kitchen speeds things up. Use the dough’s appearance (bubbles, size increase) rather than strict timing as your guide.
Essential Tools for Chocolate Sourdough Baking
- Dutch Oven or Covered Baking Vessel: A heavy, heat-safe pot with a lid is essential for creating steam during baking, which gives sourdough its signature crispy, caramelized crust. Cast iron or enameled steel options work well.
- Kitchen Scale: Sourdough baking demands precision. A digital scale measuring in grams ensures consistent hydration and ingredient ratios, which directly impacts fermentation timing and crumb structure.
- Banneton or Proofing Basket: This fabric-lined basket supports your shaped dough during cold fermentation and prevents it from spreading. The floured surface also helps with scoring and transfer.
- Bread Lame or Sharp Scoring Blade: A dedicated scoring tool or very sharp knife creates clean slashes that control oven spring and expand along intended lines, improving the final loaf’s appearance and crust quality.
Le Creuset Enameled Cast Iron Dutch Oven 5.5 Qt
Best for: Serious home bakers wanting professional results
The gold standard for sourdough baking. This 5.5-quart Dutch oven distributes heat evenly and retains steam perfectly during the critical first 20 minutes of baking. The heavy enameled cast iron construction handles repeated high-heat cycles without degradation. The fitted lid seals tightly, creating the humid environment necessary for optimal crust development. Built to last decades with proper care.
Check Current Price on Amazon →Cuisinart Chef’s Classic Enameled Cast Iron 5.5 Qt Dutch Oven
Best for: Budget-conscious bakers who don’t want to compromise
Offers exceptional value without sacrificing performance. This enameled cast iron Dutch oven heats evenly and locks in steam just as effectively as premium brands at a fraction of the cost. The 5.5-quart capacity is ideal for a standard artisan loaf. Reviews consistently praise its durability and heat retention. A smart choice for testing sourdough techniques before investing in luxury cookware.
Check Current Price on Amazon →Etekcity Digital Kitchen Scale SF-400
Best for: First-time sourdough bakers
An affordable, accurate digital scale that measures up to 11 pounds in gram increments. The backlit LCD display is easy to read, and the touch-sensitive buttons are responsive. It’s compact enough to fit any kitchen counter and includes a stainless steel platform that’s simple to clean. Perfect for following sourdough recipes with precision without overwhelming options or complexity.
Check Current Price on Amazon →Hario V60 Acaia Pearl Digital Kitchen Scale
Best for: Precision-focused bakers who want the best
This Japanese-engineered scale offers unmatched accuracy to 0.1-gram precision with a fast response time ideal for adding ingredients methodically. The sleek design and high-visibility display make it a pleasure to use. While premium-priced, the durability and accuracy justify the investment for serious bakers who measure every sourdough component with exacting standards.
Check Current Price on Amazon →Start Your Chocolate Sourdough Journey Today
Making artisan chocolate sourdough at home is entirely achievable with patience, a reliable sourdough starter, and the right equipment. The combination of tangy fermented dough and rich cocoa creates a sophisticated loaf that rivals bakery offerings—and tastes better because you made it yourself. Start with a Dutch oven and a kitchen scale, follow the step-by-step process outlined above, and don’t rush the fermentation stages. Your first loaf will be learning experience; by your third or fourth attempt, you’ll develop an intuition for timing and texture that turns this recipe into your signature bread.
The products recommended above are chosen to support each stage of sourdough baking, from mixing through final scoring. Whether you’re equipping a new kitchen or upgrading existing tools, each piece serves a specific function that directly improves your chocolate sourdough results. The investment in quality tools pays dividends across every batch you bake. Begin with precision measurements and patient fermentation, and you’ll soon be producing chocolate sourdough loaves worthy of sharing—or keeping all to yourself.
Frequently Asked Questions
Can I make chocolate sourdough without a Dutch oven?
Yes, though results won’t be identical. You can bake on a preheated baking stone or steel while spraying the oven walls with water every 5 minutes for the first 15 minutes to create steam. A Dutch oven simply makes steam capture automatic and more effective. For best results, invest in one.
What type of chocolate works best?
Dark chocolate with 70% cacao or higher provides depth without overpowering the sourdough’s tang. Milk chocolate will be too sweet and mask the fermented flavors. Chop it into roughly 1/2-inch pieces so it distributes evenly and melts slightly during baking without creating large chocolate pockets.
How do I know if my starter is ready to use?
Feed your starter 4-8 hours before baking and wait until it’s at peak activity: the surface should be bubbly, it should smell pleasantly sour and yeasty, and it should have roughly doubled in volume. If you poke it, it should slowly spring back with a few bubbles visible.
Why is my chocolate sourdough dense or gummy inside?
This usually means under-fermentation during bulk fermentation or insufficient cooling time before slicing. Ensure bulk fermentation shows visible bubbles and 50% volume increase, perform all stretch and folds, and always cool the loaf completely (2+ hours) before cutting. The crumb structure needs time to set.
Can I freeze the shaped dough instead of cold fermenting overnight?
Yes. Shape the dough, wrap it well in plastic, and freeze for up to 2 weeks. When ready to bake, place the frozen loaf directly into your preheated Dutch oven—no thawing needed. Add 5-10 minutes to the total baking time since it starts colder.
As an Amazon Associate, Build & Bloom earns from qualifying purchases. We only recommend products we genuinely think are useful. Prices and availability vary; check Amazon for the latest.
Leave a Reply