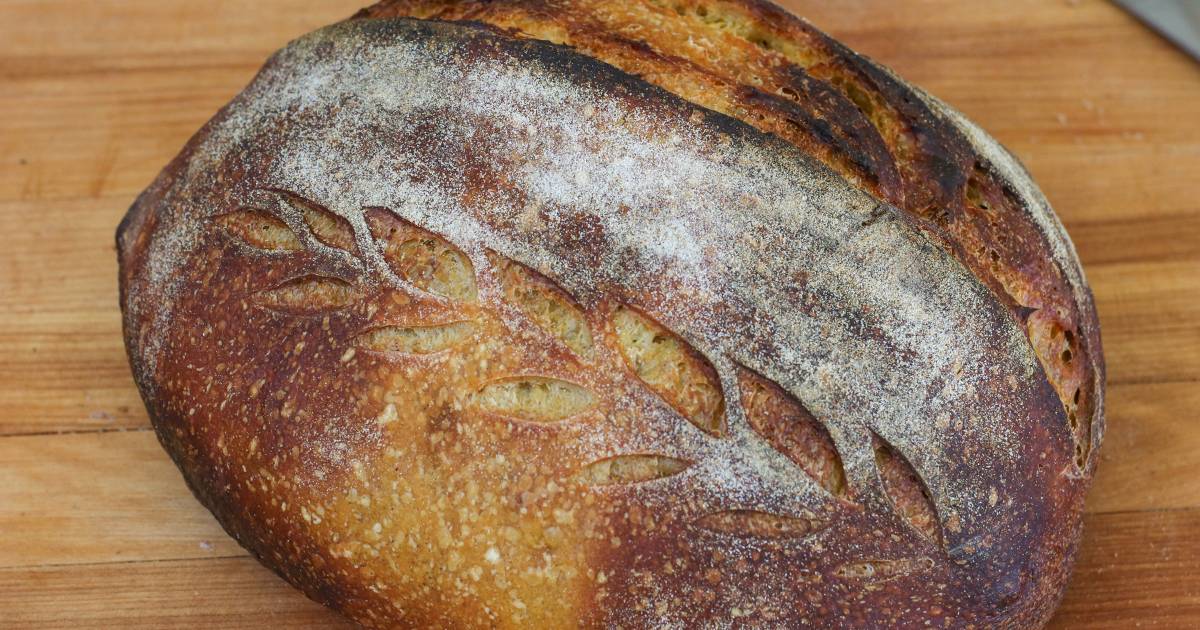

Making pumpkin sourdough at home seems intimidating, but the process is actually forgiving and rewarding. The long fermentation develops deep flavor while pumpkin puree adds moisture and subtle sweetness. With a mature sourdough starter and patience, you’ll produce a beautiful rustic loaf with a crackling crust and creamy crumb that rivals your local bakery.
How to Make Artisan Pumpkin Sourdough Bread
This recipe combines a traditional long-fermentation sourdough with roasted pumpkin puree and warming spices. Total time is 3-4 days, but active hands-on work totals less than 30 minutes.
Ingredients
- 500g bread flour or all-purpose flour
- 350ml lukewarm water
- 150g active sourdough starter (fed 4-8 hours prior)
- 100g pure pumpkin puree (roasted, not canned pie filling)
- 10g sea salt
- 5g ground cinnamon
- 2g ground ginger
- 1g ground nutmeg and clove (combined)
Method
Mix dough and autolyse
Combine flour, water, pumpkin puree, and spices in a large bowl. Stir until no dry flour remains and let rest covered for 30 minutes. This autolyse period allows flour to fully hydrate and develops gluten structure naturally.
Incorporate starter and salt
Add your active sourdough starter and salt to the dough. Mix thoroughly by hand or with a wooden spoon until fully integrated. The dough will feel sticky and shaggy at this stage, which is normal.
Bulk fermentation with stretch and folds
Over the next 4-5 hours, perform four sets of stretch and folds at 30-minute intervals. Wet your hand, grab one side of dough, stretch it up and fold over the center. Rotate bowl and repeat four times per set. This builds strength without intensive kneading.
Cold retard overnight
After bulk fermentation, transfer dough to a floured proofing basket or bowl lined with a cloth. Cover tightly and refrigerate for 12-18 hours. Cold fermentation develops flavor complexity and makes scoring easier.
Score and preheat oven
Remove dough from refrigerator 30 minutes before baking. Preheat your oven and Dutch oven to 475°F (245°C). Place dough on parchment paper and score the top with a sharp blade in your desired pattern, cutting about half an inch deep.
Bake covered then uncovered
Carefully transfer dough on parchment into the preheated Dutch oven. Bake covered for 20 minutes to trap steam and create a strong crust. Remove the lid and bake uncovered for 25-30 minutes until golden brown and hollow-sounding when tapped.
Cool completely before slicing
Transfer bread to a wire rack and let cool for at least 1 hour before cutting. The interior continues to set during cooling, ensuring clean slices rather than gummy crumb.
- Feed your starter at room temperature 4-8 hours before mixing dough; it should be bubbly and at peak rise with a pleasant sour aroma.
- If your kitchen is cool, bulk fermentation may take 5-6 hours instead of 4; look for the dough to increase 50% and show visible bubbles on the surface.
- Save pumpkin puree from roasting your own sugar pumpkins in fall; canned pie filling contains added spices and sugar that will throw off your recipe balance.
What to Look For in Sourdough Baking Equipment
- Dutch Oven Material and Size: Choose cast iron or enameled cast iron with at least 5.5-quart capacity. The heavy mass retains heat and the lid traps steam during the critical first 20 minutes of baking, creating the signature crackling crust.
- Proofing Basket Shape: Round banneton baskets work best for round loaves, while oval ones suit longer batards. The flour-dusted texture prevents sticking during overnight cold fermentation and helps maintain dough shape.
- Scoring Blade Sharpness: A sharp tool is essential for clean cuts that allow controlled oven spring. Dull blades drag and tear the dough, resulting in irregular crust formation and poor appearance.
- Kitchen Scale Precision: Sourdough relies on precise baker’s percentages; a scale accurate to 1 gram ensures consistent hydration, fermentation timing, and final loaf structure. Digital scales with a tare button are essential.
Lodge 6-Quart Enameled Cast Iron Dutch Oven
Best for: Home sourdough bakers seeking reliable heat retention and easy cleanup
The industry standard for bread baking, Lodge’s enameled cast iron Dutch oven provides superior heat retention and even baking. The 6-quart capacity accommodates large batches, and the enamel coating eliminates seasoning maintenance while resisting rust. Heavy construction radiates heat for optimal crust development. Available in classic red, white, and blue finishes to match any kitchen.
Check Current Price on Amazon →Cuisinart Chef’s Classic 5.5-Quart Enameled Cast Iron Dutch Oven
Best for: Budget-conscious bakers who don’t want to compromise on performance
Cuisinart’s enameled Dutch oven delivers professional sourdough results at half the price of premium brands. The 5.5-quart capacity is ideal for standard loaves, and the enamel coating is chip-resistant and dishwasher safe. Heat distribution is even and consistent, making it suitable for both bread baking and stovetop recipes. A solid entry point for beginning sourdough enthusiasts.
Check Current Price on Amazon →Staub Cocotte 5.5-Quart Enameled Cast Iron Dutch Oven
Best for: Experienced bakers willing to invest in heirloom-quality cookware
Staub’s hand-crafted enameled cast iron represents the pinnacle of Dutch oven engineering. The heavy-gauge construction and superior enamel quality ensure exceptional heat retention and durability across generations. The matte black interior resists scratching while the color-matched exterior enhances any kitchen. Each piece is individually numbered and finished by hand, making it a kitchen heirloom.
Check Current Price on Amazon →BANNETON Proofing Basket 9-Inch Round
Best for: First-time sourdough bakers needing foolproof dough containment
This traditional round banneton basket is woven from food-safe rattan and prevents dough sticking during cold fermentation. The 9-inch diameter accommodates standard 500g recipes perfectly. The floured linen liner provides texture that supports dough rise while preventing adhesion. Comes with instructions on seasoning and care. Perfect for developing muscle memory before upgrading to multiple baskets.
Check Current Price on Amazon →Final Recommendation
Artisan pumpkin sourdough is entirely achievable at home with basic equipment and patience. The combination of tangy sourdough fermentation with autumn spices creates a sophisticated loaf that impresses friends and family. Start with a Lodge Dutch oven and a single banneton basket, then expand your equipment collection as you gain confidence. Most importantly, keep detailed notes on your fermentation times and oven temperature so you can replicate successes and troubleshoot variations.
The beauty of sourdough lies in its flexibility and responsiveness to your unique kitchen environment. Your first loaf may not be perfect, but it will still taste infinitely better than store-bought bread. By your third or fourth bake, you’ll develop an intuition for dough consistency, fermentation stage, and oven dynamics. Pumpkin sourdough specifically rewards patient fermentation, so embrace the 3-4 day timeline as an opportunity to slow down and engage with a traditional craft that humans have perfected over millennia.
Frequently Asked Questions
Can I use canned pumpkin puree instead of roasted pumpkin?
Canned pie filling contains added spices and sugar that will disrupt the recipe balance. However, pure canned pumpkin works fine as a substitute for roasted. Just strain it through cheesecloth first to remove excess moisture, as canned versions are wetter than roasted puree.
How do I know when my starter is ready to use?
Your starter should be fed 4-8 hours before mixing dough and should have roughly doubled in volume with a dome of bubbles on top. It should smell pleasantly sour and vinegary. If refrigerated, remove it the night before and feed it in the morning before using.
What if my dough didn’t rise much during bulk fermentation?
Cold kitchens slow fermentation significantly. Extend bulk fermentation by 1-2 hours or place dough in a warm location like an oven with the light on. You’re looking for approximately 50% volume increase and visible bubbles, not a specific time frame.
Why is my crust not crackling?
A crackling crust requires trapped steam in the first 20 minutes of baking. Ensure your Dutch oven is fully preheated for at least 30 minutes and that the lid seals tightly. Opening the oven door during the covered phase releases steam and prevents crust development.
Can I freeze sourdough dough for later baking?
Yes, after the cold retard phase, you can freeze dough for up to 2 weeks. Thaw overnight in the refrigerator before scoring and baking. Frozen dough may require an extra 5-10 minutes of baking time due to its cold center.
As an Amazon Associate, Build & Bloom earns from qualifying purchases. We only recommend products we genuinely think are useful. Prices and availability vary; check Amazon for the latest.
Leave a Reply