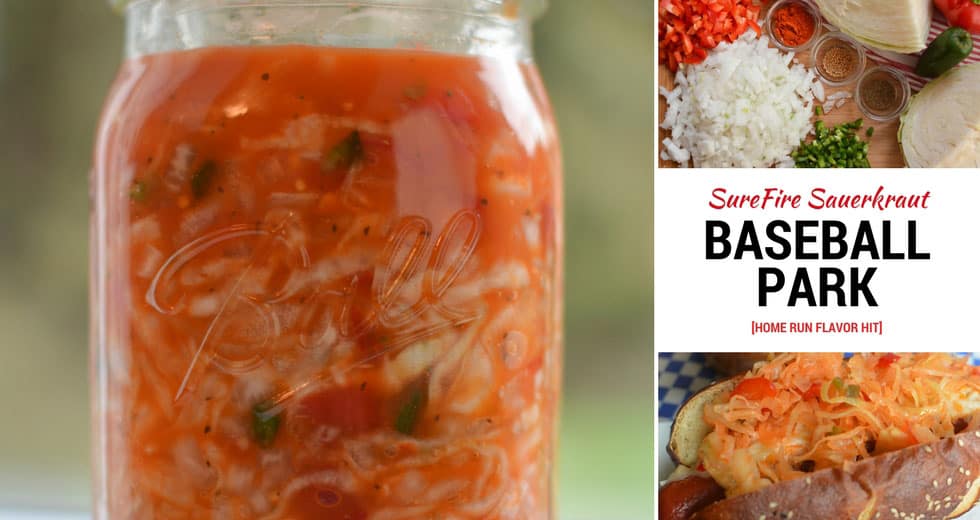

If you’re building a gut-healthy kitchen, fermented foods like sauerkraut belong in your rotation–but store-bought versions are expensive and often pasteurized, killing the live probiotics you’re after. Baseball sauerkraut, loaded with caramelized onions, is cheaper, tastier, and easier to make at home than you’d think. All you need is a jar, salt, and vegetables. In this guide, we’ll walk you through the exact process so your first batch ferments perfectly.
How to Make Baseball Sauerkraut with Onions
This recipe produces about one quart of tangy, onion-rich sauerkraut through natural fermentation. The process takes 3-7 days, requiring minimal hands-on time.
Ingredients
- One medium head of green or red cabbage (about 2 pounds), finely shredded
- Three large yellow or white onions, thinly sliced
- Two tablespoons of non-iodized sea salt or pickling salt
- Filtered or dechlorinated water (chlorine can inhibit fermentation)
- One quart-sized glass jar with a wide mouth opening
Method
Prepare your vegetables
Wash your cabbage and onions thoroughly under cool running water. Using a sharp knife or mandoline slicer, shred the cabbage into thin ribbons (about 1/8-inch thick) and slice the onions into half-moons. The thinner your cuts, the faster fermentation will occur and the more liquid will release from the vegetables.
Layer and salt your ingredients
Place about one-quarter of your shredded cabbage into a clean glass jar. Sprinkle with a pinch of salt, then add a layer of sliced onions. Repeat this layering pattern until all vegetables are in the jar, finishing with a cabbage layer. The salt draws moisture from the vegetables through osmosis, creating a brine.
Pack down and extract liquid
Using a wooden spoon, clean fist, or fermentation tamper, press down firmly on the vegetables for 2-3 minutes. You should see liquid rising above the vegetables. If insufficient liquid appears, let the jar sit at room temperature for 30 minutes, then press again. This liquid is essential–it creates the anaerobic environment needed for fermentation.
Submerge the vegetables
Ensure all shredded cabbage and onion pieces remain below the brine line. If vegetables float above the liquid, add a small amount of filtered water mixed with 2% salt by weight (about 1 teaspoon per cup of water) until fully submerged. Use a fermentation weight, clean cabbage leaf, or folded parchment paper to keep everything pressed down.
Cover and ferment
Place a loose cover on the jar–a cloth, coffee filter, or loose-fitting lid works well. This allows gases to escape while preventing dust and insects from entering. Keep the jar at room temperature (65-75 degrees Fahrenheit is ideal) away from direct sunlight.
Check and taste daily
Starting on day three, open the jar daily and taste a small sample. You’ll notice bubbling, cloudiness, and a tangy aroma as fermentation progresses. These are signs of active Lactobacillus growth. The sauerkraut is ready when it reaches your preferred level of tanginess, typically 3-7 days depending on room temperature.
Refrigerate to stop fermentation
Once you’re satisfied with the flavor, seal the jar with a tight lid and transfer it to cold storage. Refrigeration dramatically slows fermentation, preserving your sauerkraut at its peak flavor for several months. The cold also allows flavors to meld and develop further.
- Warmer fermentation (70-75F) produces faster, tangier sauerkraut; cooler temperatures (60-65F) create milder flavor with slower fermentation–choose based on your taste preference and kitchen climate.
- If white mold (kahm yeast) appears on the surface, simply skim it off with a clean spoon; it’s harmless but can affect flavor if left too long.
- Save your finished brine as a probiotic starter–add 2-3 tablespoons to your next batch to jumpstart fermentation and reduce the fermentation window by 1-2 days.
What to Look For in Fermentation Equipment
- Jar material and size: Glass is essential for fermentation because it’s chemically inert and won’t react with salt or acidic brine. Quart-sized jars are ideal for single-batch projects; gallon jars suit larger households. Avoid metal lids that will corrode; use plastic, cloth, or paper covers instead.
- Fermentation weights: Submerging vegetables below the brine is critical for anaerobic fermentation. Dedicated glass or ceramic weights, folded parchment, or even sterilized cabbage leaves work. This prevents mold growth and ensures even fermentation throughout the batch.
- Salt quality: Non-iodized salt is non-negotiable–iodine inhibits fermentation and creates off-flavors. Sea salt and pickling salt both work. Avoid table salt, which contains anti-caking agents that cloud your brine and interfere with beneficial bacteria.
- Breathable covers: Your fermentation vessel needs to release carbon dioxide while blocking contaminants. Cloth, coffee filters, paper towels, or cheesecloth secured with a rubber band work better than sealed lids, which can build pressure and crack the jar.
Bormioli Rocco Fido Glass Jar with Hermetic Lid (2 Liter)
Best for: Fermentation beginners and serious fermenters
This Italian glass jar features a classic bail-and-latch closure that’s airtight when sealed but can be left slightly loose for fermentation. The wide mouth opening makes packing and retrieving vegetables effortless, and the 2-liter capacity handles multiple batches or family-sized portions. The thick glass withstands temperature changes, and the timeless design looks attractive on kitchen shelves. Dishwasher safe and built to last decades.
Check Current Price on Amazon →Ball Wide Mouth Quart Mason Jars (Set of 12)
Best for: Budget-conscious fermenters and bulk projects
The classic Mason jar remains a reliable, affordable choice for fermentation. Wide mouth openings accommodate thick vegetable pieces without struggle, and the standard threading accepts various lid options. Buy these in bulk for minimal per-jar cost. While standard metal lids aren’t ideal for fermentation, you can replace them with cloth covers or airlock lids. The glass is sturdy and recyclable.
Check Current Price on Amazon →Cultures for Health Fermentation Crock Kit
Best for: First-time fermenters wanting foolproof results
This purpose-built fermentation system includes a ceramic crock, water-seal lid, ceramic weights, and detailed instructions. The water seal creates perfect anaerobic conditions while allowing gas to escape–no guesswork needed. The heavy ceramic construction retains consistent temperature, and integrated weights keep vegetables submerged. Ideal for someone intimidated by traditional jar fermentation. Comes with starter cultures for fastest results.
Check Current Price on Amazon →Le Parfait Super Jar Glass Fermentation Bottles (1 Liter, 2-Pack)
Best for: Regular fermenters wanting quality at fair price
These French glass bottles feature rubber gaskets and metal hinged closures that seal when locked but allow partial opening for gas release. The 1-liter size is perfect for weekly fermentation batches, and the two-pack gives flexibility for simultaneous ferments. The narrow neck is slightly less convenient than wide-mouth designs but maintains excellent gas exchange. Professional-quality glass at mid-range pricing.
Check Current Price on Amazon →Start Your Fermentation Journey Today
Baseball sauerkraut teaches the fundamentals of fermentation while delivering probiotic benefits and bold flavor. The recipe requires no special skills, expensive equipment, or mysterious ingredients–just salt, vegetables, a jar, and patience. Your first batch will likely exceed store-bought versions in both taste and nutritional density. The process demystifies fermentation, making you confident to experiment with other fermented vegetables like kimchi, pickles, and mixed vegetable medleys.
Invest in one quality fermentation vessel and a set of ceramic weights, and you’ll ferment batches for decades. The startup cost is modest compared to the health benefits and cumulative savings from abandoning expensive probiotic supplements and store-bought fermented foods. Begin with the baseball sauerkraut recipe, refine your technique based on taste preferences, then expand into advanced fermentation projects. Your gut microbiome–and your palate–will thank you.
Frequently Asked Questions
Why isn’t my sauerkraut fermenting? I don’t see bubbles.
Fermentation isn’t always visibly bubbly–some occurs silently. Confirm fermentation by checking for tanginess (taste a small sample), cloudiness in the brine, or a sour smell. Ensure vegetables stay submerged; exposed vegetables grow mold instead of fermenting. If truly no change appears after 7 days in a warm kitchen, your salt or water may contain chlorine, or the room temperature is too cold (below 60F).
Can I use tap water for fermentation?
Chlorine in tap water can inhibit fermentation, though some water systems add such small amounts it’s negligible. To be safe, filter your tap water or let it sit uncovered overnight to allow chlorine to evaporate. Distilled water is fine but unnecessarily expensive. Chlorine-free spring water or filtered water are ideal.
How long does finished sauerkraut last in the refrigerator?
Properly fermented and sealed sauerkraut lasts 4-6 months in cold storage. The acidic brine acts as a preservative. Flavor actually improves over the first month as fermentation continues slowly in the cold. Discard immediately if you notice pink or orange mold, which indicates harmful contamination.
Can I adjust the salt amount for less sodium?
Salt is critical for fermentation–it prevents harmful bacteria while allowing beneficial Lactobacillus to thrive. Reducing salt below 2% by weight risks spoilage. Instead, use your finished sauerkraut as a flavoring agent in small portions rather than eating large servings, which dilutes sodium intake.
What does white fuzzy mold on sauerkraut mean?
White mold on the surface is usually harmless kahm yeast, which forms when vegetables contact air. Simply skim it off with a clean spoon. However, pink, orange, or fuzzy mold below the brine surface indicates dangerous mold and means the entire batch should be discarded. Always keep vegetables submerged to prevent surface mold.
As an Amazon Associate, Build & Bloom earns from qualifying purchases. We only recommend products we genuinely think are useful. Prices and availability vary; check Amazon for the latest.
Leave a Reply