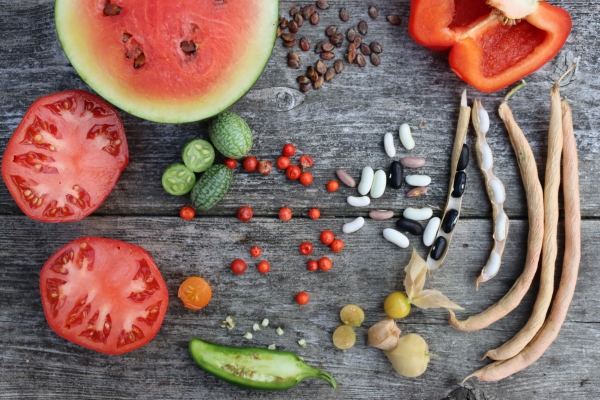

Buying seed packets year after year adds up—and most home gardeners don’t realize they’re sitting on free seeds already growing in their garden. If you’ve ever wondered why some plants in your beds seem to reseed themselves while others disappear, the answer is seed maturity and proper harvesting. Learning to save seeds is one of the most rewarding homestead skills, turning your best-performing plants into unlimited future crops while deepening your connection to what you grow.
How to Save Seeds from Your Garden
Seed saving is straightforward once you understand the lifecycle of your plants. The process takes just a few weeks and requires minimal tools.
What You Will Need
- Paper bags or envelopes for collecting and storing seeds
- A cutting tool such as scissors or garden shears for harvesting seed pods
- A drying surface like a paper plate, newspaper, or cloth with good air circulation
- Glass jars or airtight containers for long-term storage
- Labels and permanent marker to record plant variety and harvest date
- Silica gel packets (optional but recommended for humidity control)
Steps
Choose the right plants to harvest from
Select healthy, vigorous plants that performed well in your garden. These traits are often heritable, so you’re building a garden adapted to your specific growing conditions. Avoid plants showing disease or pest damage, as weak genetics may transfer to offspring.
Allow seeds to fully mature on the plant
Resist the urge to harvest early. Seeds need to develop completely while still attached to the parent plant. For most vegetables and flowers, this means waiting until seed pods feel papery, lose their green color, and appear nearly ready to drop naturally. This usually takes 3-6 weeks after the plant flowers.
Cut seed pods or heads from the plant
Use a clean cutting tool to remove entire seed heads or pods during a dry morning. Place them directly into a paper bag. For plants with seeds that shatter easily (like beans or peas), you can cut the entire stem and hang it upside-down over a bag to catch falling seeds.
Dry seeds completely before storage
Spread harvested seeds on a flat drying surface in a warm, well-ventilated space away from direct sunlight. A garage shelf, attic, or shaded porch works well. Leave seeds undisturbed for 2-3 weeks until they feel completely brittle and snap rather than bend. Moisture is the enemy of seed longevity.
Remove seeds from pods and debris
Once fully dry, crush seed pods gently by hand over a clean container, or rub dried flower heads between your palms to separate seeds from chaff. Use your fingers to pick out any remaining plant material. For larger seeds, this step is simple; smaller seeds may benefit from a gentle screening.
Test seeds for viability if desired
Though optional, testing ensures your saved seeds will sprout. Place a sample of 10 seeds between damp paper towels in a sealed bag for 5-10 days. If 70% or more germinate, your seed viability is strong enough for storage. This takes the guesswork out of planting.
Label and store seeds in cool, dry conditions
Place dried seeds in airtight containers or glass jars. Write the plant variety, harvest date, and any notes about performance on each label. Store in a cool location (ideally 40-50F) with low humidity, such as a refrigerator, basement, or root cellar. Seeds kept properly can remain viable for 2-10 years depending on species.
- Focus first on easy plants: tomatoes, beans, peppers, squash, and marigolds are forgiving and produce abundant seeds quickly.
- Save seeds only from open-pollinated or heirloom varieties—hybrid plants (marked F1) won’t produce offspring identical to the parent.
- Keep detailed notes on which plants you saved from and how they performed; this builds a personalized seed library adapted to your climate.
What to Look For in Seed-Saving Equipment
- Drying surface quality: You need a surface that allows air circulation from below and doesn’t trap moisture. Solid plates or trays can cause mold; screens or mesh allow better airflow. Look for food-grade materials if seeds will touch the surface directly.
- Storage container air-tightness: Moisture and oxygen degrade seeds over time. Glass jars with rubber seals or dedicated seed storage containers with locking mechanisms keep seeds viable longer than paper or plastic bags. Airtight is non-negotiable for storage longer than one season.
- Labeling durability: Seeds stored in cool, humid environments like refrigerators will expose labels to moisture. Choose waterproof labels or permanent markers designed for plastic and glass to ensure your variety information survives storage.
- Silica gel effectiveness: If storing in humid climates, silica gel packets absorb ambient moisture inside containers. Choose rechargeable packets so you can dry them out and reuse them multiple seasons, or select packs with color indicators showing when they’re saturated.
Fiskars Bypass Pruning Shears
Best for: Cutting seed heads and pods cleanly without crushing them
Fiskars pruning shears offer clean, sharp cuts essential for harvesting mature seed pods without damaging seeds inside. The bypass design (two blades sliding past each other) minimizes crushing compared to anvil shears, and the ergonomic handles reduce hand fatigue during extended harvesting. The stainless steel blades resist rust even when wet from morning dew, and they’re easily sharpened to maintain cutting performance across multiple seasons.
Check Current Price on Amazon →Rubbermaid Brilliance Airtight Food Storage Container Set
Best for: Long-term seed storage with clear visibility
These clear plastic containers let you see your seed supply at a glance, and the leak-proof lids with locking tabs create an airtight seal preventing moisture infiltration. The medium size is ideal for holding multiple seed envelopes without wasting space, and they stack efficiently in refrigerator or freezer storage. The durable plastic won’t crack like glass if dropped, making them forgiving for new gardeners setting up their first seed library.
Check Current Price on Amazon →Scotch Waterproof Shipping Labels
Best for: Labeling seeds for storage without fading or washing off
These waterproof labels stick to glass and plastic without peeling, and their synthetic material resists moisture in refrigerated or humid storage. A permanent marker won’t smudge even in damp conditions. At a low price point, you can label every envelope and container in your seed collection while staying well within budget. The white surface provides excellent contrast for handwritten variety names and harvest dates.
Check Current Price on Amazon →Ball Wide Mouth Pint Canning Jars with Lids
Best for: Heirloom-quality seed storage lasting decades
Glass canning jars provide superior seed preservation compared to plastic, maintaining an inert storage environment that won’t off-gas or degrade over years. The rubber-sealed lids create an airtight closure, and glass doesn’t absorb odors or flavors. These jars are beautiful enough to display in a cool closet or pantry as part of your homestead storage system. Wide mouth design makes filling and removing seeds easy, and the jars are reusable indefinitely.
Check Current Price on Amazon →What’s the best location to dry seeds?
Choose a warm (65-75F ideally), well-ventilated space away from direct sunlight and moisture. A garage shelf, attic corner, or shaded porch works well. Avoid basements or humid areas where seeds may absorb moisture before they’re ready to store.
Can I save seeds from cross-pollinating plants?
Yes, but you need to isolate plants to prevent cross-pollination. For example, if you grow two squash varieties side by side, bees will cross-pollinate them and seeds won’t breed true. Isolation distances vary by crop—some need 50+ feet separation. Focus on self-pollinating plants (tomatoes, beans, peppers) when starting out.
As an Amazon Associate, Build & Bloom earns from qualifying purchases. We only recommend products we genuinely think are useful. Prices and availability vary; check Amazon for the latest.
Leave a Reply