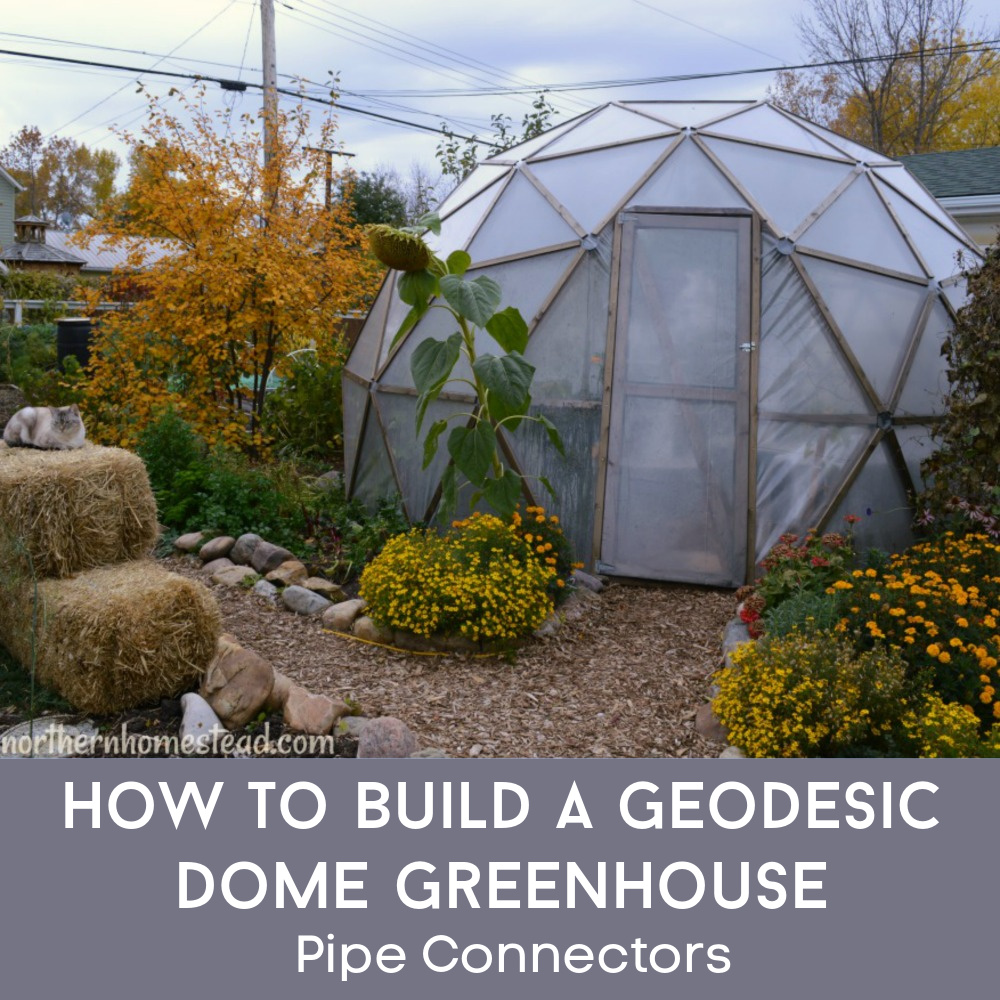

Building a geodesic dome greenhouse transforms your homestead into a four-season growing space that maximizes sunlight while minimizing heating costs. The iconic dome shape distributes wind and snow loads evenly, requires fewer support posts than traditional greenhouses, and creates an impressive focal point on your property. Whether you’re a seasoned builder or tackling your first major project, this guide breaks down the process into manageable steps so you can create a functional growing environment without expensive contractors.
How to Build Your Geodesic Dome Greenhouse
A 2-frequency geodesic dome is the most practical size for homestead gardening. This design balances structural integrity with buildability.
Materials You Will Need
- 2×4 or 2×3 lumber (pressure-treated or cedar) for struts, cut to calculated lengths based on your desired dome diameter
- Metal corner brackets or bolts with washers and nuts for joining struts at vertices
- Polycarbonate twin-wall panels or UV-resistant plastic sheeting for the exterior covering
- Measuring tape, circular saw, and drill-driver for material preparation
- Level, laser transit, or string lines for precise layout
- Bolts, washers, and nuts (typically 3/8 inch diameter) rated for outdoor use
Steps
Calculate Your Strut Lengths
Determine your desired dome diameter, then use a geodesic calculator (freely available online) to find the exact lengths for your struts. A 2-frequency dome has two different strut lengths. Mark these measurements clearly on your lumber and double-check all calculations before cutting to avoid material waste.
Cut All Struts to Length
Use a circular saw or miter saw to cut lumber to your calculated lengths. Cut all struts for one category first, then the second. Sand the cut ends lightly to remove splinters. Organize your cut pieces by length in clearly labeled piles to prevent confusion during assembly.
Mark and Drill Connection Points
Mark where holes will be drilled at each strut end using a template. The angle should be cut precisely (typically around 25-35 degrees depending on your dome frequency). Drill holes through the lumber that will accommodate your bolts, ensuring they’re centered and perpendicular to prevent binding during assembly.
Assemble the Base Ring
Lay out the bottom pentagon or hexagon ring on level ground. Connect struts end-to-end using bolts, washers, and nuts, creating a tight polygon. Check that your base is square and level before tightening all fasteners completely. A crooked base will compound errors throughout the dome.
Build the Dome Layer by Layer
Working systematically, add the second ring of struts upward from the base, connecting them to the base ring at precise angles. Continue adding rings, working from the base toward the apex. Stand back frequently to check alignment and symmetry. Have a helper stabilize the structure as it rises.
Secure the Apex Cap
Once all struts are in place, secure the final connection point at the dome’s peak. This is critical for structural integrity. Double-check that all bolts are tight, but don’t over-tighten as this can crack wood. A solid apex ensures the dome can handle wind and snow loads.
Install the Covering System
Cut polycarbonate panels or plastic sheeting to fit the triangular sections created by the strut framework. Secure panels using specialized fasteners designed for your covering material. Leave openings for ventilation doors or windows. Ensure all seams are sealed against weather penetration to maintain temperature control.
Add Access Doors and Ventilation
Install at least one hinged door for entry and exit. Add roof vents or louvers to release heat during warm months. These ventilation features are essential for managing humidity and preventing overheating. Test the door and vents multiple times before finalizing your greenhouse for the season.
- Use a laser level or transit when assembling the dome to ensure each ring maintains proper height and alignment–small errors compound into major problems at the apex.
- Pre-assemble one complete triangular section on the ground as a test fit before attempting vertical assembly, saving troubleshooting time once the structure is elevated.
- Apply wood sealant or paint to all cut strut ends before assembly to prevent rot and extend the life of your greenhouse by 10+ years.
Essential Tools and Materials for Geodesic Dome Greenhouse Construction
- Precision Measuring and Layout: Accuracy is non-negotiable in geodesic construction. Invest in a quality measuring tape (at least 50 feet), a laser level, and a speed square. Small measurement errors multiply across dozens of struts and connections.
- Cutting Tools: A miter saw with stop blocks allows repeatable, precise cuts for identical strut lengths. A circular saw provides flexibility for angled cuts at strut ends. Both tools together give you all the precision needed without expensive specialty equipment.
- Fastening Hardware: Grade-8 bolts with washers and nylon-lock nuts resist vibration loosening and outdoor corrosion. Stainless steel or galvanized options last longer than plain steel. Calculate total fastener count before purchasing to avoid multiple trips to supply stores.
- Covering Material: Polycarbonate panels provide superior insulation and durability compared to plastic sheeting, though they cost more upfront. UV-resistant polyethylene sheets offer a budget-friendly alternative for single-season or temporary structures. Choose based on your climate and long-term plans.
Bosch MS8000 Laser Level System
Best for: Builders requiring precision dome alignment
The Bosch multi-line laser projects plumb and level references across your entire work area, eliminating manual leveling and ensuring each dome ring sits perfectly. This self-leveling system maintains accuracy even on uneven ground, critical for geodesic structures where angular precision directly affects structural integrity. The 360-degree capability and long-range visibility make it invaluable for larger dome projects spanning 20+ feet.
Check Current Price on Amazon →DEWALT DCD771C 20V Compact Drill-Driver
Best for: First-time builders seeking affordable drilling power
This lightweight cordless drill handles hundreds of bolt-hole drilling operations without fatigue. The compact design fits tight angles where struts meet, and the 20V battery provides adequate torque for clean holes through 2×4 lumber. While not professional-grade, it delivers reliable performance for the typical homestead project at a fraction of specialty tool costs.
Check Current Price on Amazon →Makita LS1040 10-Inch Compound Miter Saw
Best for: DIY builders making consistent, repeatable cuts
The 10-inch blade and integrated stop blocks enable identical strut lengths across multiple pieces. The compound miter feature accommodates the angled cuts required at strut ends without complicated setup. This saw bridges the gap between handheld tools and expensive cabinet saws, making it ideal for single-project builders who want precision without mastering complex machinery.
Check Current Price on Amazon →Festool TS 55 FEBQ Track Saw System
Best for: Advanced builders prioritizing speed and precision
This professional-grade track saw cuts lumber with exceptional accuracy and minimal dust, essential when making dozens of identical strut cuts. The guided rails prevent binding and kickback, while the anti-splinter scoring blade leaves clean edges ready for finishing. The investment pays dividends on complex projects where every cut directly affects final alignment.
Check Current Price on Amazon →Start Building Your Geodesic Dome Greenhouse Today
A geodesic dome greenhouse represents a significant undertaking, but the result transforms your homestead into a productive four-season growing space. The mathematical elegance of the dome design provides structural efficiency unmatched by traditional greenhouses, while the unique aesthetic makes it a striking addition to your property. By investing time in precise measurements, quality tools, and careful assembly, you’ll create a structure that serves your garden for decades with minimal maintenance.
The key to success lies in treating this project like the engineering challenge it is–take your time with calculations, assemble a small test section first, and don’t rush the final assembly when precision matters most. Start with a 2-frequency dome in the 20-30 foot range, gather your materials over several weeks to manage costs, and recruit a dependable helper for the assembly phase. Your future self will thank you every time you harvest fresh vegetables in January while snow falls outside your magnificent dome.
Frequently Asked Questions
What size geodesic dome is best for a homestead greenhouse?
A 20-30 foot diameter 2-frequency dome provides excellent growing space for most homesteads without becoming unwieldy to construct. Smaller 12-16 foot domes work for limited space but reduce usable growing area. Larger domes (40+ feet) require more structural planning and advanced building skills.
How long does a geodesic dome greenhouse typically take to build?
A 20-foot diameter dome with one helper typically requires 40-80 hours spread over 4-8 weekends, depending on experience and material preparation. Professional teams can complete similar projects in 2-3 weeks. The longest phases are material prep (cutting and drilling) and the final assembly when precision becomes critical.
Can I use regular plastic sheeting instead of polycarbonate for covering?
Yes, UV-resistant polyethylene works as an economical covering and can last 2-3 seasons. However, polycarbonate provides better insulation, lasts 10+ years, and maintains clarity longer. The higher upfront cost pays back through extended growing seasons and reduced heating needs.
Do I need a building permit for a geodesic dome greenhouse?
Permit requirements vary significantly by location. Check with your local building department before starting–some jurisdictions require permits for any permanent structure, while others exempt small greenhouses. Permits ensure your structure meets wind and snow load codes for your region.
What’s the best way to heat a geodesic dome greenhouse during winter?
Passive solar heating works well in mild climates, supplemented by thermal mass (barrels of water). Colder regions benefit from electric heaters with thermostats, while larger operations might justify greenhouse heater systems. Proper ventilation prevents mold and excess humidity regardless of heating method.
As an Amazon Associate, Build & Bloom earns from qualifying purchases. We only recommend products we genuinely think are useful. Prices and availability vary; check Amazon for the latest.
Leave a Reply