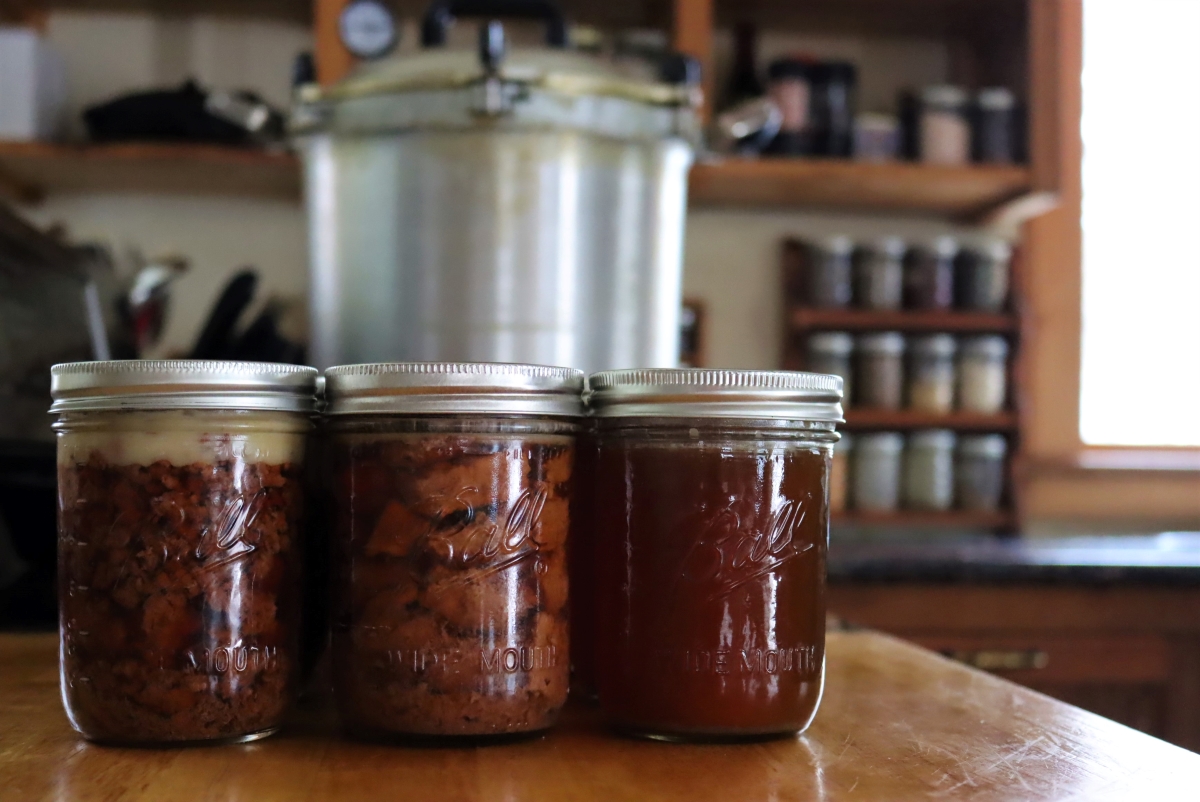

If you raise livestock, hunt, or buy meat in bulk, canning offers a way to preserve your harvest without dependence on electricity or freezer space. Many homesteaders worry about food safety when canning meat–and rightfully so. Unlike high-acid foods, meat requires pressure canning to reach temperatures that eliminate botulism spores. This guide walks you through the science and steps to can meat safely, so you can build a shelf-stable protein supply with confidence.
How to Can Meat Using a Pressure Canner
Meat canning requires precision and the right equipment. Follow these steps to safely preserve raw or cooked meat for up to five years.
Materials Needed
- A pressure canner (not a water bath canner) rated for 10-15 PSI
- Sterilized quart or pint mason jars with two-piece lids (lids must be new; rings reusable)
- Raw or cooked meat, trimmed of excess fat and cut into consistent pieces
- Salt (optional, about 1/2 to 1 teaspoon per jar for flavor)
- A clean workspace, kitchen towels, a jar lifter, and a wide-mouth funnel
Steps
Prepare Your Canner and Jars
Fill your pressure canner with 2-3 inches of water and heat it to a gentle simmer. Sterilize jars by running them through a hot dishwasher cycle or boiling them for 10 minutes. Keep jars hot in the canner water until you’re ready to fill them. Prepare lids according to manufacturer instructions (modern self-sealing lids typically don’t require pre-heating, but check your brand).
Prepare the Meat
Trim all visible fat from your meat, as fat can interfere with sealing and shorten shelf life. Cut meat into pieces no larger than 1.5 inches. For raw pack, use meat as-is. For hot pack (recommended for better results), simmer meat in a pot of broth or water for 3-5 minutes until partially cooked, then drain, reserving the liquid.
Fill Jars with Meat and Liquid
Using a wide-mouth funnel, pack meat loosely into hot jars, leaving 1.25 inches of headspace at the top. If using hot pack, pour the reserved hot liquid over the meat. If using raw pack, add boiling water or broth. Add salt now if desired. Remove air bubbles by sliding a thin tool around the inside of the jar and gently pressing the meat.
Wipe Rims and Apply Lids
Use a clean, damp cloth to wipe the rim of each jar thoroughly, removing any meat particles or liquid. Place a hot lid on each jar and screw the ring on firmly but not overly tight–you should be able to turn it back a quarter turn with your fingertips.
Load Jars into the Canner
Using a jar lifter, carefully place filled jars onto the rack inside the hot canner. Jars should not touch each other or the canner walls. If processing multiple layers, use a canning rack between layers. Ensure the water level covers the tops of jars by at least one inch.
Vent the Canner and Build Pressure
Place the canner lid on without the weight or dial gauge. Allow steam to escape freely for 10 minutes to vent air from the canner. Add the pressure weight and bring the canner to the required PSI for your altitude (typically 10 PSI for low altitudes, up to 15 PSI for elevations above 1,000 feet). Maintain steady pressure throughout processing.
Process at Pressure
Once pressure is reached, process pint jars for 75 minutes or quart jars for 90 minutes. Maintain consistent pressure by adjusting heat. Do not allow pressure to fluctuate. When time is complete, turn off heat and allow the canner to cool naturally until pressure returns to zero–do not use cold water or force the lid open.
Cool and Test Seals
Remove the canner lid and wait 5 minutes before removing jars. Place jars on a clean towel, spacing them apart, and let cool undisturbed for 12-24 hours. Once cool, check seals by pressing the center of each lid–it should be slightly concave and not pop up. Label jars with contents and date, then store in a cool, dark place.
- Always consult current USDA canning guidelines for your specific meat type and cut; times vary for chicken, beef, pork, and game meats.
- Hot pack yields better color, texture, and nutrient retention compared to raw pack, and is recommended for beginners.
- Keep a detailed log of each batch including the date, meat type, processing time, and altitude–this helps you troubleshoot and improve future batches.
What to Look For in Meat Canning Equipment
- Pressure Canner Type: Choose between dial-gauge and weighted-gauge models. Dial-gauge canners allow precise PSI monitoring but require annual calibration. Weighted-gauge models are more forgiving and need no calibration, making them ideal for beginners.
- Canner Capacity: Most home canners hold 7-10 quart jars or 13-16 pint jars per batch. Larger capacity (21-23 quart capacity) reduces batches needed for big harvests but takes longer to heat and cool.
- Jar Quality and Size: Use only jars manufactured for canning (thick glass designed for pressure). Quart and pint sizes are most practical for meat. Always use new lids each season; rings and jars are reusable indefinitely if undamaged.
- Accessory Kit: Essential tools include a jar lifter, wide-mouth funnel, air bubble remover, and headspace measuring tool. Many come bundled together and cost $10-20, saving time and preventing user error.
All American 21.5-Quart Pressure Canner with Weighted Gauge
Best for: Serious home canners and homesteaders
The All American 921 is the gold standard for meat canning. Its weighted-gauge system requires no calibration and maintains consistent pressure automatically. Made of durable aluminum with a flat-stacking design, it holds up to 7 quart jars and heats evenly on any stovetop, including induction. The no-gasket design eliminates replacement costs and increases longevity. Professional-grade construction makes this a one-time investment for decades of reliable canning.
Check Current Price on Amazon →Presto 01781 23-Quart Pressure Canner with Dial Gauge
Best for: Budget-conscious beginners
The Presto 01781 offers reliable performance at an entry-level price point. Its 23-quart capacity fits more jars per batch, and the dial gauge provides visual pressure confirmation. The canner features a simple vent pipe and one-piece cover for easy operation. While the dial gauge requires annual calibration at your local extension office, the overall value and accessibility make this an excellent choice for first-time canners testing the hobby before investing in premium equipment.
Check Current Price on Amazon →Mirro 92645A 22-Quart Pressure Cooker and Canner with Weighted Gauge
Best for: Novice canners learning the process
The Mirro 92645A combines a pressure cooker and canner in one versatile appliance, perfect for households new to food preservation. Its weighted-gauge system is simple to understand and eliminates guesswork. The stainless steel construction resists corrosion, and the large capacity accommodates family-sized batches. The included user manual and access to online canning resources make troubleshooting straightforward. This dual-purpose tool justifies the investment for multi-use kitchens.
Check Current Price on Amazon →Ball Canning Essentials Tool Set
Best for: Canners needing complete accessory kits
This seven-piece set includes a jar lifter, wide-mouth funnel, bubble remover, headspace measuring tool, lid lifter, jar wrench, and instruction guide. Made from food-grade plastic and stainless steel, the tools are dishwasher-safe and built to last through hundreds of batches. Including this accessory set eliminates guesswork about which tools you need and prevents costly mistakes from using incorrect utensils. The official Ball branding ensures compatibility with standard canning jars.
Check Current Price on Amazon →Kerr Wide Mouth Quart Canning Jars (Case of 12)
Best for: Meat canning specifically
Wide-mouth quart jars are the ideal vessel for canning meat because larger openings allow you to pack meat pieces without breaking them. Kerr jars are manufactured to withstand pressure canning temperatures and feature reliable two-piece lids. This case of 12 provides enough jars for a substantial meat canning session. The wide mouth simplifies filling and cleaning, and the 1-quart size is perfect for family meals or sharing with neighbors.
Check Current Price on Amazon →Granite Ware Pressure Canner with Weighted Gauge (30-Quart)
Best for: Large-batch commercial or farm use
For homesteaders processing large meat harvests, the Granite Ware 30-quart canner processes 10+ quart jars per batch. Its heavy-duty porcelain-coated steel construction distributes heat evenly and resists rust. The weighted-gauge system provides reliable pressure control without calibration. The larger footprint suits commercial or farm kitchens. While pricier than consumer models, the per-batch efficiency and durability make it a smart investment for serious preservationists.
Check Current Price on Amazon →Ball 16-Quart Pressure Canner with Weighted Gauge
Best for: Small households and limited storage
The Ball 16-quart model fits smaller kitchens and stovetops while still handling 5-6 quart jars per batch. Its weighted-gauge system requires no calibration and works on all heat sources. The compact footprint makes storage easier in apartments or cabins without sacrificing functionality. This size is ideal for preserving game meat from a single hunt or a family’s annual beef processing, proving that effective canning doesn’t require industrial equipment.
Check Current Price on Amazon →Victorio 02197 Stainless Steel Pressure Canner (23.5-Quart) with Dual-Pressure System
Best for: Perfectionist canners and high-altitude locations
The Victorio 02197 represents the pinnacle of home-canning technology. Its dual-pressure system accommodates both low-altitude and high-altitude processing without manual adjustment, eliminating a common source of error. The heavy-duty stainless steel resists staining and corrosion, and the precision-engineered design heats uniformly. Advanced canners appreciate the accuracy and reliability this model delivers, justifying the premium price through consistently perfect batches and decades of trouble-free operation.
Check Current Price on Amazon →Start Your Meat Canning Journey
Canning meat is one of the most rewarding food preservation skills a homesteader can master. It transforms a harvest or bulk purchase into shelf-stable meals ready in minutes, without freezer dependency. By investing in quality equipment–a reliable pressure canner, proper jars, and essential tools–you eliminate most sources of error and set yourself up for consistent success. The initial learning curve is steep, but following USDA guidelines and maintaining meticulous attention to processing times and pressure ensures safe, delicious results.
Start with a single batch of your preferred meat and keep detailed notes: the cut used, cooking method, processing time, and how long it lasted in your household. This data becomes invaluable as you refine your technique and scale up production. Many canners report that their first successful batch of shelf-stable meat sparked a passion for food independence. Whether you’re preserving a deer harvest, processing homegrown poultry, or buying beef in bulk, the security of knowing your protein supply is safe and ready transforms how you approach meal planning.
Frequently Asked Questions
Can I use a water bath canner instead of a pressure canner for meat?
No. Water bath canners only reach 212°F, which is insufficient to kill botulism spores in low-acid foods like meat. Pressure canners reach 250°F at 10 PSI, making them essential for safe meat preservation. Using a water bath canner risks serious foodborne illness.
How long does canned meat last?
Properly canned meat stored in a cool, dark place lasts 3-5 years or longer. Quality gradually declines over time, so consuming within the first 2 years offers optimal flavor and nutrition. Always inspect jars before opening for signs of spoilage like discoloration or bulging lids.
What should I do if a jar doesn’t seal?
If a jar fails to seal within 24 hours, refrigerate it and use the contents within 3-4 days, or reprocess the meat immediately with a new lid. Never store unsealed jars at room temperature, as bacterial growth poses a safety risk.
Do I need to add liquid when canning meat?
Yes. Meat must be covered with liquid (broth or water) to achieve proper heat penetration and prevent discoloration. Leave 1.25 inches of headspace, allowing the liquid to expand during processing without forcing the lid off or contaminating the seal.
Can I can ground meat, or only whole cuts?
Ground meat can be canned, but whole cuts and pieces are preferred because ground meat is more prone to bacterial contamination during grinding. If canning ground meat, ensure it came from a clean source and hot-pack it for safety. Follow USDA guidelines for processing times.
As an Amazon Associate, Build & Bloom earns from qualifying purchases. We only recommend products we genuinely think are useful. Prices and availability vary; check Amazon for the latest.
Leave a Reply