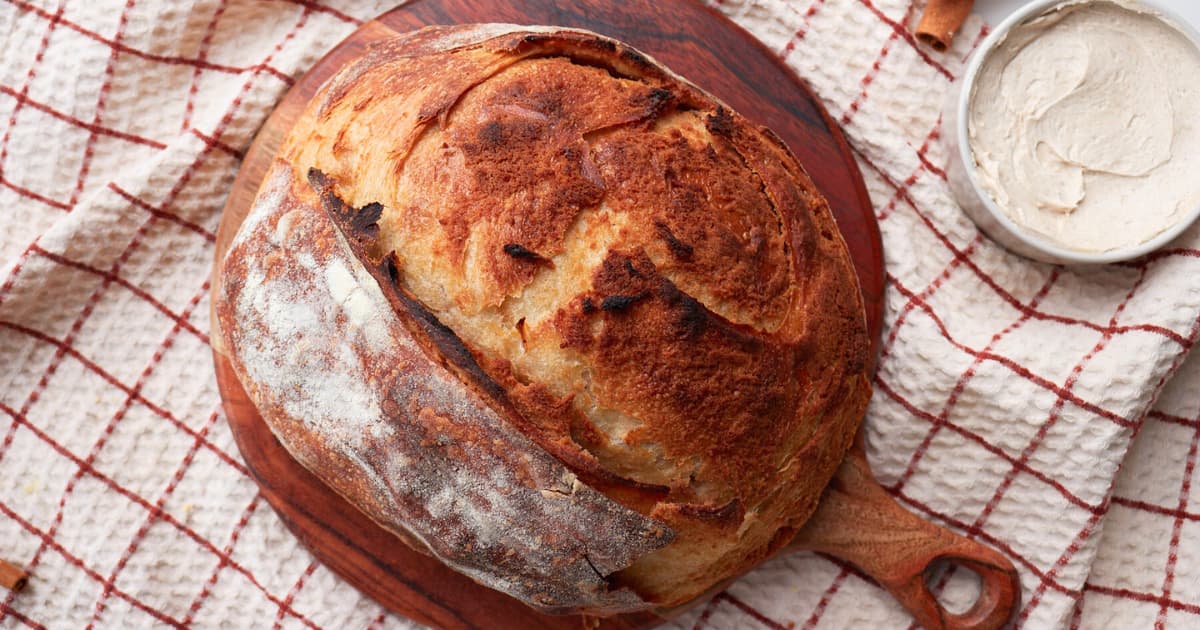

If you’ve mastered basic sourdough but crave something with more flavor and aroma, cinnamon honey butter sourdough is the natural next step. This variation transforms your everyday loaf into a bakery-quality treat with warm spice notes and subtle sweetness. The technique builds on standard sourdough methods while teaching you how to layer flavors without disrupting fermentation. Whether you’re planning weekend brunch or want to impress with homemade gifts, this recipe delivers impressive results with minimal additional effort.
How to Make Cinnamon Honey Butter Sourdough Bread
This recipe combines traditional sourdough fermentation with a flavorful cinnamon-honey-butter filling. Total time spans 24-48 hours, most of which is hands-off fermentation.
Ingredients
- 500g bread flour or all-purpose flour
- 350ml filtered water at room temperature
- 100g active sourdough starter (fed and bubbly)
- 10g sea salt
- 3 tablespoons softened butter
- 2 tablespoons honey
- 2 teaspoons ground cinnamon
Method
Mix and Autolyse
Combine flour and water in a large bowl, stirring until all dry flour is incorporated. Let this mixture rest for 30 minutes to 2 hours at room temperature. This resting period, called autolyse, allows the flour to fully hydrate and develops gluten naturally. After resting, add your bubbly starter and salt, then mix thoroughly until a shaggy dough forms.
Bulk Fermentation with Stretch and Folds
Place dough in a covered container and let it ferment at room temperature for 4-6 hours. Every 30 minutes for the first 2 hours, perform a stretch and fold: wet your hand, grab one side of the dough, stretch it up and fold it over itself. Rotate the bowl and repeat from all four sides. This builds strength without kneading. The dough should increase in volume by 50-75% and show visible bubbles when ready.
Shape and Add the Filling
Turn dough onto a lightly floured surface and gently shape it into a rectangle about 1/4-inch thick. Mix your softened butter, honey, and ground cinnamon into a paste. Spread this mixture evenly across the dough, leaving a 1-inch border on all sides. Roll the dough tightly from one long end, sealing the seam as you go. Shape the roll into a boule (round loaf) by tucking the edges underneath.
Cold Final Proof
Place the shaped dough seam-side up into a flour-dusted proofing basket or bowl lined with a kitchen towel. Cover and refrigerate for 12-24 hours. This extended cold fermentation develops deeper flavor and makes scoring easier. The cold dough also slashes more cleanly and rises better in the oven.
Preheat and Score
Remove dough from refrigerator and preheat your oven to 500F with a covered heavy pot or Dutch oven inside for at least 45 minutes. Turn dough onto parchment paper, seam-side down. Using a sharp knife or bread lame, score the top with a single deep slash at a 30-degree angle. This allows controlled expansion and creates the signature ear.
First Bake (Covered)
Carefully place parchment and dough into the preheated hot pot. Cover with the lid and bake for 20 minutes at 500F. This trapped steam creates a crispy crust. The steam also allows the dough to expand fully before the crust sets, giving you maximum oven spring and a light, airy crumb.
Second Bake (Uncovered)
Remove the lid and reduce oven temperature to 450F. Bake for an additional 25-30 minutes uncovered, until the crust is deep golden brown. You should hear a hollow sound when you tap the bottom of the loaf. The internal temperature should reach 205-210F when measured with a thermometer in the thickest part.
Cool Completely
Transfer the finished loaf to a wire cooling rack and let it rest for at least 1 hour before slicing. This cooling period allows the crumb to set properly; cutting too early releases steam and creates a gummy texture. Once cool, slice and enjoy the aromatic swirls of cinnamon throughout the loaf.
- Keep your starter at peak activity: feed it 4-8 hours before mixing and use it when it’s at maximum rise with visible bubbles on top. A sluggish starter leads to weak fermentation and flat bread.
- Watch dough behavior, not just time. Fermentation speed varies by room temperature. Warmer kitchens may finish bulk fermentation in 4 hours; cooler ones might need 6-8 hours. Look for 50-75% volume increase and visible bubbles throughout.
- Don’t skip the cold proof. The extended refrigeration develops complex flavor that room-temperature proofing cannot match, plus it makes the dough much easier to score cleanly.
Essential Tools for Sourdough Baking Success
- Dutch Oven or Covered Baking Vessel: This is the single most important tool for home sourdough. Trapping steam during the first 20 minutes of baking creates the crispy, caramelized crust that defines artisan bread. Look for heavy cast iron or enameled options that can handle 500F temperatures.
- Proofing Basket (Banneton): These flour-dusted baskets support shaped dough during the final proof and prevent spreading. They’re far more effective than bowls lined with towels, especially during long cold fermentation. Round or oval shapes match common loaf styles.
- Kitchen Scale: Sourdough baking relies on ratios and percentages, not cup measurements. A digital scale measuring in grams ensures consistency between bakes. This single tool elevates your success rate dramatically compared to volume-based recipes.
- Bread Lame or Sharp Knife: Clean, deep scoring controls how your loaf expands in the oven and creates the decorative ear. A dedicated bread lame (razor blade on a handle) gives superior results over knives because it cuts without dragging, but a very sharp knife works if kept at proper angle.
Lodge Enameled Cast Iron Dutch Oven, 5.5 Quart
Best for: Any home sourdough baker
The Lodge 5.5-quart Dutch oven is the industry standard for sourdough baking. Its heavy cast iron distributes heat evenly, the enamel coating resists sticking, and the tight-fitting lid traps steam perfectly for the first 20 minutes of baking. This exact size accommodates boules up to 2 pounds with comfortable clearance. Lodge’s lifetime durability means this single purchase outlasts countless loaves. The black exterior hides burns and browning, and it transitions seamlessly from oven to table for rustic presentation.
Check Current Price on Amazon →Tramontina Covered Dutch Oven, 5.5 Quart
Best for: Budget-conscious beginners
Tramontina delivers nearly identical performance to premium brands at significantly lower cost. The 5.5-quart capacity fits standard sourdough loaves, heat distribution is excellent, and the colorful enamel coating makes it attractive for table service. While not quite as thick as vintage Lodge, it performs admirably for hundreds of bakes before showing wear. Perfect for someone still refining technique before investing in heirloom equipment.
Check Current Price on Amazon →BANNETON Proofing Basket Set, Round 9-inch
Best for: First-time shaping learners
This banneton set includes two round 9-inch proofing baskets plus linen liners, giving you backup baskets for multiple loaves or simultaneous proofing schedules. The rattan construction naturally prevents sticking without excessive flour buildup. Perfect diameter for 750-1000g loaves. Includes clear instructions for proper use and care. The round shape teaches proper boule shaping without the basket constraining your technique.
Check Current Price on Amazon →Staub Enameled Cast Iron Cocotte, 5.5 Quart
Best for: Serious bakers and dual-purpose cooking
Staub combines superior engineering with restaurant-grade aesthetics. The black matte enamel interior resists staining and allows better heat observation. The self-basting lid has a textured surface that returns moisture to bread during baking, enhancing crust quality beyond standard Dutch ovens. More expensive than alternatives, but the engineering refinements produce noticeably better results for dedicated sourdough enthusiasts. Works equally well for French cooking projects.
Check Current Price on Amazon →Final Recommendation
Cinnamon honey butter sourdough represents the perfect bridge between mastering basic sourdough and exploring endless flavor variations. The technique remains pure sourdough fermentation—no shortcuts or commercial yeast—while the filling transforms your loaf into something memorable enough for gifts or brunch tables. Start with quality equipment (a Dutch oven and proofing basket make the difference between frustration and success), trust your fermentation instincts over timers, and expect your first attempt to teach you more than any recipe can. The cold overnight proof is your secret weapon: it develops complexity that day-old fermentation never achieves.
Your investment in a proper Dutch oven and kitchen scale pays dividends across every loaf you’ll bake for decades. These aren’t luxuries; they’re the foundation separating sourdough successes from disappointing failures. Once you experience how dramatically these tools improve your results, you’ll understand why serious bakers prioritize them over flashy gadgets. Make this recipe, dial in your technique over two or three attempts, then confidently build your own sourdough variations knowing the fundamentals are rock solid.
Frequently Asked Questions
Can I make this recipe without a Dutch oven?
You can bake in a regular covered baking pan or create a steam environment using an inverted pan over your loaf, but results won’t match the Dutch oven’s superior heat retention and steam trapping. A Dutch oven remains essential for the distinctive crispy crust this recipe demands.
What if my starter isn’t doubling in 4-8 hours?
Your starter needs feeding more consistently. Try doubling your daily feeding schedule for 5-7 days before attempting bread. If your kitchen is cold (below 70F), fermentation slows dramatically; consider keeping starter in a slightly warmer spot like an oven with the light on.
How do I know if bulk fermentation is complete?
Look for three signs: the dough has increased 50-75% in volume, visible bubbles appear throughout when you gently spread it, and it passes the poke test (a gentle fingertip press springs back slowly, leaving a slight indent). Time alone isn’t reliable because temperature affects speed.
Why did my loaf turn out dense instead of airy?
Dense crumb usually comes from weak starter (not bubbly enough), insufficient fermentation time, or degassing during shaping. Verify your starter peaks with bubbles on top, extend bulk fermentation until you see the volume and bubble signs, and handle shaped dough more gently.
Can I prepare this the day before and bake same-day morning?
Yes, this is the ideal workflow. Shape the loaf in the evening, refrigerate overnight, then bake straight from cold. There’s no need to come to room temperature; cold dough actually bakes better. Remove from fridge about 30-45 minutes before baking if your kitchen is very cold, but don’t warm it fully.
As an Amazon Associate, Build & Bloom earns from qualifying purchases. We only recommend products we genuinely think are useful. Prices and availability vary; check Amazon for the latest.
Leave a Reply