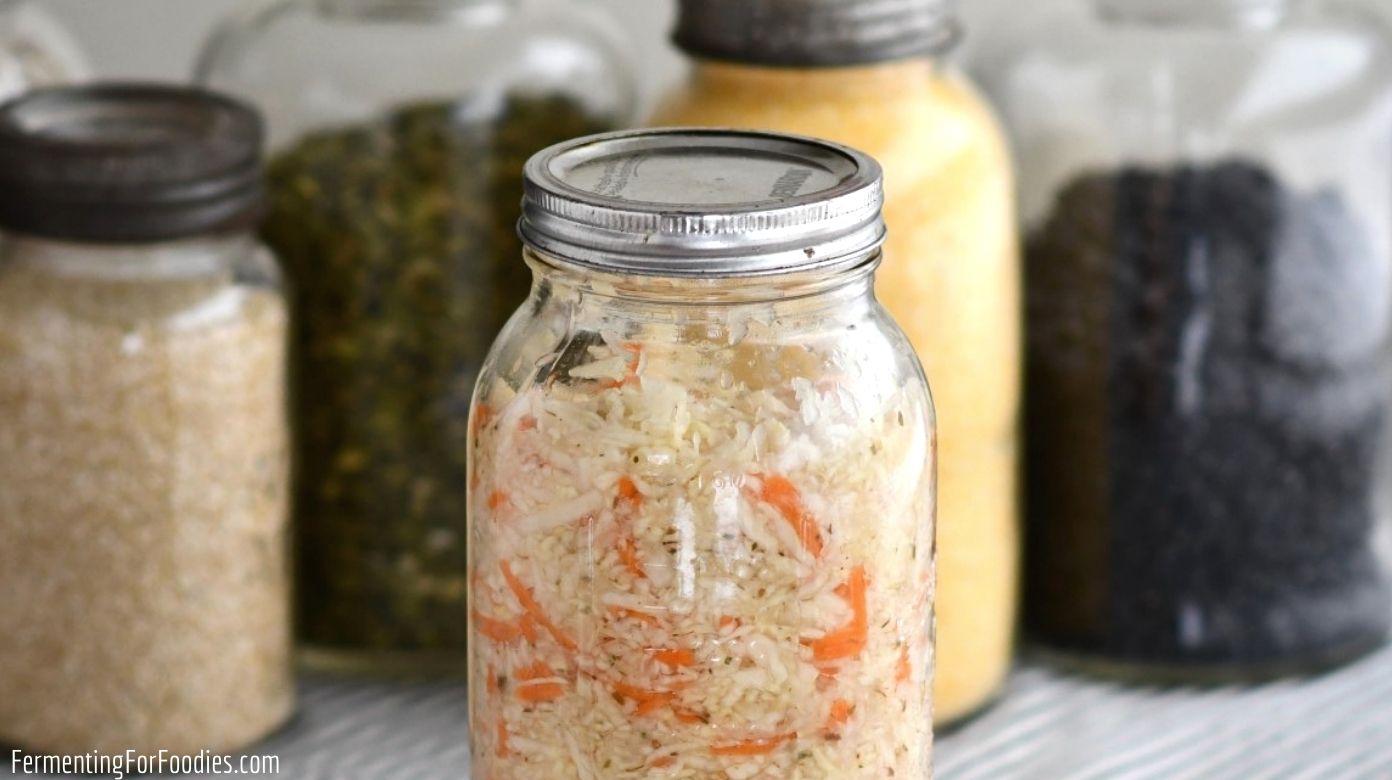

Curtido brings a crisp, tangy punch to any meal and delivers live probiotics straight to your gut–but you don’t need special equipment or fancy fermentation knowledge to make it at home. This Salvadoran staple starts with vegetables you already have, a salt solution, and time. In less than a week, you’ll have jars of complex, crunchy relish that costs pennies per serving and tastes infinitely better than store-bought versions.
How to Make Curtido at Home
Curtido ferments through a simple salt-brine method that encourages lactobacillus to flourish while preventing harmful bacteria. The process takes 3-7 days depending on room temperature, and requires just one active step: combining and packing.
Ingredients
- 1 small head of green cabbage (about 2 pounds), thinly sliced or shredded
- 2 medium carrots, julienned or grated into thin matchsticks
- 1 medium white onion, thinly sliced
- 1 tablespoon of sea salt or pickling salt (not iodized)
- 2-3 dried guajillo or cayenne peppers, seeds removed (optional but traditional)
- 1 teaspoon of dried oregano
Method
Prepare Your Vegetables
Slice your cabbage into thin ribbons using a sharp knife or mandoline, working from the widest parts toward the core to maximize length. Julienne the carrots into thin sticks about the size of matchsticks–this helps them ferment evenly and creates pleasant texture contrast. Slice onions thinly and separate into individual layers. Pat everything dry with a clean cloth to remove excess surface moisture.
Layer Vegetables with Salt
Place your sliced cabbage into a large mixing bowl, then sprinkle about one-third of the salt over it. Massage the cabbage firmly with your hands for 2-3 minutes until juices begin releasing–you’re breaking cell walls to encourage brine formation. Add carrots and onions in layers, sprinkling remaining salt as you go, and continue massaging until the bowl contains a visible brine liquid at the bottom.
Pack Into a Fermentation Vessel
Transfer the vegetable mixture and all accumulated brine into a clean glass jar, pressing down firmly as you add it. The vegetables should be fully submerged under the brine; if liquid doesn’t cover them by at least an inch, add a small amount of salt water (1 tablespoon salt per cup of water). Leave about 2 inches of headspace at the jar’s top for gas release during fermentation.
Add Aromatics and Seal
Sprinkle the dried oregano over the top, and distribute the deseeded dried peppers throughout if using. Cover the jar loosely with a lid or cloth secured with a rubber band–the goal is to prevent dust and insects from entering while allowing carbon dioxide to escape. Store in a cool, dark corner of your kitchen away from direct sunlight.
Monitor During Fermentation
Check your jar daily, looking for bubbling activity (a good sign), cloudiness in the brine (also normal), and any white surface mold (skim off immediately if spotted). You may notice a distinct vinegary smell developing–this is precisely what you want. The fermentation can take anywhere from 3 days at room temperature (68-75F) to 7 days in cooler conditions (60-65F).
Taste and Refrigerate
Around day 3, open the jar and taste a small sample. If it’s tangy enough for your preference, it’s ready to refrigerate, which dramatically slows fermentation. If you prefer more funk and complexity, leave it another 2-3 days. Once satisfied, seal the lid and move the jar to your refrigerator where it will keep for 2-3 months.
Serve and Store
Curtido shines alongside pupusas, black beans, grilled meats, or rice bowls. Use a clean spoon each time to prevent introducing bacteria, and always keep unused portions submerged in brine. The longer it sits in the refrigerator, the more sour and complex it becomes–many people find it even better after a month.
- Keep vegetables submerged by using a fermentation weight or even a clean cabbage leaf folded on top–exposed vegetables are prone to mold, while submerged portions ferment beautifully
- Temperature is your fermentation timer: warmer kitchens (72F+) produce ready-to-eat curtido in 3-4 days, while cooler spots take 5-7 days and often develop deeper flavors
- Reserve some brine in a separate jar: if you need to top off your ferment or make a second batch, mature brine jumpstarts fermentation by introducing established beneficial bacteria
What to Look For in Fermentation Jars and Equipment
- Jar Material and Size: Glass is your best choice because it’s inert, won’t absorb flavors, and lets you monitor fermentation visually. Aim for a quart-sized jar (32 ounces) as your starter, which fits one batch of curtido perfectly without too much headspace.
- Wide Mouth Opening: Wide-mouth jars make packing vegetables and removing finished curtido dramatically easier than narrow-mouth designs. This feature alone saves frustration and prevents vegetable breakage during the process.
- Fermentation Weights: Keeping vegetables submerged is critical for mold prevention, so dedicated fermentation weights (glass or silicone) are worth the investment. They prevent the guesswork of makeshift solutions and last through hundreds of batches.
- Lid Compatibility: Look for jars with standard-fit lids or airlocks that allow gas escape while preventing dust and insects. Screw-top lids work if loosened slightly, but specialized fermentation lids with one-way valves reduce daily monitoring.
Bormioli Rocco Quattro Stagioni Glass Fermentation Jar with Clip Lid, 1 Liter
Best for: Serious home fermenters and complete beginners alike
This Italian-made glass jar is the workhorse of the fermentation world. Its wide mouth accommodates vegetables easily, the thick glass handles temperature fluctuations without cracking, and the hinged clip lid allows gas release while keeping contaminants out. At 1 liter (slightly over a quart), it’s the perfect size for a single curtido batch. The jar’s timeless design means you can ferment confidently, monitor progress through clear glass, and store finished curtido directly in the refrigerator for months.
Check Current Price on Amazon →Rubbermaid Brilliance Wide Mouth Glass Storage Container, 68 Ounces
Best for: Budget-conscious fermenters trying their first batch
This widely available glass container costs a fraction of specialty fermentation jars yet performs admirably for curtido. The wide mouth and airtight lid work perfectly if you simply leave it slightly cracked during fermentation, and the sturdy borosilicate glass won’t leach chemicals. While it lacks specialty venting, its clear construction lets you monitor fermentation, and at 68 ounces it accommodates a full batch with room to spare.
Check Current Price on Amazon →Fermentools Airlock Fermentation Lid for Wide Mouth Mason Jars
Best for: Newcomers who already own mason jars
This ingenious plastic lid transforms any wide-mouth mason jar into a proper fermentation vessel. Its one-way airlock valve automatically releases carbon dioxide while preventing oxygen from entering, eliminating daily monitoring. Simply fill a mason jar you probably already own, screw on this lid, and let the airlock do the work. It’s an affordable upgrade that removes most guesswork and is perfect for people testing whether fermentation becomes a regular hobby.
Check Current Price on Amazon →Ball Wide Mouth Quart Mason Jars, Pack of 12
Best for: Batch fermenters making multiple recipes at once
Ball’s iconic mason jars are affordable, durable, and universally compatible with fermentation lids and weights. At 32 ounces each, a quart is perfect for curtido batches, and buying a dozen means you can ferment multiple batches simultaneously or keep previous batches stored long-term. The wide mouth design accommodates both packing and removal with ease, and their ubiquity means replacement lids are always available.
Check Current Price on Amazon →Kilner Clip Top Fermentation Jar with Ceramic Weight, 2 Liters
Best for: Serious fermenters who want everything in one package
This British-made jar combines premium construction with included fermentation weights, eliminating the need for separate purchases. The 2-liter capacity ferments double batches, the heavy borosilicate glass resists temperature stress, and the ceramic weight sits perfectly inside the jar without sliding around. The clip-top lid design is heirloom quality, meaning your grandchildren could ferment with this jar.
Check Current Price on Amazon →Glassnow Wide Mouth Glass Fermentation Jar Set with 2 Silicone Weights
Best for: Serious home fermenters wanting complete control
This set includes not just the jar but two silicone fermentation weights that adapt to any vegetable load or jar size. The wide-mouth design simplifies packing and removal, the glass is thick enough to handle vigorous packing, and silicone weights last forever without degrading. At an intermediate price point, it offers premium features without luxury pricing, making it ideal for someone committed to regular fermentation.
Check Current Price on Amazon →Pyrex Storage Plus Glass Containers with Vented Plastic Lids, 4 Cup
Best for: Minimal-equipment fermenters already using Pyrex
These microwave-safe glass containers with their distinctive red vented lids work surprisingly well for fermentation. The vented design naturally allows gas escape while the plastic lid sits firmly enough to prevent contamination. At 4 cups (32 ounces), they’re quart-sized perfect for curtido, and if you already use Pyrex in your kitchen, you can ferment without buying specialty equipment.
Check Current Price on Amazon →Harsch German Fermentation Crock with Grommet Lid and Weights, 5 Liters
Best for: Dedicated fermenters making large quantities regularly
This traditional German stoneware crock represents the pinnacle of fermentation vessel design, used for generations. Its ceramic construction and water-seal grommet lid create the perfect anaerobic environment, while included ceramic weights ensure proper submersion. At 5 liters, it ferments three curtido batches simultaneously, and its rustic beauty looks stunning on open shelving. This is a lifetime investment that becomes more beautiful with use.
Check Current Price on Amazon →Your First Batch of Curtido Awaits
Making curtido at home connects you to a tradition spanning generations and cultures, delivering living probiotics that improve digestion while transforming simple vegetables into complex, crave-worthy flavor. The process is forgiving enough for absolute beginners yet rewarding enough for experienced fermenters, and the investment in one good jar pays dividends across dozens of batches. Within a week, you’ll understand why Salvadoran families keep crocks of this tangy relish perpetually fermenting.
Start with whichever jar speaks to your situation–whether that’s a budget-friendly wide-mouth container you already own or a heirloom-quality crock you’ll pass down. The vegetables, salt, and time do the real work; your vessel simply creates the right environment. Soon you’ll be spooning curtido onto pupusas, rice bowls, and grilled meats, knowing exactly what went into it and how alive it truly is.
Frequently Asked Questions
Why did my curtido develop white fuzzy mold on top?
Surface mold occurs when vegetables aren’t fully submerged in brine. Skim off the mold immediately, press vegetables down, and add a fermentation weight to prevent recurrence. The brine underneath is usually fine and safe to consume.
How do I know if my curtido is done fermenting?
Taste it starting on day 3–when the tanginess satisfies your preference, it’s ready. There’s no single ‘done’ point; some people prefer gentle fermentation (3-4 days), while others want intense sourness (7+ days). Once satisfied, refrigerate to stop fermentation.
Can I use iodized table salt instead of pickling or sea salt?
No–iodized salt inhibits fermentation and can turn your curtido mushy. Stick to non-iodized pickling salt, sea salt, or kosher salt. Read labels carefully, as some sea salts contain anti-caking agents that cloud your brine.
Is curtido safe to eat if it smells strongly of vinegar?
Yes, absolutely–that pungent vinegary smell is the hallmark of successful fermentation. It indicates lactic acid production and robust beneficial bacteria. If it smells rotten or off-putting, discard it, but vinegar-forward aroma is exactly what you want.
How long can I store finished curtido in the refrigerator?
Properly submerged curtido keeps for 2-3 months in the refrigerator, though flavor continues deepening. Some fermenters report jars lasting 6+ months. Always use clean utensils to remove portions, and ensure remaining curtido stays under brine.
As an Amazon Associate, Build & Bloom earns from qualifying purchases. We only recommend products we genuinely think are useful. Prices and availability vary; check Amazon for the latest.
Leave a Reply