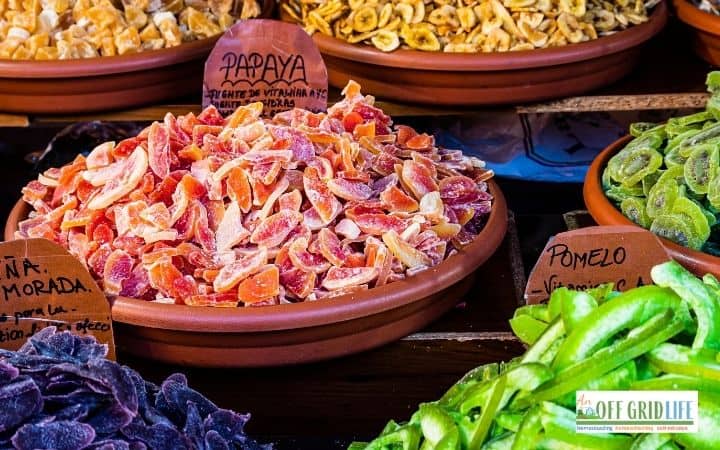

If you’re serious about food preservation and want to reduce waste while building your homestead pantry, dehydrating is one of the most accessible methods to master. Unlike canning, which requires specialized knowledge about safety, dehydrating is forgiving and requires minimal equipment. This guide walks you through everything you need to know to confidently dry your first batch of food this week.
How to Dehydrate Foods: Step-by-Step Process
Dehydrating works by removing water content that bacteria and mold need to grow, effectively extending shelf life to months or years. The process is straightforward once you understand the fundamentals.
What You Will Need
- A food dehydrator (stackable tray style or box style recommended for beginners)
- Sharp knife or mandoline slicer for uniform thickness
- Cutting board
- Paper towels or clean cloths for drying produce
- Storage containers (glass jars or airtight containers)
- Food thermometer (optional but helpful for monitoring)
Steps
Select and Inspect Your Produce
Choose fresh, ripe fruits, vegetables, or herbs without blemishes or soft spots. Wash everything thoroughly under running water and pat dry completely with paper towels. Moisture on the surface slows dehydration, so take time to ensure everything is bone dry before proceeding.
Slice Food to Uniform Thickness
Cut your produce into consistent pieces approximately 1/8 to 1/4 inch thick. Uniform thickness ensures everything dries at the same rate, preventing some pieces from being under-dried while others become too brittle. Use a sharp knife or mandoline slicer to maintain consistency across all pieces.
Pre-treat if Desired
While optional, pre-treating lighter fruits like apples or pears prevents browning and oxidation. Soak slices briefly in lemon juice diluted with water, or use a commercial fruit preserver. This step is purely for aesthetic appeal and does not affect food safety or shelf life.
Arrange Food on Dehydrator Trays
Lay pieces in a single layer on your dehydrator trays without overlapping or touching. Air must circulate freely around each piece for even drying. Slightly crowded trays will still work but will extend drying time by several hours.
Set Temperature and Begin Dehydrating
Consult your dehydrator manual for specific temperature recommendations, but generally use 125-135F for herbs and delicate fruits, 135-155F for most vegetables, and 160-165F for meat products. Set the timer and allow the dehydrator to run without opening it, as each opening releases heat and extends drying time.
Monitor Progress and Test for Doneness
After the recommended time, check several pieces to see if they’re fully dry. Properly dehydrated food should be brittle or leathery depending on the item, with no visible moisture when bent or squeezed. If any pieces feel soft or moist, continue running the dehydrator and check again in 30-minute intervals.
Cool Completely Before Storing
Remove trays and let food cool to room temperature for at least one hour. Storing warm food creates condensation inside containers, which reintroduces moisture and can cause mold growth. Once cooled, pack into airtight containers and label with the item name and date.
Store in Cool, Dark Conditions
Keep dehydrated foods in a pantry, cupboard, or cool closet away from direct sunlight. Properly dehydrated and stored foods will last 6-12 months, though most are consumed much sooner. Check containers periodically for any signs of moisture or off odors.
- Start with durable vegetables like carrots, zucchini, and bell peppers before attempting delicate fruits, as they’re more forgiving of slight variations in thickness.
- Keep a dehydration log noting what you dried, at what temperature, and how long it took–this builds your personal reference guide and saves time on future batches.
- Pre-freeze berries for 2-3 hours before dehydrating to crack the skins slightly, which allows moisture to escape faster and reduces drying time by 25-40 percent.
What to Look For in a Food Dehydrator
- Temperature Range and Control: Look for dehydrators offering adjustable temperatures between 95-165F with digital controls. This flexibility allows you to dry everything from delicate herbs and yogurt to jerky and mushrooms without buying multiple machines.
- Tray Capacity and Expandability: Beginners benefit from 4-6 trays as standard, with the option to add more. Stackable models let you expand capacity as your confidence grows, while fixed models waste less counter space. Calculate how much food you realistically want to process at once.
- Air Circulation Design: Horizontal air flow (side-to-side) typically dries more evenly than vertical designs, especially for wet foods. Box-style dehydrators with this feature tend to have fewer hot spots and require less rotating of trays during the process.
- Noise Level and Energy Efficiency: Dehydrators run for 4-12 hours per batch, so noise matters if your kitchen is near living spaces. Choose models rated under 70 decibels. Energy-efficient units with insulated bodies cost less to operate long-term despite higher upfront prices.
Cosori Premium Food Dehydrator Machine
Best for: Serious beginners and experienced users
The Cosori 6-tray dehydrator features precise digital temperature control from 95-158F, intelligent humidity sensors, and even heat distribution across all trays simultaneously. Its stainless steel construction and glass door allow you to monitor progress without opening the unit. The machine includes preset programs for common foods like beef jerky and fruit, while still offering full manual control. With 600-watt power and 30-hour timer, it handles batches from small herb drying to large fruit preservation with consistent results. Many users report drying times 20% faster than competitors.
Check Current Price on Amazon →NESCO Snackmaster Pro Food Dehydrator
Best for: Budget-conscious beginners
The NESCO Snackmaster delivers reliable performance at a fraction of premium prices, with expandable capacity from 4 to 12 trays. Its Convertigrill top tray functions as both dehydrator and heating element, distributing heat evenly across the vertical stack. Temperature range of 95-160F covers all common foods, while the simple mechanical thermostat is easy to understand for newcomers. At under 600 watts, it’s energy-efficient for daily use. The plastic construction feels less durable than stainless models, but thousands of homesteaders rely on this workhorse for basic fruit and vegetable preservation.
Check Current Price on Amazon →Hamilton Beach 32100A Food Dehydrator
Best for: First-time dehydrators
Hamilton Beach’s 5-tray model prioritizes simplicity without sacrificing performance. Large digital display shows temperature and time clearly, while three preset programs guide you through drying fruit, vegetables, and jerky without guessing. Vertical heating design with top-down airflow ensures even drying across all trays. The 600-watt motor maintains steady 95-160F temperatures, and the machine is quiet enough for kitchen use during evening hours. Dishwasher-safe trays reduce cleanup friction, making the process less intimidating for absolute beginners.
Check Current Price on Amazon →Excalibur 3926TB Food Dehydrator
Best for: Serious homesteaders and small-scale producers
The Excalibur is the gold standard for serious food preservation, featuring 26-hour timer, 15-temperature settings from 105-165F, and a powerful 600-watt horizontal airflow system. Its 9-tray capacity and timer with on/off switch allow overnight drying without monitoring. Stainless steel exterior, poly-screen trays, and industrial construction promise 25+ year lifespan. The Excalibur dries more uniformly than competitor models, eliminating the need to rotate trays mid-cycle. This is an investment, but bulk dehydrating operations and serious preservationists consider it essential.
Check Current Price on Amazon →Magic Mill Food Dehydrator Machine
Best for: Homesteaders wanting quality without premium pricing
Magic Mill combines professional features at mid-range cost. Its 6-tray stackable design, digital controls (95-158F), and patented dual-fan system provide consistent results comparable to dehydrators twice the price. The stainless steel frame looks polished enough for countertop display, while the 700-watt power ensures faster drying than similarly priced competitors. Many users report completing batches in 6-8 hours versus 10-12 on budget models. Temperature accuracy within 2 degrees makes it suitable for meat jerky and other items requiring precision.
Check Current Price on Amazon →Vitamix Dehydrator and Blender Combo
Best for: Small kitchens and single-person households
This compact 4-tray unit integrates dehydration with Vitamix’s blending expertise, ideal for apartments or RVs where counter space is precious. Despite smaller footprint, the 600-watt heating system and 95-145F range handles fruits, vegetables, and herbs effectively. The glass cover lets you monitor progress without opening. Drying capacity is roughly 40% of full-size models, making it better for small batches of herbs and homemade dog treats than bulk preservation. Construction quality matches other Vitamix appliances.
Check Current Price on Amazon →Ninja FD401 Compact Food Dehydrator
Best for: Users wanting preset programs and modern design
Ninja’s FD401 combines sleek design with practical functionality, featuring 6-tray capacity and 4 preset modes for fruit, jerky, vegetables, and custom drying. Temperature range of 95-158F with digital readout appeals to tech-savvy homesteaders. The compact footprint (11 inches wide) fits modest kitchens while maintaining full-size drying capacity. Vertical heating distributes warmth evenly, and the automatic shutoff after 39 hours prevents over-drying overnight batches. Ninja’s 3-year warranty beats most competitors.
Check Current Price on Amazon →L’Equip FilterPro Food Dehydrator
Best for: Professional and ultra-serious hobbyists
L’Equip represents the apex of home dehydrator design, with 10-tray capacity, temperature precision to within 1 degree (105-175F), and advanced HEPA filtration that removes odors and airborne contaminants. Its brushless DC motor runs nearly silent while delivering consistent, even heat distribution. Stainless steel construction and commercial-grade components justify the premium price for those running near-production-volume operations. The FilterPro excels at large batches of mushrooms, herbs, and jerky where precision and capacity matter most.
Check Current Price on Amazon →Start Your Dehydration Journey This Week
Food dehydration is one of the most straightforward preservation methods available to homesteaders, requiring minimal investment and offering immediate, visible results. A quality dehydrator, sharp knife, and understanding of basic temperature guidelines are all you need to transform fresh produce into shelf-stable foods that taste better and cost less than store-bought alternatives. Most beginners complete their first successful batch within a single afternoon.
Choose your starting dehydrator based on realistic capacity needs and budget, then pick one simple food–apple slices, herb bundles, or zucchini chips–to master before expanding into more complex projects. The satisfaction of eating preserved food you grew and dried yourself builds momentum for expanding your preservation skills into canning, fermenting, and other techniques that anchor a truly self-sufficient homestead.
Frequently Asked Questions
How long does dehydrated food last in storage?
Properly dried and stored foods last 6-12 months, with some items like dried beans lasting 1-2 years. Shelf life depends on moisture content, storage temperature, and light exposure. Keep containers in cool, dark places and check periodically for signs of moisture or off odors.
Can I dehydrate foods in an oven instead of buying a dehydrator?
Yes, oven dehydration works at temperatures around 135-150F, though most ovens fluctuate more than dehydrators. Prop the door open slightly to allow moisture to escape, and expect 1.5-3x longer drying times. Ovens also use significantly more energy, making dehydrators more economical for regular preservation.
What foods are easiest to dehydrate for beginners?
Start with herbs, apple slices, banana chips, and zucchini chips–these are forgiving of thickness variations and have obvious visual cues when done. Avoid delicate berries, fish, and meat jerky until you have 2-3 successful batches under your belt.
Do I need to blanch vegetables before dehydrating?
Blanching (briefly boiling) is optional and extends shelf life slightly, but most homesteaders skip it since dehydration alone prevents spoilage. Some vegetables like broccoli and carrots dry faster if blanched first, but the time saved doesn’t justify the extra work for most beginner projects.
How do I know when food is completely dry?
Fully dehydrated food should have zero moisture when squeezed or bent. Fruits are typically leathery, vegetables brittle, and herbs crumbly. If any moisture releases when you apply pressure, continue drying. When in doubt, dehydrate an extra 30 minutes–over-dried food stores longer than under-dried.
As an Amazon Associate, Build & Bloom earns from qualifying purchases. We only recommend products we genuinely think are useful. Prices and availability vary; check Amazon for the latest.
Leave a Reply