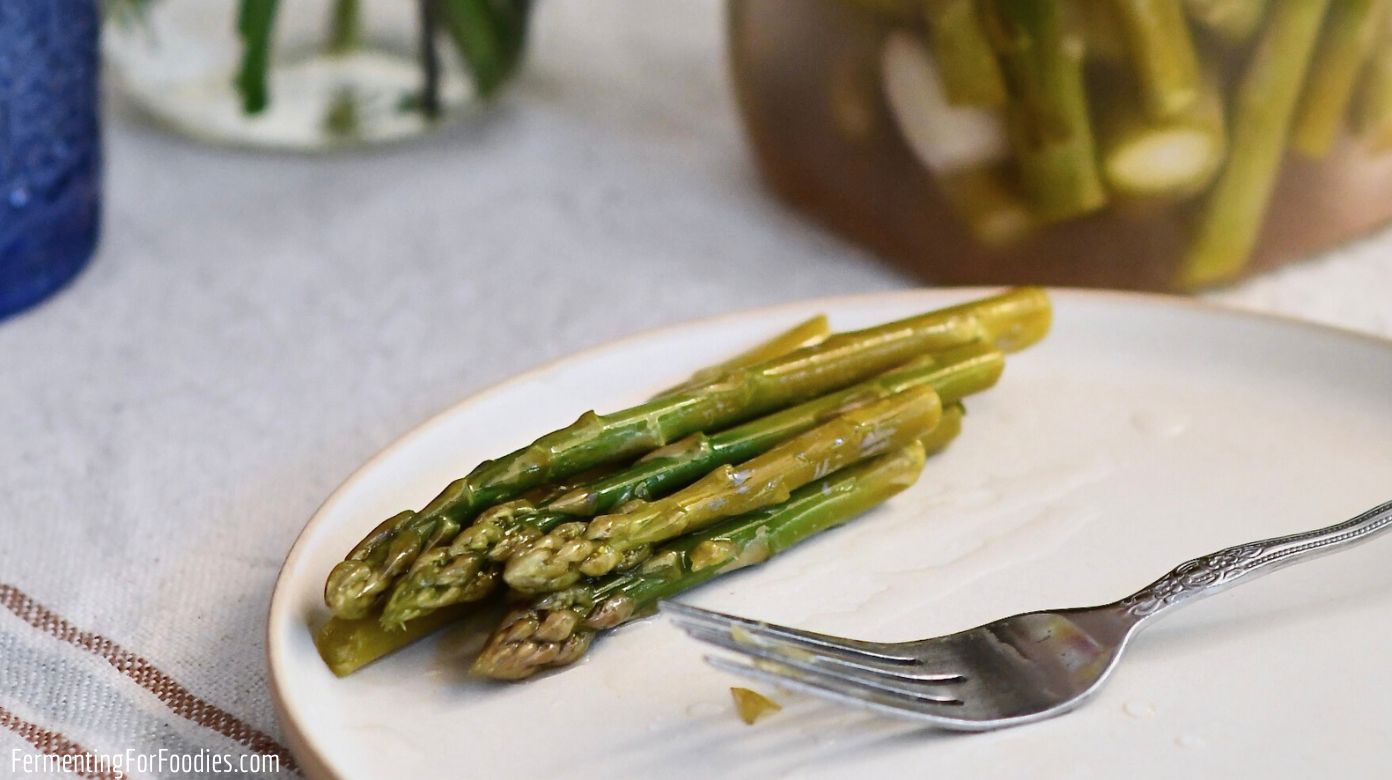

Fermented asparagus offers one of the easiest entry points into home fermentation—requiring just a few basic ingredients and minimal hands-on time. If you’ve been curious about fermentation and gut health but intimidated by complex recipes, this straightforward method proves that building beneficial bacteria in your food is simpler than you think. Unlike complicated kombucha or multi-step sourdough starters, fermented asparagus relies on the salt-brine method to naturally encourage the right microbes while keeping harmful ones at bay.
How to Ferment Asparagus in 7 Days
This traditional lacto-fermentation method harnesses salt and natural bacteria to transform fresh asparagus into a probiotic powerhouse. The entire process is hands-off once you’ve assembled the brine.
Ingredients
- 1.5 to 2 pounds fresh asparagus, trimmed to fit your jar
- Filtered or dechlorinated water (chlorine inhibits fermentation)
- Sea salt or pickling salt, approximately 2-3 tablespoons per quart
- Optional flavorings: garlic cloves, dill, peppercorns, red pepper flakes, or fresh ginger
- A clean glass jar with a wide mouth (quart-sized or larger)
Method
Prepare your asparagus and vessel
Rinse fresh asparagus thoroughly under cool water and trim the woody bottoms (usually the bottom 1-2 inches). Pat dry with a clean cloth. Wash your glass jar and any implements in hot soapy water; fermentation tolerates non-sterile conditions better than canning, but cleanliness prevents unwanted mold.
Pack the jar strategically
Layer asparagus spears standing upright in your jar, alternating with your chosen seasonings. Garlic, fresh dill, and peppercorns are classic pairings. Pack tightly enough that spears won’t float freely, but leave 2 inches of headspace for brine.
Make your fermentation brine
Dissolve sea salt in filtered water at a ratio of about 2-3 percent by weight (roughly 2-3 tablespoons salt per quart of water). Stir until salt completely dissolves. Taste the brine—it should be pleasantly salty, similar to a potato chip. This concentration creates an environment where beneficial lactobacillus thrives while preventing bad bacteria.
Cover the asparagus completely
Pour your prepared brine over the packed asparagus until all spears are submerged. Use a fermentation weight, small glass jar filled with brine, or even a clean cabbage leaf to keep vegetables below the surface. Vegetables exposed to air can develop surface mold.
Choose your lid and location
Use a loose lid, cloth cover, or specialized fermentation airlock lid that allows gas to escape while preventing contamination. Place your jar in a cool, dark corner of your kitchen—ideally 65-75 degrees Fahrenheit. A pantry, basement, or cabinet works perfectly. Avoid direct sunlight and heat sources.
Monitor fermentation progress
After 24-48 hours, cloudy sediment and small bubbles will appear in your brine—this is beneficial fermentation at work. Taste a spear daily starting on day 3. Early on, asparagus will taste fresh and salty; by days 5-7, it develops a pleasant tangy flavor and softer texture. Fermentation speed depends on room temperature.
Taste and adjust to preference
Fermented asparagus is ready when it reaches your preferred tanginess, typically between 3-7 days. Cooler kitchens take longer; warmer kitchens ferment faster. Once it tastes right, seal the jar and move it to cold storage to dramatically slow fermentation.
Store for long-term use
Transfer your finished fermented asparagus to the refrigerator, where cold temperatures nearly halt the fermentation process. Properly fermented and refrigerated asparagus keeps for several months. The brine continues to develop subtle flavors over time, and you can add fresh asparagus to the same brine to ferment subsequent batches.
- If white mold (kahm yeast) forms on the surface, simply skim it off with a clean spoon—it’s harmless and doesn’t affect the ferment. However, pink or fuzzy mold indicates contamination; discard the batch.
- Warmer fermentation (70-75°F) completes faster but produces softer asparagus; cooler temperatures (60-65°F) ferment slower but preserve crunchier texture. Choose based on your climate and texture preference.
- Taste your brine occasionally during fermentation—when it becomes pleasantly sour, the ferment is developing properly. Trust your palate over rigid timelines since temperature variations affect each batch differently.
What to Look For in Fermentation Equipment
- Glass jar material and size: Wide-mouth glass jars (quart to half-gallon) work best for fermented vegetables because they’re easy to pack and monitor. Avoid metal lids that contact brine (they corrode); use plastic, glass, or cloth instead. Look for jars specifically labeled borosilicate or heat-tempered glass.
- Fermentation weights or airlocks: Keeping vegetables submerged prevents mold growth. Dedicated fermentation weights (ceramic, glass, or silicone) are worth the investment, though improvised solutions like small filled jars work fine. Airlock lids allow gas escape while blocking air and contaminants.
- Salt quality: Use non-iodized salt (sea salt or pickling salt) because iodine inhibits fermentation. Table salt with anti-caking additives clouds your brine unnecessarily. Quality matters more than price—affordable pickling salt performs identically to premium sea salt.
- Water treatment: Chlorine and chloramine in tap water can inhibit fermentation. Filtered water, dechlorinated tap water (left sitting 24 hours), or bottled water all work. If your tap water is heavily chlorinated, investing in a simple pitcher filter prevents fermentation failures.
Bormioli Rocco Fido Glass Jar Quart Size
Best for: Any fermentation beginner or regular practitioner
The Fido design features a hinged glass lid with a rubber gasket that creates a light seal while allowing carbonation to escape naturally—ideal for fermentation without expensive airlocks. The wide mouth and clear glass let you monitor fermentation progress daily, and the durable borosilicate glass handles repeated use for years. At around $10-15, this single jar becomes your workhorse for fermented asparagus, pickles, and beyond.
Check Current Price on Amazon →Ball Wide Mouth Quart Mason Jar (Set of 12)
Best for: Budget-conscious fermenters planning multiple batches
Classic mason jars work perfectly for fermentation when used with cloth covers instead of metal lids. This 12-pack ensures you always have clean jars ready and costs under $15 total. The wide mouth design makes packing asparagus easy, and the durable glass withstands years of fermentation cycles. Pair with fabric covers and rubber bands for a complete fermentation setup.
Check Current Price on Amazon →Cultures for Health Glass Fermentation Weights (Set of 2)
Best for: First-time fermenters who want foolproof submersion
These curved glass weights nestle perfectly inside standard jars to keep vegetables submerged without fuss. Unlike ceramic weights that can crack, borosilicate glass handles drops and temperature changes. At $12 for a pair, you get reliable weights for multiple jars and never worry about improvised solutions allowing mold growth. Dishwasher safe and completely inert.
Check Current Price on Amazon →Mortier Pilon Airlock Fermentation Jar (1.5 Liter)
Best for: Dedicated fermenters wanting professional-grade equipment
This Canadian-made glass fermentation vessel includes an integrated airlock lid that lets CO2 escape while completely sealing out contaminants and oxygen. The wider base and curved design make it aesthetically pleasing enough to display on your counter. At around $35-40, it’s more expensive than basic jars but eliminates guesswork about proper fermentation conditions. Perfect for serious practitioners planning multiple batches.
Check Current Price on Amazon →Start Your Fermentation Journey Today
Fermented asparagus represents one of the gentlest entry points into home fermentation, requiring nothing more than asparagus, salt, water, and patience. Unlike sourdough starters demanding daily feeding or kombucha requiring precise temperature control, this recipe forgives minor variations while consistently producing delicious results. Within a week, you’ll transform fresh vegetables into a probiotic-rich snack that your gut will thank you for.
Begin with a single wide-mouth jar and quality non-iodized salt, then let time and beneficial bacteria do the work. Within days, you’ll taste tanginess developing and gain confidence to experiment with flavor variations. Once you’ve mastered fermented asparagus, the same method works for cucumbers, green beans, carrots, and mixed vegetables. Welcome to a healthier, more sustainable approach to food preservation—and better digestive health.
Frequently Asked Questions
Is fermented asparagus actually a good source of probiotics?
Yes. Lacto-fermentation creates live Lactobacillus bacteria (the same beneficial strain in yogurt) that support digestive health. Raw fermented vegetables contain far more active cultures than pasteurized fermented foods. Each spoonful of fermented asparagus contains millions of these beneficial bacteria, assuming fermentation occurred properly and the jar wasn’t pasteurized.
What does white cloudy stuff in the fermentation jar mean?
Cloudy sediment is typically dead yeast and bacterial cells settling—a completely normal and harmless byproduct of fermentation. If the cloudiness forms a film on top rather than settling at the bottom, it might be kahm yeast. Simply skim off surface yeast with a clean spoon; the ferment underneath is still safe. Pink, orange, or fuzzy mold indicates contamination and the batch should be discarded.
Can I reuse the brine for fermenting new asparagus batches?
Yes, and many fermentation enthusiasts prefer this method. Existing brine already contains beneficial bacteria and requires less active fermentation time for subsequent batches. Simply add fresh asparagus to leftover brine and ferment for 2-4 days. After 3-4 reuses, the brine flavor becomes very strong; refresh it or start fresh for milder results.
How do I know if my fermented asparagus went bad?
Trust your senses. Fermented asparagus should smell pleasantly sour and slightly garlicky. If it smells putrid or rotten, discard it. Similarly, pink, orange, or fuzzy mold indicates spoilage. Fermented asparagus stored in the refrigerator keeps safely for months; if in doubt and it’s been stored properly, the worst case is an unpleasant taste rather than food poisoning.
Does fermented asparagus need to be refrigerated after fermentation?
Yes, once fermented to your liking, move it to the refrigerator to dramatically slow fermentation. Room temperature storage after fermentation completes will result in increasingly sour, mushy asparagus within days. Refrigeration preserves your preferred flavor and texture while keeping probiotics alive for months.
As an Amazon Associate, Build & Bloom earns from qualifying purchases. We only recommend products we genuinely think are useful. Prices and availability vary; check Amazon for the latest.
Leave a Reply