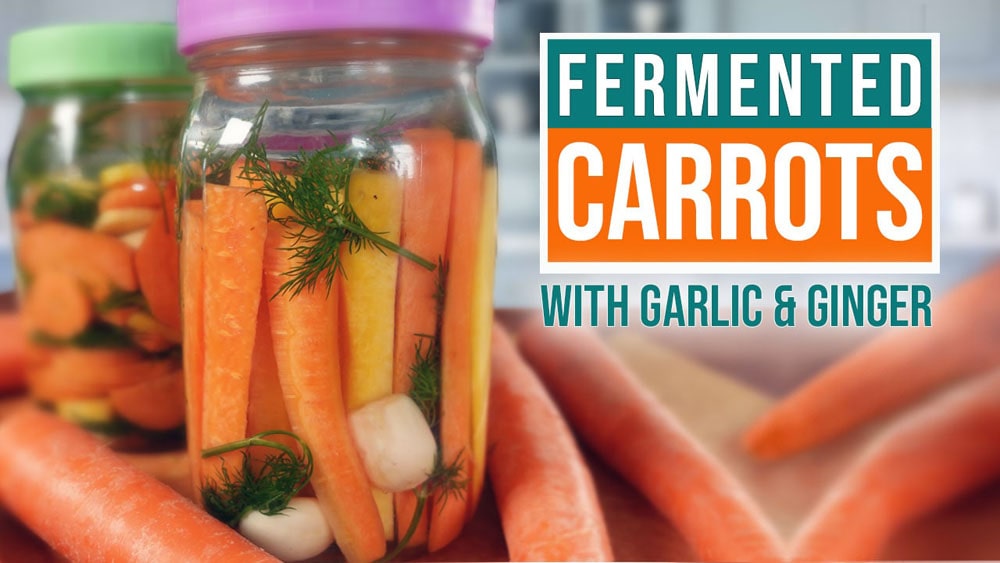

Fermented carrots are one of the easiest, most delicious ways to add probiotics to your diet without buying expensive supplements or yogurt. They taste great as a snack straight from the jar, pair perfectly with meals, or add crunch to salads. If you’ve never fermented anything before, carrots are the ideal starting point because they ferment quickly, rarely go wrong, and taste amazing after just a few days.
How to Make Fermented Carrots at Home
This simple lacto-fermentation method relies on salt, time, and the natural bacteria already present on your vegetables. The process takes 3-10 days depending on how tangy you prefer your carrots.
Ingredients
- Fresh carrots (about 2 pounds, enough to fill your jar)
- Sea salt or non-iodized salt (2 tablespoons per quart of water)
- Filtered or dechlorinated water (chlorine can inhibit fermentation)
- Garlic cloves, fresh dill, or peppercorns (optional, for flavoring)
- A clean glass jar with a lid (1-quart capacity works well)
Method
Wash and Prepare the Carrots
Scrub your carrots under cool running water to remove any soil. You can peel them or leave the skin on based on preference. Cut them into sticks, rounds, or spears about 1/4 inch thick. Aim for consistent sizes so they ferment evenly.
Make Your Brine Solution
Dissolve 2 tablespoons of salt in 1 quart of filtered water. Stir well until the salt completely dissolves. This saltwater solution is what prevents harmful bacteria while allowing the beneficial lactobacillus to thrive. Taste the brine–it should taste pleasantly salty, similar to a potato chip.
Pack the Jar
Place any aromatics (garlic, dill, peppercorns) on the bottom of your clean jar. Layer the carrot pieces on top, packing them snugly but not so tight that they’re crushed. Leave about 2 inches of headspace at the top.
Pour the Brine
Pour the saltwater solution over the carrots until they are completely submerged. It’s critical that the carrots stay below the liquid surface throughout fermentation, as any exposed pieces can develop mold. Use a clean weight, a cabbage leaf, or even a smaller jar filled with water to keep them submerged.
Cover and Leave at Room Temperature
Screw the lid on loosely or use a cloth cover secured with a rubber band. This allows gases produced during fermentation to escape while keeping dust and insects out. Place the jar on a kitchen counter or pantry shelf away from direct sunlight, where it will remain around 65-75 degrees Fahrenheit.
Monitor and Taste Daily
Starting on day 2 or 3, open the jar and taste a carrot stick. You’ll notice bubbles rising and the brine becoming slightly cloudy–both signs of active fermentation. The carrots will gradually become softer and more tangy. Continue tasting until they reach your preferred flavor, typically 3-10 days depending on room temperature.
Transfer to Cold Storage
Once the carrots taste the way you like them, secure the lid tightly and move the jar to your refrigerator. The cold slows fermentation dramatically, preserving the carrots in their current state. They will keep for several months in the fridge, though they may slowly continue to become tangier over time.
- If white surface mold (kahm yeast) appears, simply skim it off with a clean spoon. It’s harmless but affects flavor. This is different from pink or black mold, which means discard the batch.
- Ferment in a cooler environment (60-65 F) for slower, more complex flavors; warmer temperatures (75+ F) speed up fermentation but can result in mushier texture.
- Add a grape leaf or oak leaf to your jar–the tannins help keep carrots crisp throughout fermentation.
What to Look For in Fermentation Equipment
- Glass Jar Quality and Size: Choose food-grade glass jars in 1-quart or 2-quart sizes. Avoid metal lids that contact brine directly, as salt can corrode them. Wide-mouth jars are easier to pack and remove vegetables from.
- Fermentation Weights: A dedicated weight keeps vegetables submerged without effort. Look for food-grade silicone, glass, or ceramic weights designed specifically for fermentation to prevent mold development on exposed surfaces.
- Salt Quality: Use sea salt or pickling salt without anti-caking agents or iodine. Table salt and iodized salt can cloud brine and inhibit fermentation. Celtic sea salt and Himalayan pink salt work well and add trace minerals.
- Airlock Lids and Cloth Covers: Specialty fermentation lids with airlocks allow gases to escape while preventing oxygen from entering. Alternatively, simple cloth or cheesecloth secured with a rubber band works fine and costs nothing.
Bormioli Rocco Fido Glass Jar
Best for: First-time and experienced fermenters
This Italian glass jar is the gold standard for fermentation. The airtight clamp lid creates a perfect seal while remaining easy to open, and the wide mouth makes packing and removing vegetables simple. Food-grade glass won’t absorb odors, and it comes in convenient 1.5-liter and 2-liter sizes. Many fermentation enthusiasts use these for multiple batches year after year. The clear glass lets you monitor progress, and the durable construction means you won’t need to replace it.
Check Current Price on Amazon →Ball Wide Mouth Mason Jars
Best for: Budget-conscious home fermenters
A classic choice for fermentation, Ball mason jars are affordable and available everywhere. The wide mouth design makes packing vegetables easy, and you likely have some in your kitchen already. While the metal lids aren’t ideal for long-term fermentation, simply leaving the ring loose or using a cloth cover solves this problem. At under 10 dollars for a set, they’re an excellent way to start without investment.
Check Current Price on Amazon →Mortier Pilon Glass Fermentation Kit
Best for: Complete beginners wanting everything in one box
This all-in-one kit includes a large glass jar, food-grade weights, an airlock lid, and detailed instructions. You simply unbox it and start fermenting without hunting for separate components. The included weights ensure vegetables stay submerged, and the airlock lid removes guesswork about whether you’re doing it right. Perfect for someone who’s never fermented before and wants confidence that they have the right tools.
Check Current Price on Amazon →Kavalier Glass Fermentation Vessel
Best for: Serious fermenting enthusiasts
This premium German glass vessel features an integrated airlock system, ensuring perfect anaerobic conditions for fermentation. The design prevents mold from forming on exposed surfaces, and the quality glass is incredibly durable. It’s a professional-grade tool that serious fermentation hobbyists love. While pricier than basic jars, the engineering and consistency of results justify the cost for dedicated fermenters.
Check Current Price on Amazon →Le Parfait Glass Jar Super
Best for: Home fermenters wanting European quality at reasonable cost
Le Parfait jars strike an excellent balance between quality and price. The French glass and sturdy wire-and-rubber seal create an excellent fermentation environment. These jars are slightly more expensive than basic mason jars but far less costly than premium fermentation vessels. They’re beautiful enough to display on your counter and durable enough to last decades.
Check Current Price on Amazon →Pickle Pipe Fermentation Valve
Best for: Upgrading existing jars with professional airlock system
If you already have jars, the Pickle Pipe airlock valve screws onto standard mason jar lids, eliminating guesswork about when to burp your jar. The one-way valve lets CO2 escape while preventing oxygen from entering, creating ideal fermentation conditions. At around 15 dollars, it’s an affordable upgrade that transforms any wide-mouth jar into a professional fermentation vessel.
Check Current Price on Amazon →Weck Straight Glass Jars
Best for: Fermenters with limited counter space
Weck jars come in smaller 1/2-liter and 1-liter sizes, perfect for apartments or small kitchens. Despite their compact size, they ferment beautifully with their clip-and-rubber seal system. The straight sides pack efficiently in the fridge, and the clear glass lets you monitor fermentation. Ideal for someone who wants to experiment with fermented carrots without committing to a large jar.
Check Current Price on Amazon →Zengmo Fermentation Glass Weight Set
Best for: Perfectionists who want premium fermentation weights
This set includes four beautifully designed glass weights that fit standard wide-mouth jars perfectly. Made from high-quality borosilicate glass, they won’t break, won’t leach anything into your brine, and add an elegant touch to your fermentation setup. While you don’t technically need specialty weights, these make fermentation foolproof and look lovely in your jar.
Check Current Price on Amazon →Start Your Fermentation Journey Today
Fermented carrots are genuinely one of the easiest foods to ferment at home. You need nothing more than carrots, salt, water, and a jar to create a tangy, crunchy snack packed with probiotics. Most beginners succeed on their first try, and the process teaches you valuable fermentation skills you can apply to cabbage, cucumbers, and beyond. There’s no complicated equipment required, though investing in a good glass jar or fermentation kit makes the process even more enjoyable.
Start with a single quart jar this week. Within days, you’ll have fermented carrots ready to eat straight from the jar, toss into salads, or serve alongside any meal. The best part? Once you taste your first batch, you’ll understand why fermentation is such a treasured skill on homesteads and in kitchens worldwide. Your gut will thank you, and you’ll save money compared to buying commercial probiotic foods.
Frequently Asked Questions
How long do fermented carrots last in the refrigerator?
Properly fermented and refrigerated carrots last 4-6 months, though they continue slowly fermenting and becoming tangier. Some people keep them longer–they’re still safe to eat, just more intensely flavored. If you notice any off-smells or pink/black mold, discard them.
Can I use tap water for fermentation?
Tap water contains chlorine designed to kill bacteria, which interferes with fermentation. Use filtered water, distilled water, or leave tap water sitting uncovered overnight to allow chlorine to evaporate. This is a small step that significantly improves your results.
Why did my fermented carrots turn mushy?
Mushiness usually results from fermenting at temperatures above 75 F or fermenting too long. Try cooler conditions and taste earlier, around day 5. Adding a grape leaf or using calcium water (food-grade calcium chloride) also preserves crispness.
Is the white cloudy film that forms normal?
Yes, that’s kahm yeast, a harmless surface mold. Simply skim it off with a clean spoon. It affects flavor but isn’t dangerous. If you see pink, orange, or black mold, the batch is unsafe and should be discarded.
Do fermented carrots really contain probiotics?
Yes, lacto-fermented carrots contain live beneficial bacteria (Lactobacillus and others) that support gut health. The fermentation process creates an acidic environment where these bacteria thrive. However, cooking fermented carrots kills the probiotics, so eat them raw or add to dishes after cooking to preserve their benefits.
As an Amazon Associate, Build & Bloom earns from qualifying purchases. We only recommend products we genuinely think are useful. Prices and availability vary; check Amazon for the latest.
Leave a Reply