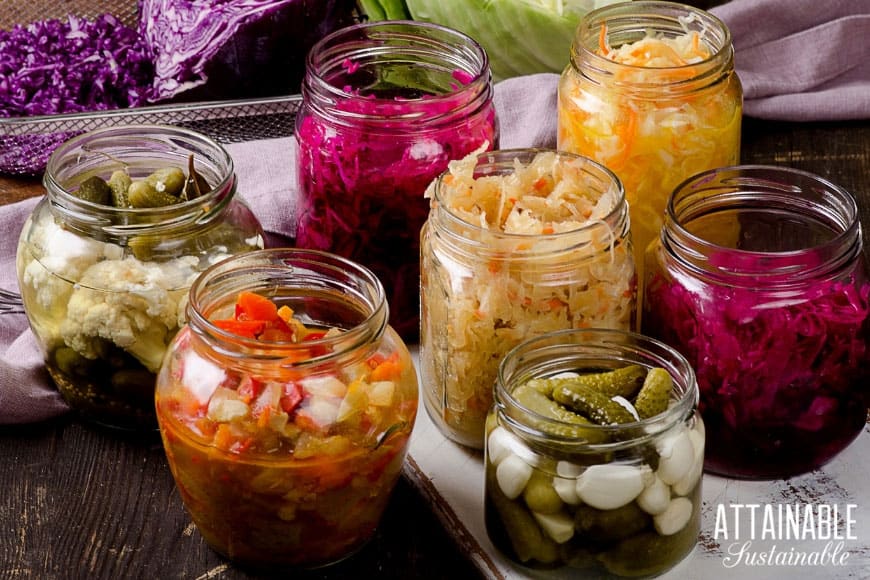

You’ve heard fermented foods are good for your gut, but the process seems mysterious and intimidating. The truth is fermentation is one of the oldest and easiest food preservation methods humans have used for thousands of years. With nothing but fresh vegetables, salt, and water, you can create shelf-stable, probiotic-rich foods that taste incredible and support digestive health. Let’s walk through the complete process step by step.
How to Ferment Vegetables: The Basic Method
The fermentation process relies on creating an anaerobic environment where beneficial lactobacillus bacteria thrive. This simple method works for any vegetable or combination you prefer.
What You Will Need
- Fresh vegetables (cabbage, carrots, cucumbers, garlic, or any produce you enjoy)
- Non-iodized salt (iodine interferes with fermentation)
- Filtered or dechlorinated water (chlorine can inhibit bacterial growth)
- A clean glass jar with an airtight lid
- A weight to keep vegetables submerged below the brine
- Optional: spices, herbs, or starter culture to accelerate fermentation
Steps
Prepare Your Vegetables
Wash all vegetables thoroughly under clean running water and pat dry. Chop or slice them into bite-sized pieces or thin slices, depending on your preference. Remove any damaged outer leaves from cabbage or leafy vegetables, but save a few clean leaves to use later. The preparation stage is important because smaller pieces ferment faster and more evenly throughout.
Create Your Salt Brine
In a clean bowl, dissolve salt into filtered water using approximately 2-3% salt by weight (a standard ratio is about 1-2 tablespoons of salt per quart of water). Stir until the salt is completely dissolved. The salt draws moisture from the vegetables through osmosis, creating the brine naturally. It also prevents harmful bacteria from growing while beneficial lactobacillus thrives in this salty environment.
Layer Vegetables and Brine in Your Jar
Place your prepared vegetables into a clean glass jar, adding any optional seasonings between layers. Pour the saltwater brine over the vegetables until they are completely submerged. This submersion is critical because vegetables exposed to air can develop mold. Fill the jar until the brine reaches near the top, leaving about an inch of headspace.
Weight Down the Vegetables
Use a weight to keep all vegetables pressed below the surface of the brine. You can use a smaller glass jar filled with water, a ceramic fermentation weight, or even a clean cabbage leaf held down by the jar rim. Any vegetables that float above the brine will develop mold and spoil your batch. Check after a few hours and adjust the weight if needed.
Seal and Set in a Cool Location
Close the jar with an airtight lid and place it on your counter, in a pantry, or in a cool cupboard away from direct sunlight. The ideal fermentation temperature is between 55-75 degrees Fahrenheit. Cooler temperatures slow fermentation (which can be good for flavor development), while warmer temperatures speed it up. Fermentation can take anywhere from 3 days to several weeks depending on temperature and your taste preferences.
Taste and Monitor Progress
After 3-4 days, open your jar and taste a small piece of vegetable. You should notice a tangy, sour flavor developing. If you prefer more fermentation, seal it back up and check again in another few days. The vegetables will continue to develop in flavor and acidity. Look for small bubbles rising through the brine, which indicates active fermentation is occurring.
Transition to Cold Storage
Once the vegetables reach your preferred level of tanginess, seal the jar tightly and move it to your refrigerator. Cold temperatures dramatically slow fermentation, essentially pausing the process. Your fermented vegetables will keep for several months in the fridge, and the flavor may continue to deepen slowly over time. Some people enjoy moving jars between room temperature and cold storage to control fermentation speed.
Serve and Use in Recipes
Use your fermented vegetables as a probiotic-rich condiment with meals, chop them into salads, add them to grain bowls, or eat them straight from the jar as a snack. The brine itself can be saved and used in salad dressings, soups, or as a starter culture for your next batch of fermentation. Each serving provides beneficial live bacteria that support digestive health.
- Start with cabbage or mixed vegetables if you’re new to fermentation–they’re forgiving and ferment reliably at room temperature
- Keep your fermentation jar away from direct sunlight, which can degrade the vegetables and affect flavor development
- Save a few tablespoons of finished fermented brine to use as a starter culture in your next batch, which speeds up fermentation by 1-2 days
What to Look For in Fermentation Equipment
- Jar Size and Material: Choose glass jars in 1-quart to 1-gallon sizes for home fermentation. Glass is non-reactive and won’t leach chemicals into your brine. Avoid plastic, which can absorb odors and flavors, and metal, which can corrode from acidic brine.
- Lid Quality: Look for airtight lids that create a proper seal but can allow gases to escape during fermentation. Traditional screw-on lids work, but airlocks or specialized fermentation lids prevent mold and reduce the need to burp jars daily.
- Weight System: Fermentation weights keep vegetables submerged, preventing mold growth. Glass weights, ceramic options, or stainless steel weights are all effective. Avoid plastic weights that may leach chemicals into acidic brine.
- Salt Type and Purity: Always use non-iodized salt like sea salt or pickling salt. Iodized table salt inhibits fermentation. Avoid anti-caking agents and additives. The salt should be pure sodium chloride or sea salt with minimal processing.
Ball Wide Mouth Quart Canning Jars (Set of 12)
Best for: Home fermenters of all experience levels
These classic wide-mouth glass jars are the gold standard for fermentation. The wide opening makes it easy to pack vegetables and retrieve finished ferments. At one quart, they’re the ideal size for single batches. The strong borosilicate glass resists thermal shock and won’t leach chemicals into your acidic brine. Ball’s reliable screw-on lids create an airtight seal, and you get a dozen jars for multiple simultaneous ferments or long-term storage. The wide-mouth design is significantly easier to work with than narrow-mouth jars when packing and unpacking vegetables.
Check Current Price on Amazon →Fermentationculture.eu Easy Fermentation Jar Kit
Best for: First-time fermenters wanting an all-in-one solution
This complete kit includes a 1-liter glass jar with an integrated airlock lid, ceramic weights, and detailed instruction booklet. The airlock design automatically releases gases without allowing oxygen in, eliminating the need to ‘burp’ your jars daily. Ceramic weights are food-safe and won’t affect brine chemistry. The included guide walks you through your first batch from prep to storage. At an affordable price point, this kit removes guesswork and gives you everything needed to start fermenting today.
Check Current Price on Amazon →Anchor Hocking Clear Glass Jars (Quart, 4-Pack)
Best for: Budget-conscious fermenters wanting basic functionality
Anchor Hocking’s clear glass quart jars are simple, durable, and affordable. The straight-sided design maximizes interior space and makes packing vegetables straightforward. Standard screw-on lids seal adequately for fermentation. These jars work perfectly for fermentation despite their lower price point. The clear glass lets you monitor your ferment’s progress visually. While they lack specialty features, they’re reliable workhorses that produce excellent results when paired with simple weights.
Check Current Price on Amazon →Bormioli Rocco Fido Glass Jar with Clamp Lid (2-Liter)
Best for: Regular fermenters who want durability and style
These Italian-made glass jars feature an elegant clamp-lock lid mechanism that’s both attractive and functional. The 2-liter capacity is perfect for larger fermentation batches. The thick borosilicate glass is extremely durable and resistant to thermal shock from temperature changes. The clamp-style closure creates a reliable seal and can be stored on open shelving without looking utilitarian. The wider base provides stability, and the curved shape is aesthetically pleasing for counter display.
Check Current Price on Amazon →Start Your Fermentation Journey Today
Fermentation is an accessible, ancient food preservation method that anyone can master in their own kitchen. With just a few simple supplies–a clean jar, fresh vegetables, salt, and time–you can create nutrient-dense, probiotic-rich foods that support digestive health and taste delicious. The process is forgiving and requires no special skills or equipment beyond what we’ve outlined here. Your first batch might take 3-7 days depending on temperature, and you’ll develop intuition about timing and flavor as you practice.
The real reward of home fermentation extends beyond the health benefits. You’ll discover how to preserve the harvest, save money on specialty foods, and create ingredients tailored to your exact taste preferences. Whether you start with a single jar and basic supplies or invest in a complete fermentation setup, you’re joining a tradition of food preservation that spans centuries and cultures. Begin with our step-by-step guide, keep your vegetables submerged, taste frequently, and trust the process. Your gut will thank you.
Frequently Asked Questions
How do I know if my fermented vegetables are safe to eat?
Safe ferments have a sour or tangy smell, visible bubbles in the brine indicating active fermentation, and no fuzzy mold on the vegetables themselves. A cloudy brine (from beneficial bacteria) is normal and safe. White film on the surface is usually harmless kahm yeast and can be skimmed off. If you see pink, orange, or fuzzy colored mold, discard the batch–these indicate contamination.
Why is my fermented vegetable brine cloudy?
Cloudiness is almost always a good sign, caused by beneficial lactobacillus bacteria multiplying during fermentation. This cloudiness indicates your ferment is working properly and developing probiotics. You can drink the brine as a digestive tonic or use it as a starter for your next batch. It’s not harmful and actually proves your ferment is thriving.
Can I ferment vegetables without salt?
While technically fermentation can occur without salt, it’s not recommended for beginners. Salt prevents pathogenic bacteria from growing while beneficial lactobacillus thrives. Without salt, your ferments are more prone to spoilage and mold. A minimum 2% salt brine (by weight) is the standard for safe, reliable home fermentation.
How long will fermented vegetables last in the refrigerator?
Properly fermented and sealed vegetables will keep for several months in the refrigerator, typically 3-6 months or longer. The cold storage essentially pauses fermentation, and the acidic brine acts as a natural preservative. As long as they smell normal, taste tangy, and show no signs of mold, they’re safe to eat. Flavor often continues to develop slowly over time.
What’s the difference between fermented vegetables and pickled vegetables?
Fermented vegetables rely on naturally occurring beneficial bacteria and salt brine to preserve them over time, developing probiotics in the process. Pickled vegetables use vinegar as the preserving agent, killing any beneficial bacteria. Fermentation creates live probiotic foods while pickling does not. Fermented vegetables taste fresher and are more beneficial for gut health, while pickled vegetables can be made faster.
As an Amazon Associate, Build & Bloom earns from qualifying purchases. We only recommend products we genuinely think are useful. Prices and availability vary; check Amazon for the latest.
Leave a Reply