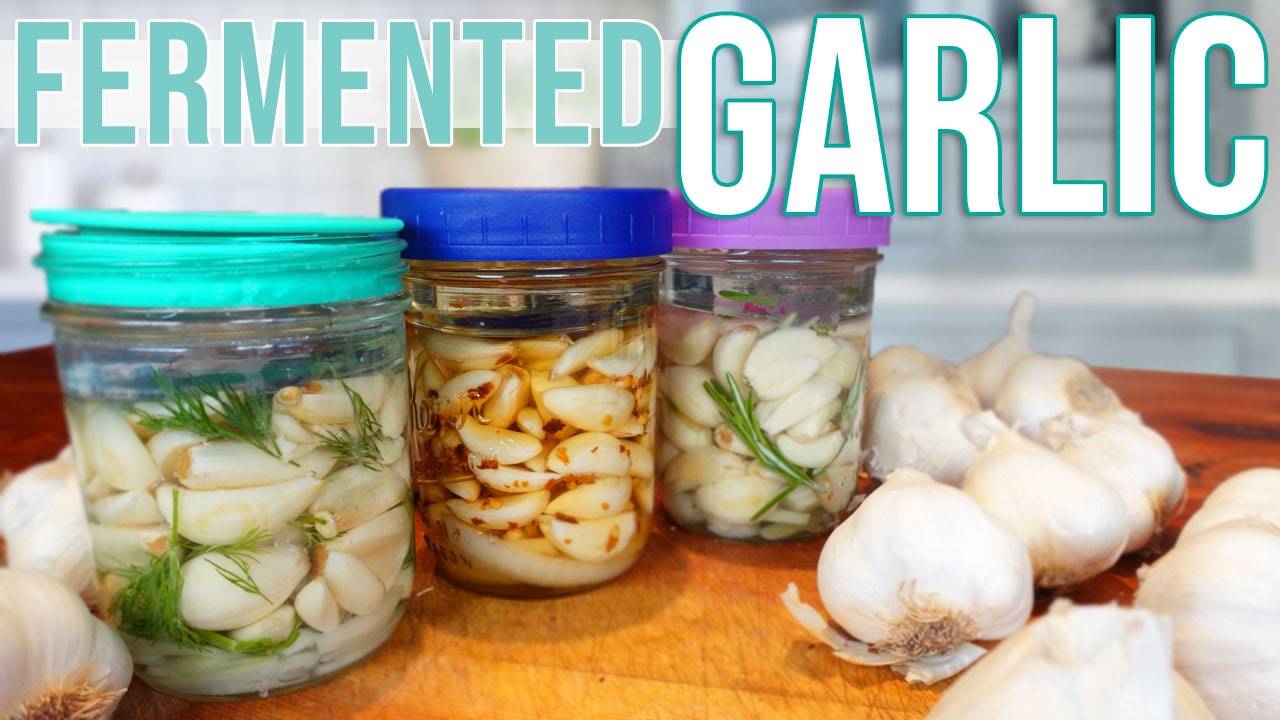

Fermented garlic transforms ordinary cloves into a pungent, tangy probiotic powerhouse that’s easier to digest and packed with beneficial bacteria. If you’ve been curious about fermentation but intimidated by complex recipes, fermented garlic is the perfect gateway project. It requires just three ingredients, minimal equipment, and mostly hands-off waiting time. Whether you’re building a gut-healthy pantry or looking to add depth to your cooking, this simple recipe delivers results in under a month.
How to Make Fermented Garlic: Step-by-Step Recipe
This basic fermented garlic recipe yields a shelf-stable, probiotic-rich condiment with minimal effort. The fermentation process typically takes 1-4 weeks depending on temperature and your taste preference.
Ingredients
- 1 to 2 pounds of fresh garlic (about 3-4 bulbs), peeled into individual cloves
- 2 tablespoons of non-iodized salt (sea salt or pickling salt works best)
- 2 cups of filtered or dechlorinated water (chlorine can inhibit fermentation)
- Optional: 1 teaspoon of whey, or 1/4 teaspoon of probiotic powder to jumpstart fermentation
Method
Prepare Your Garlic
Separate fresh garlic bulbs into individual cloves and peel away the papery skin. Rinse the peeled cloves under cool water and pat them dry thoroughly with a clean cloth or paper towel. Removing excess moisture helps prevent unwanted mold growth during fermentation.
Mix Your Brine Solution
Combine filtered water and non-iodized salt in a clean bowl, stirring until the salt dissolves completely. The ratio should be roughly 2% salt by weight (about 1 tablespoon per cup of water). Taste the brine–it should be pleasantly salty like a potato chip, not overwhelmingly so.
Pack Your Fermentation Vessel
Place all peeled garlic cloves into a clean glass jar. Pour the brine solution over the cloves until they are completely submerged under liquid. If using a fermentation aid like whey or probiotic powder, stir it into the brine before pouring. Make sure no cloves are exposed to air, as they may develop mold.
Keep Garlic Submerged
Garlic cloves naturally want to float. Use a fermentation weight, a smaller jar, or even a clean cabbage leaf to hold them beneath the brine surface. Submerged garlic ferments cleanly and safely; exposed portions are prone to contamination.
Cover and Observe
Place an airlock lid or loose cloth cover over the jar. If using a cloth, secure it with a rubber band. The jar should allow gases to escape (produced by fermentation) without allowing outside air and dust to enter. Leave the jar at room temperature, away from direct sunlight.
Monitor Fermentation Progress
Over the first few days, you may notice cloudy brine, bubbles, or a pleasant sour smell–all signs that fermentation is working. After 1 week, taste a clove to gauge flavor development. Continue fermenting for 2-4 weeks until the garlic reaches your desired tanginess and the raw bite has mellowed.
Taste and Adjust
Once the garlic cloves have softened and developed a rich, tangy flavor, fermentation is complete. At this point, you can eat it immediately or transfer the jar to cold storage to slow fermentation dramatically. Refrigerated fermented garlic keeps for several months, developing deeper flavor over time.
Store and Use
Keep your finished fermented garlic in the refrigerator in its brine. Use the cloves in salad dressings, pasta dishes, soups, or anywhere you’d use regular garlic. The brine itself becomes a probiotic-rich condiment perfect for drizzling over cooked vegetables.
- Start with room temperature between 65-75°F for reliable fermentation; warmer temperatures speed up the process but cooler temps allow for more complex flavor development
- If white mold (kahm yeast) forms on the surface, skim it off with a clean spoon–it’s harmless but affects flavor; submerging your garlic prevents this entirely
- Save the fermentation brine after eating the garlic; use it as a probiotic salad dressing, marinade base, or pickle liquid for other vegetables
What to Look For in Fermentation Equipment
- Jar Material and Size: Glass jars are ideal because they don’t leach chemicals, allow you to monitor fermentation visually, and resist salt corrosion. A quart-sized jar works perfectly for 1-2 pounds of garlic; larger batches need gallon-sized containers.
- Fermentation Weights and Airlocks: Dedicated fermentation weights hold vegetables submerged effortlessly, while airlock lids allow gases to escape without introducing oxygen or contamination. These tools prevent mold and ensure clean fermentation every time.
- Salt Quality: Non-iodized sea salt or pickling salt is essential; iodized table salt inhibits beneficial bacteria and clouds the brine. Look for pure salt with no anti-caking agents or additives listed.
- Water Quality: Filtered or dechlorinated water prevents chlorine from killing beneficial fermentation bacteria. If your tap water is heavily chlorinated, use bottled water or let tap water sit uncovered overnight to allow chlorine to evaporate.
Masontops Wide Mouth Fermentation Lid Kit
Best for: Anyone starting fermentation
This airlock lid system fits standard Mason jars and eliminates guesswork from fermentation. The one-way valve allows carbon dioxide to escape while preventing oxygen and contamination from entering, ensuring clean, safe fermentation every time. Includes everything you need to transform any wide-mouth jar into a professional fermentation vessel. Works perfectly for garlic, vegetables, and other fermented foods.
Check Current Price on Amazon →Ball Wide Mouth Quart Canning Jars 12-Pack
Best for: Budget-conscious beginners
These classic wide-mouth glass jars are affordable, durable, and perfect for fermented garlic. The wide opening makes packing and removing garlic simple, and at this price point, you can make multiple batches simultaneously. FDA-approved for food storage, these jars have been trusted for generations. Pair with any fermentation lid or weight system for reliable results.
Check Current Price on Amazon →Fermentationculture.eu Glass Fermentation Weight Set
Best for: First-time fermenters
This set includes hand-blown glass weights that fit inside standard jars to keep garlic and vegetables submerged. Glass won’t leach chemicals or affect flavor like plastic might. The set comes with detailed instructions and works with any jar size. Simple, effective, and a great addition to any fermentation setup for foolproof results.
Check Current Price on Amazon →Mortier Pilon Glass Fermentation Jar with Airlock
Best for: Serious fermentation enthusiasts
This premium glass fermentation vessel comes with an integrated airlock lid, measurement markings, and a built-in weight system all in one package. The design is optimized for professional-quality fermentation with superior glass clarity and weight distribution. Perfect for those committed to building a fermented food practice or making large batches of fermented garlic regularly.
Check Current Price on Amazon →Real Salt Sea Salt Pickling Salt 26 oz
Best for: Salt-conscious fermenters
This unrefined sea salt contains no iodine, anti-caking agents, or additives that interfere with fermentation. The clean mineral profile supports robust bacterial cultures without clouding brine. One container makes dozens of garlic fermentation batches, offering excellent long-term value. Store in a dry place and use for all your fermentation and pickling projects.
Check Current Price on Amazon →Anchor Hocking Heritage Glass Gallon Jar
Best for: Large-batch fermenters
When you’re ready to scale up your fermented garlic production, this gallon-sized glass jar is affordable and reliable. The wide mouth allows easy access, and the thick glass resists thermal stress. Perfect for fermenting 3-4 pounds of garlic at once while still fitting comfortably in most refrigerators. Pairs well with airlock lids or weight systems.
Check Current Price on Amazon →Pyrex Glass Storage Containers with Lids 2-Cup
Best for: Small-space fermenting and storage
These compact glass containers work as both fermentation vessels and storage containers once fermentation completes. The snap-on lids keep finished fermented garlic fresh in the refrigerator, eliminating jar transfers. Ideal for apartment dwellers or anyone with limited fridge space who wants to make smaller batches regularly.
Check Current Price on Amazon →Fido Jar Italian Glass Fermentation 2 Liter
Best for: Aesthetic-focused fermenters
These stunning Italian-made glass jars feature a beautiful hinged lid mechanism and are gorgeous enough to display on open shelving. The silicone gasket creates an excellent seal while allowing gas exchange through the lid design. Premium quality that doubles as elegant kitchen decor while fermenting your garlic. Investment piece that lasts decades.
Check Current Price on Amazon →Start Your Fermentation Journey Today
Fermented garlic is one of the easiest, most rewarding fermentation projects for beginners. With just three ingredients and basic equipment, you can transform ordinary garlic into a probiotic-rich condiment that elevates everything from salad dressings to roasted vegetables. The process teaches you fermentation fundamentals while delivering a delicious, shelf-stable result in under a month. Once you taste homemade fermented garlic, store-bought versions pale in comparison.
Start with a single quart jar, a basic airlock lid, and quality salt. Monitor your fermentation over a few weeks, taste along the way, and adjust timing to your preference. Before long, you’ll be experimenting with fermented onions, peppers, and vegetables using the same techniques. This foundational skill opens doors to a whole world of nutrient-dense, gut-friendly foods you can make at home for pennies.
Frequently Asked Questions
How do I know if my fermented garlic has gone bad?
Good fermented garlic smells pleasantly sour and tangy. Signs of spoilage include pink or black mold, a rotten egg smell, or slime on the cloves. White kahm yeast on the surface is harmless and can be skimmed off. When in doubt, trust your nose–fermentation produces distinctive, appetizing aromas.
Can I use iodized table salt for fermentation?
No–iodized salt inhibits beneficial bacteria and makes brine cloudy. Use non-iodized sea salt, pickling salt, or mineral salt instead. These options contain no additives and allow fermentation to proceed cleanly.
Why is my fermented garlic still crunchy after two weeks?
Temperature plays a big role–cooler kitchens (below 65°F) slow fermentation significantly. Garlic at room temperature (68-72°F) typically softens in 2-3 weeks. You can also eat crunchy fermented garlic; the flavor develops even if the texture stays firm.
Can I ferment garlic in a plastic jar?
Glass is strongly preferred because plastic can leach chemicals into the brine and fermented foods. Plastic also makes it harder to monitor fermentation visually. Glass jars are inexpensive, long-lasting, and ideal for fermentation.
How long does fermented garlic last once refrigerated?
Properly fermented garlic stored in its brine lasts 4-6 months in the refrigerator, sometimes longer. The cold temperature slows fermentation to a crawl, preserving the garlic while flavor continues developing slowly. Always use clean utensils when removing garlic to prevent contamination.
As an Amazon Associate, Build & Bloom earns from qualifying purchases. We only recommend products we genuinely think are useful. Prices and availability vary; check Amazon for the latest.
Leave a Reply