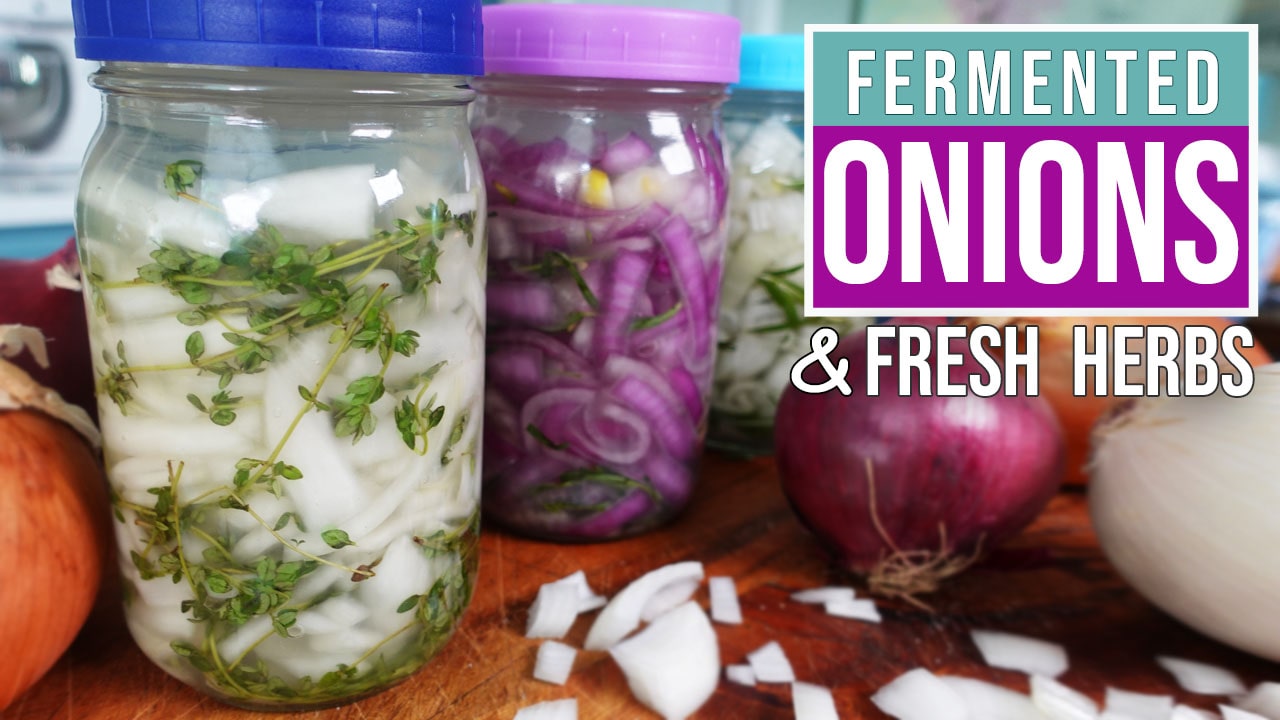

If you’re looking to boost your gut health while adding incredible flavor to your meals, fermented onions are one of the easiest fermentation projects to master. Unlike complex sourdough or kimchi, fermented onions require just three ingredients and minimal equipment. In 3-7 days, you’ll have a zesty, probiotic-packed condiment that transforms sandwiches, salads, tacos, and grain bowls into something special.
How to Make Fermented Onions at Home
This simple lacto-fermentation method creates mild, herby fermented onions using salt, water, and time. The process relies on naturally occurring Lactobacillus bacteria to preserve and transform your onions.
Ingredients
- 2-3 medium yellow or red onions, peeled and thinly sliced
- 2 tablespoons of sea salt or pickling salt (not iodized)
- 2 cups of filtered or dechlorinated water at room temperature
- Optional aromatics: 3-4 cloves of garlic, 1 tablespoon of whole peppercorns, 1 teaspoon of mustard seeds, or fresh herbs like thyme or bay leaves
Method
Prepare Your Vessel and Brine
Sterilize a clean glass jar by rinsing it with hot water. In a separate bowl, dissolve the sea salt completely in filtered water, stirring until no grains remain. This salt brine creates an environment where beneficial bacteria thrive while harmful pathogens cannot survive.
Layer Onions and Optional Seasonings
Add your thinly sliced onions to the jar, alternating with garlic cloves, peppercorns, mustard seeds, or fresh herbs if using them. Pack the onions down gently as you layer; they should be loosely packed but not crushed.
Pour Brine Over Onions
Slowly pour the cooled salt brine over the onion layers until they are completely submerged. This is critical: any onion pieces exposed to air can develop mold. Leave about 1-2 inches of headspace at the top of the jar for expansion.
Keep Onions Submerged
Use a smaller jar filled with water, or a fermentation weight, to hold the onions below the brine surface. You can also use a cabbage leaf folded and tucked under the rim. This prevents mold formation during fermentation.
Cover and Place in Dark Location
Loosely cover the jar with a clean cloth or coffee filter secured with a rubber band, or use a fermentation lid with an airlock valve if you have one. Place the jar on a kitchen shelf or in a cabinet away from direct sunlight at room temperature (ideally 60-75°F).
Monitor Daily for Fermentation Signs
After 24 hours, you should see tiny bubbles rising through the brine and the liquid may become slightly cloudy. These are signs the fermentation is working. Check daily for mold (white fuzzy growth on the surface) and skim off any white film that forms, which is harmless but can affect flavor.
Taste After 3-4 Days
Open the jar and taste a single onion slice. After 3 days, they should taste pleasantly tangy and mild. Continue fermenting up to 7 days if you prefer a stronger, more complex flavor. Trust your taste buds to decide when they’re ready.
Transfer to Cold Storage
Once your fermented onions reach desired tanginess, seal the jar tightly and move it to the refrigerator. The cold slows fermentation dramatically. They’ll keep for 2-3 months refrigerated and continue developing subtle flavors over time.
- Use filtered or boiled-then-cooled water to avoid chlorine, which can interfere with fermentation. If you must use tap water, let it sit uncovered for 24 hours to allow chlorine to evaporate.
- Red onions ferment slightly faster than yellow onions and create a beautiful pink brine. For milder flavor, use sweet onions like Vidalia or Walla Walla.
- If white mold (kahm yeast) forms on the surface, simply skim it off with a clean spoon. It’s harmless. However, if you see green or black fuzzy mold, discard the batch.
What to Look For in Fermentation Equipment
- Glass Jar Quality: Choose jars that are at least 1 quart capacity with straight sides and a wide mouth opening for easy packing and removal. Avoid jars with cracks or chips that could harbor bacteria. Wide-mouth mason jars are the most affordable and reliable option.
- Fermentation Weights: A dedicated weight keeps vegetables submerged without requiring extra tools. Look for glass, ceramic, or food-grade silicone weights that fit your jar’s diameter. Even a small ramekin filled with water works as a budget alternative.
- Airlock Lids or Covers: One-way airlock lids allow gases to escape while preventing oxygen and contaminants from entering. Cloth covers with rubber bands work fine for beginners and cost nothing, but airlock lids provide more reliable protection.
- Salt Type: Use non-iodized sea salt or pickling salt with no additives. Iodized table salt and anti-caking agents interfere with fermentation. A good salt should list only sodium chloride as the ingredient, and a kitchen scale ensures accurate measurements.
Bormioli Rocco Fido Glass Jars (1 Quart)
Best for: Most home fermenters
These Italian glass jars feature secure flip-cap closures that create an airtight seal while remaining easy to open. The 1-quart size is perfect for fermented onions, and the wide mouth accommodates thick slices with ease. Durable borosilicate glass withstands temperature changes, and the jars are dishwasher-safe for long-term use. Many fermentation enthusiasts prefer these over basic mason jars for their superior seal and elegant design.
Check Current Price on Amazon →Ball Wide Mouth Quart Mason Jars (Set of 12)
Best for: Beginners and budget-conscious gardeners
The classic choice for fermentation at a fraction of the cost. These wide-mouth mason jars are inexpensive and readily available at any grocery or hardware store. Pair them with a cloth cover or purchase separate lids for long-term storage. While the seal isn’t as elegant as specialty fermentation jars, they work reliably and are the most versatile option for any kitchen project.
Check Current Price on Amazon →Mortier Pilon Fermentation Lids (Set of 3)
Best for: First-time fermenters using mason jars
These silicone airlock lids transform ordinary mason jars into proper fermentation vessels. Simply place the lid on any wide-mouth jar and watch carbon dioxide escape through the one-way valve. The set includes three lids in different sizes, supporting you through multiple fermentation projects simultaneously. No additional equipment needed beyond basic jars.
Check Current Price on Amazon →Kilner Clip Top Glass Jar (2 Liter)
Best for: Serious fermenters making larger batches
The British-made Kilner jar represents premium fermentation equipment with its iconic glass clip lid and rubber seal. The 2-liter capacity handles 4-5 pounds of onions in one batch. These jars are built to last decades and create a perfect anaerobic seal. The large capacity makes them ideal for meal-prepping multiple servings or preserving a full harvest.
Check Current Price on Amazon →Redmond Real Salt, Fine Sea Salt (26 oz)
Best for: Pure, mineral-rich salt for fermentation
This unrefined sea salt contains trace minerals that support fermentation while avoiding iodine and anti-caking agents. Redmond’s salt comes from an ancient sea deposit and is free from additives. One 26-ounce container provides enough salt for multiple fermentation batches. The fine grain dissolves quickly and distributes evenly throughout your brine.
Check Current Price on Amazon →Simply Organic Pickling Spice (2.3 oz)
Best for: Adding herby, zesty flavor to fermented onions
This pre-mixed blend of mustard seeds, coriander, dill, and peppercorns eliminates guesswork when seasoning your ferment. Simply add a teaspoon per jar for professional flavor without purchasing individual spices. The organic certification ensures no pesticides or additives, and the small size stays fresh in your spice cabinet for multiple batches.
Check Current Price on Amazon →OXO Good Grips Stainless Steel Salad Spinner
Best for: Washing and storing fresh onions before fermentation
Before fermentation begins, clean onions need thorough rinsing. This salad spinner removes excess water quickly using a simple spin mechanism. The compact size stores easily in cabinets, and the mesh basket holds multiple onions while allowing water to drain completely. Keeping your produce dry prevents excess moisture in your brine.
Check Current Price on Amazon →Escali Precision Digital Kitchen Scale (11 lb capacity)
Best for: Accurate fermentation ratios
Precise measurements ensure reliable fermentation every single time. This stainless steel scale displays weight in grams or ounces with accuracy to 0.1 ounces. The backlit LCD screen is easy to read, and the large platform accommodates bowls of salt and water. Serious fermenters know that consistent ratios create consistent results.
Check Current Price on Amazon →Start Your Fermentation Journey Today
Fermented onions represent one of the easiest entry points into home fermentation. With just three ingredients and basic equipment, you’ll produce a probiotic-rich condiment that elevates sandwiches, tacos, salads, and grain bowls. The process takes only a few minutes of hands-on time, then fermentation happens on its own over 3-7 days. There’s something deeply satisfying about creating your own gut-healthy food with minimal effort or expense.
Start small with a single quart jar and one batch of onions. Once you taste the results and understand how fermentation works, you’ll likely expand into other vegetables like carrots, beets, and mixed pickles. The equipment serves double duty for any fermentation project, making your initial investment valuable for years to come. Build your confidence with these simple fermented onions, then explore the wider world of lacto-fermentation with the same proven methods.
Frequently Asked Questions
How do I know if my fermented onions have gone bad?
Properly fermented onions smell sour and pleasant, with no off-odors. If you notice a rotten smell, slime coating the onions, or fuzzy green/black mold, discard the batch immediately. Harmless white mold (kahm yeast) can be skimmed off, and cloudiness in the brine is normal and indicates active fermentation.
Can I use table salt or kosher salt for fermentation?
Table salt contains iodine and anti-caking agents that interfere with fermentation and cloud your brine. Kosher salt works better than table salt but still lacks the mineral content of sea salt. Use non-iodized sea salt or pickling salt specifically labeled for fermentation for the best results.
What temperature is ideal for fermenting onions?
Room temperature between 60-75°F is optimal for fermented onions. Cooler temperatures (below 60°F) slow fermentation significantly, while warmer temperatures (above 75°F) accelerate fermentation but may reduce flavor complexity. Avoid placing jars in direct sunlight or near heating vents.
How long do fermented onions last in the refrigerator?
Properly stored fermented onions keep for 2-3 months in the refrigerator in a sealed jar. Cold temperatures slow fermentation almost completely. As long as they remain submerged in brine and show no signs of mold, they’re safe to eat. Over time, they become increasingly tangy.
Can I ferment onions in plastic containers?
Glass is strongly preferred because it doesn’t leach chemicals into acidic brine and doesn’t absorb odors or stains. Plastic containers can degrade or impart flavors over time. If you must use plastic, ensure it’s food-grade and BPA-free, though glass jars remain the safest and most reliable option.
As an Amazon Associate, Build & Bloom earns from qualifying purchases. We only recommend products we genuinely think are useful. Prices and availability vary; check Amazon for the latest.
Leave a Reply