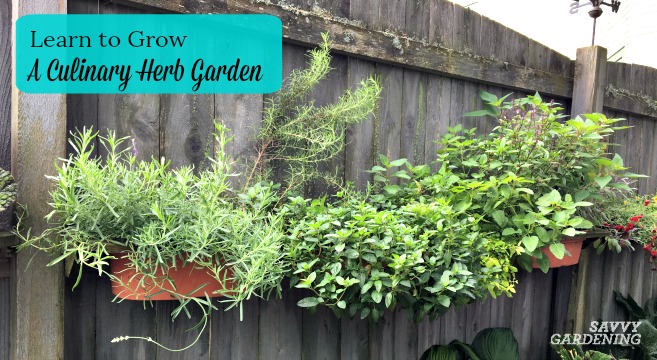

If you’ve ever wished you could reach outside and grab fresh herbs for dinner instead of buying wilted bunches at the grocery store, a culinary herb garden is your answer. Whether you have a sprawling backyard or just a sunny windowsill, growing your own herbs is simpler than you think—and the flavor difference is transformative. This guide walks you through planting, maintaining, and harvesting herbs that will make your cooking taste restaurant-quality.
How to Grow a Culinary Herb Garden
Building a thriving herb garden takes just a few key steps and basic materials. Follow this process to establish a garden that produces fresh flavors all season long.
What You Will Need
- Containers with drainage holes (6-12 inches deep minimum)
- High-quality potting soil designed for herbs or vegetables
- Herb seedlings or seeds (basil, parsley, thyme, oregano, rosemary recommended for beginners)
- A sunny location with at least 6-8 hours of direct sunlight daily
- Watering can or spray bottle for consistent moisture
Steps
Choose the Right Location
Select a spot that receives at least 6-8 hours of direct sunlight each day. South-facing windows, patios, or garden beds work well. Herbs need strong light to develop robust flavor, so avoid shady corners. If you’re growing indoors, place containers as close to a window as possible or supplement with a grow light.
Prepare Your Containers
Use containers that are at least 6 inches deep with drainage holes in the bottom. Fill each container with moist potting soil, leaving about an inch of space at the top. Ensure the soil is loose and well-draining to prevent root rot, which is the primary killer of potted herbs.
Plant Your Herbs
If starting from seedlings, gently remove each plant from its nursery pot and place it in the prepared container at the same depth it was growing. If planting from seed, follow packet instructions for depth and spacing. Water gently after planting until soil is moist but not waterlogged.
Establish a Watering Routine
Check soil moisture daily by inserting your finger about an inch deep. Water when the top inch feels dry, but before the soil becomes completely parched. Most culinary herbs prefer consistently moist (not wet) soil. Water from the base rather than overhead to reduce disease and pest issues.
Begin Harvesting in 3-4 Weeks
Once your herbs have developed 3-4 sets of true leaves, you can begin pinching off leaves for cooking. Always harvest from the top of the plant, removing no more than one-third of the foliage at a time. This encourages bushier growth and prevents the plant from becoming leggy.
Pinch Off Flower Buds Regularly
When herb plants start to flower, pinch off the blooms unless you want seeds. Flowering signals the plant to stop producing leaves, so removing buds keeps your herb producing fresh foliage longer. Some flowers are edible and attractive, but for maximum leaf production, prioritize pinching.
Fertilize Monthly During Growing Season
Once herbs are established and you’ve begun harvesting, apply a balanced, diluted liquid fertilizer every 3-4 weeks during spring and summer. Herbs in containers deplete nutrients faster than in-ground plants, so supplemental feeding supports continued productivity and flavor intensity.
Monitor for Pests and Problems
Inspect plants weekly for signs of pests like spider mites or whiteflies, and for diseases like powdery mildew. Improve air circulation by spacing containers appropriately and avoid wetting foliage when watering. Most common herb problems are prevented through proper light, drainage, and airflow rather than chemical intervention.
- Start with hardy, forgiving herbs like basil, thyme, oregano, and rosemary before attempting delicate varieties like cilantro or chervil
- Group herbs with similar water needs together; water-loving parsley and mint should be separate from drought-tolerant rosemary and lavender
- Harvest regularly and aggressively—the more you pick, the bushier and more productive your plants become
What to Look For in Herb Gardening Supplies
- Container Size and Drainage: Herb containers should be at least 6 inches deep with adequate drainage holes. Larger containers (10-12 inches) hold more soil moisture and require less frequent watering, while smaller pots suit compact herbs and windowsill gardens. Always prioritize drainage—root rot is the fastest way to kill herbs.
- Potting Soil Quality: Not all potting soil is created equal. Look for soil specifically formulated for herbs or vegetables that includes perlite or vermiculite for drainage. Avoid garden soil or topsoil, which compact in containers and retain too much moisture. Organic, nutrient-rich blends give herbs the best start.
- Sunlight Requirements: Culinary herbs are sun worshippers that need 6-8 hours of direct light daily. If your natural light is limited, invest in a full-spectrum grow light positioned 6-12 inches above plants. Inadequate light produces weak, flavor-poor herbs, so this is worth getting right from the start.
- Seedling Quality vs. Seeds: Beginners have better success with established seedlings from a nursery, which reach harvest size in weeks rather than months. Seeds are more economical for experienced gardeners who want specific varieties. Either approach works—choose based on your timeline, budget, and patience level.
Bloem Dura Cotta Planter Pot with Drainage
Best for: Any herb gardener seeking reliable, attractive containers
These lightweight composite pots combine terra cotta aesthetics with modern durability. Available in 6, 8, and 12-inch sizes, they feature excellent drainage and resist cracking. The neutral colors work in any setting, from windowsills to patios. Bloem’s pots retain moisture better than clay while remaining breathable, creating ideal conditions for herb roots. Stackable design makes storage convenient, and they’re affordable enough to buy multiples.
Check Current Price on Amazon →Riverbend Home 6-Inch Plastic Nursery Pots
Best for: Cost-conscious gardeners and those starting multiple herbs
Economical plastic pots that work perfectly for herb gardening. These 6-inch pots come in packs, making them ideal for growing multiple herb varieties at once. Lightweight and durable, they feature adequate drainage holes and are easy to clean between uses. While less visually appealing than ceramic options, they’re practical for production-focused gardeners who care more about functionality than aesthetics.
Check Current Price on Amazon →Espoma Organic Potting Mix
Best for: New gardeners who want premium results from quality soil
This certified organic potting mix is specifically formulated to support healthy plant growth in containers. It contains mycorrhizae fungi and beneficial microbes that encourage strong root development, plus a balanced nutrient blend that reduces the need for frequent fertilizing. The light, fluffy texture provides excellent drainage while retaining adequate moisture. It’s an investment in success—quality soil makes the difference between struggling and thriving herbs.
Check Current Price on Amazon →Scheurich Self-Watering Planter Pot
Best for: Busy gardeners and those prone to over or under-watering
Self-watering technology removes guesswork from herb gardening. These pots feature a built-in water reservoir that maintains consistent soil moisture through a wicking system, dramatically reducing the frequency of watering needed. Available in decorative colors and 8 to 12-inch sizes, they’re perfect for patios or living spaces. The mechanism is reliable and self-regulating, ideal for travel-prone gardeners or those managing multiple plants.
Check Current Price on Amazon →Start Your Culinary Herb Garden Today
Growing fresh herbs at home is one of the most rewarding gardening projects you can undertake. Within weeks, you’ll have fragrant basil for pesto, fresh thyme for roasted chicken, and oregano that tastes infinitely better than dried varieties from the store. The investment is minimal—a few containers, quality soil, and reliable herbs—but the payoff in flavor, freshness, and kitchen satisfaction is enormous. Even apartment dwellers can succeed with a sunny windowsill and simple supplies.
Start small with 2-3 herb varieties you actually cook with regularly. As you develop confidence and learn your space’s light and watering patterns, expand your collection. Within a season, you’ll be harvesting constantly and wondering why you didn’t start sooner. The combination of homegrown freshness and the ritual of pinching herbs just before cooking creates a connection to food that store-bought ingredients simply can’t match. Your future self will thank you for starting today.
Frequently Asked Questions
Can I grow culinary herbs indoors without natural sunlight?
Yes, but you’ll need supplemental grow lights providing 12-16 hours of full-spectrum illumination daily. Position lights 6-12 inches above plants and use a timer for consistency. Many herbs adapt well to indoor growing when light is adequate, though they may produce slightly less foliage than sun-grown plants.
How often should I water my herb containers?
Check soil moisture daily and water when the top inch feels dry to the touch. Most herbs prefer consistently moist (not waterlogged) soil. In hot weather, daily watering may be necessary, while cooler seasons might require watering every 2-3 days. Drainage holes and pot size significantly affect frequency.
When can I start harvesting from newly planted herbs?
Give seedlings 2-3 weeks to establish roots before harvesting. Seed-grown herbs take longer (6-8 weeks typically). Once plants develop 3-4 sets of true leaves, you can begin pinching off leaves for cooking. Light, regular harvesting actually encourages bushier growth.
Which herbs are easiest for beginners to grow?
Basil, thyme, oregano, rosemary, and parsley are forgiving and productive. These tolerate slight neglect, grow quickly, and handle regular harvesting well. Avoid delicate herbs like cilantro or chervil until you’ve mastered the basics—they’re more finicky about temperature and light.
Can I grow perennial herbs (like rosemary) in the same pot as annual herbs (like basil)?
No—it’s better to pot them separately because they have different water and nutrient needs. Rosemary prefers drier conditions and longer-term containers, while basil likes consistent moisture and is replanted seasonally. Mixing them usually results in one thriving while the other struggles.
As an Amazon Associate, Build & Bloom earns from qualifying purchases. We only recommend products we genuinely think are useful. Prices and availability vary; check Amazon for the latest.
Leave a Reply