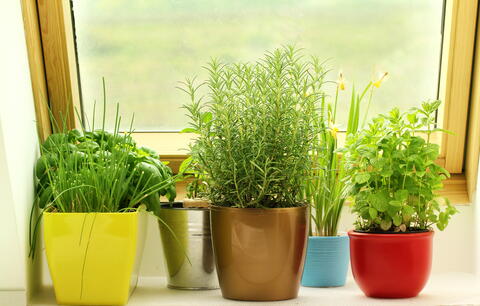

The dream of fresh herbs year-round doesn’t require a garden or outdoor space—your kitchen window or closet can become a thriving herb factory. If you’ve tried growing herbs indoors before and watched them wilt under inadequate light or drown in soggy soil, you’re not alone. The good news is that indoor herb growing follows predictable rules, and once you understand the core requirements, you’ll have reliable harvests of basil, mint, oregano, and dozens of other varieties regardless of season or climate.
How to Set Up Your Indoor Herb Garden
Indoor herb growing succeeds when you replicate the warm, bright conditions most herbs prefer. This step-by-step process takes just an hour to establish and requires minimal ongoing maintenance.
What You Will Need
- Containers with drainage holes (4-6 inches wide minimum)
- Seed-starting or potting mix designed for container plants
- Grow light fixture or bright windowsill location
- Watering can with a spout for precision watering
- Herb seeds or seedlings suited to indoor growing
Steps
Choose Your Growing Location
Select a spot near a south-facing window that receives at least 6 hours of natural sunlight daily, or prepare to install a dedicated grow light above your containers. If using natural light only, rotate your containers every 2-3 days so all sides receive equal exposure. For most homes, supplemental lighting produces faster, bushier growth and more reliable harvests.
Prepare Your Containers
Fill clean containers with moistened potting mix, leaving about half an inch of space at the rim. Ensure each container has at least one drainage hole in the bottom—water sitting in the pot will cause root rot and fungal issues. If repurposing old containers, wash them thoroughly and verify drainage before planting.
Plant Your Seeds or Seedlings
For seeds, follow packet depth instructions (most herb seeds are tiny and barely need covering). For seedlings, gently remove from nursery containers and plant at the same depth they were originally growing. Water lightly after planting until the soil is evenly moist but not waterlogged.
Install Consistent Lighting
If using a grow light, position it 6-12 inches above the soil surface and set it on a timer for 12-16 hours daily. Most LED grow lights run efficiently and generate minimal heat. If using only natural window light, ensure your chosen window gets consistent sun without afternoon heat blasting through glass in summer months.
Establish a Watering Routine
Check soil moisture with your finger daily—water when the top half-inch feels dry. Indoor herb containers dry faster than outdoor gardens, so daily or every-other-day watering is typical. Use room-temperature water and pour until water exits the drainage holes, ensuring the entire soil profile gets moisture.
Monitor Temperature and Humidity
Most culinary herbs prefer temperatures between 60-70 degrees Fahrenheit. Keep containers away from heater vents and cold drafts. If your home is very dry (below 40% humidity), mist plants lightly every few days or set containers on pebble trays with shallow water beneath them.
Begin Harvesting at 4-6 Weeks
Once plants have developed 4-6 true leaves, begin pinching off the top growth to encourage bushier development. These early pinched leaves are edible and delicious. Never remove more than one-third of the plant at a time, and always pinch above a leaf node to stimulate branching.
- Start with easy winners like basil, mint, parsley, and chives—these forgive beginner mistakes and grow quickly indoors.
- Group plants with similar watering needs together; this makes daily care faster and reduces the risk of under- or over-watering.
- Set a phone reminder for your grow light timer; consistency in lighting matters more than perfection in other factors.
What to Look For in Indoor Herb Growing Equipment
- Grow Light Output and Spectrum: Look for full-spectrum LED lights rated for seed starting or vegetative growth. Output should be measured in watts (40-80W is typical for home setups). Avoid cheap incandescent shop lights, which generate heat and waste energy without delivering usable light spectrum.
- Container Drainage and Material: Containers must have drainage holes, and plastic, ceramic, or fabric options all work equally well. Size matters—cramping herbs into tiny pots stresses them; aim for 4-6 inches wide minimum. Fabric pots dry faster than plastic and ceramic, which some growers prefer for moisture management.
- Potting Mix Composition: Indoor herbs need loose, well-draining mix rather than dense garden soil. Quality seed-starting mixes contain peat moss or coco coir, perlite, and vermiculite. Avoid topsoil or all-purpose garden mixes for containers; these compact too much over time and trap excess moisture.
- Light Timer Reliability: If using a grow light, a simple mechanical or digital timer removes the guesswork from lighting schedules. Digital timers are more reliable and often include backup battery features. This single tool often prevents more plant failures than any other piece of equipment.
EZORKAS LED Grow Light Panel with Timer
Best for: Most indoor herb gardeners
This full-spectrum LED grow light delivers 75 watts of usable light across a 18-inch panel, efficiently covering 4-6 medium herb containers. The integrated timer allows up to 16-hour daily cycles without additional equipment. Heat output is minimal, making it safe for kitchen countertops and shelves. Dimmable settings let you adjust intensity as seedlings mature, and the gooseneck mounting bracket positions light at any height. Users report noticeably bushier, faster-growing herbs compared to window sills alone.
Check Current Price on Amazon →Burpee Seed Starting Mix
Best for: New gardeners seeking reliable soil
This ready-to-use potting mix is specifically formulated for seed starting and container herbs with optimal drainage and aeration. The blend includes sphagnum peat moss, perlite, and pine bark, creating a lightweight medium that resists compacting over multiple seasons. No fertilizer added, making it ideal for starting seeds without burn risk. Available in 8-quart and larger bags, it’s cost-effective and consistently praised by herb gardeners for uniform moisture retention and healthy root development.
Check Current Price on Amazon →Krelax Plastic Nursery Pots with Saucers
Best for: Cost-conscious gardeners starting multiple herbs
This 50-pack of 4-inch plastic pots includes matching drainage saucers, providing affordable containers for a full herb collection. The bright color aids monitoring of soil moisture at a glance, and the lightweight design makes rearranging easy. Drainage holes are pre-punched and sized correctly to prevent waterlogging while retaining adequate moisture. These pots are reusable for years, making the per-container cost minimal for long-term herb gardening.
Check Current Price on Amazon →Vivosun 24-Hour Mechanical Timer
Best for: Grow light automation on any budget
This simple mechanical timer plugs between your grow light and wall outlet, cycling power on and off automatically. No batteries or programming required—just set the dial for your desired on-time (up to 12 hours). The heavy-duty outlet design handles the electrical load of LED grow lights without overheating. At this price point, it’s an unbeatable way to ensure consistent 14-16 hour light cycles without manual intervention or smartphone apps.
Check Current Price on Amazon →Start Your Indoor Herb Garden This Week
Growing fresh herbs indoors transforms your cooking and extends the gardening season into winter months when outdoor plants go dormant. The setup is simple—containers with drainage, quality potting soil, consistent moisture, and adequate lighting—and the payoff is enormous. Within 4-6 weeks you’ll be harvesting aromatic basil, mint, and parsley that taste infinitely better than supermarket alternatives. The satisfaction of snipping fresh herbs while snow falls outside creates a special connection to your food that’s hard to achieve any other way.
Don’t let a failed attempt or cold climate convince you that fresh herbs are out of reach. Start with just three plants—basil, mint, and parsley—using the fundamentals outlined above. These three will likely succeed, build your confidence, and spark enthusiasm for expanding your indoor herb garden. Within a season you’ll be sharing seedlings with friends and considering a second grow light for your collection. The barrier to fresh, year-round herbs is lower than you think.
Frequently Asked Questions
Can I grow herbs indoors without a grow light?
Yes, but only if you have a south-facing window with at least 6 hours of direct sunlight daily. Most herbs tolerate window-only growing, though they often grow slowly, stretch toward the light, and produce less foliage. A grow light dramatically improves results and enables growing in kitchens, basements, or offices without windows.
How often should I water indoor herbs?
Check soil daily by inserting your finger half an inch deep—water when it feels dry at that depth. Most indoor herb containers need watering every 1-2 days, but this varies by container material, room humidity, and air circulation. Overwatering is the most common mistake; always err on the side of slightly dry rather than waterlogged soil.
Which herbs are easiest for beginners to grow indoors?
Basil, mint, parsley, chives, and oregano are the most forgiving indoor herbs. They germinate quickly, tolerate variable conditions, and recover from minor neglect. Avoid cilantro, dill, and fennel indoors initially—these bolt quickly under artificial lighting and require more care than beginner-friendly options.
Why are my indoor herbs pale and spindly?
This indicates insufficient light. Herbs stretch toward light sources when they’re dim, resulting in weak, elongated stems and pale leaves. Increase light intensity, lower the light fixture closer to the plants (6-12 inches), or extend your daily light cycle to 14-16 hours. Improvement typically appears within one week of increased lighting.
Do indoor herbs need fertilizer?
Most high-quality potting mixes contain enough nutrients for 6-8 weeks of growth. After that initial period, a diluted liquid herb or vegetable fertilizer applied every 3-4 weeks sustains healthy growth. Avoid heavy fertilizing indoors—it encourages excessive leafy growth at the expense of flavor concentration compared to moderately fed herbs.
As an Amazon Associate, Build & Bloom earns from qualifying purchases. We only recommend products we genuinely think are useful. Prices and availability vary; check Amazon for the latest.
Leave a Reply