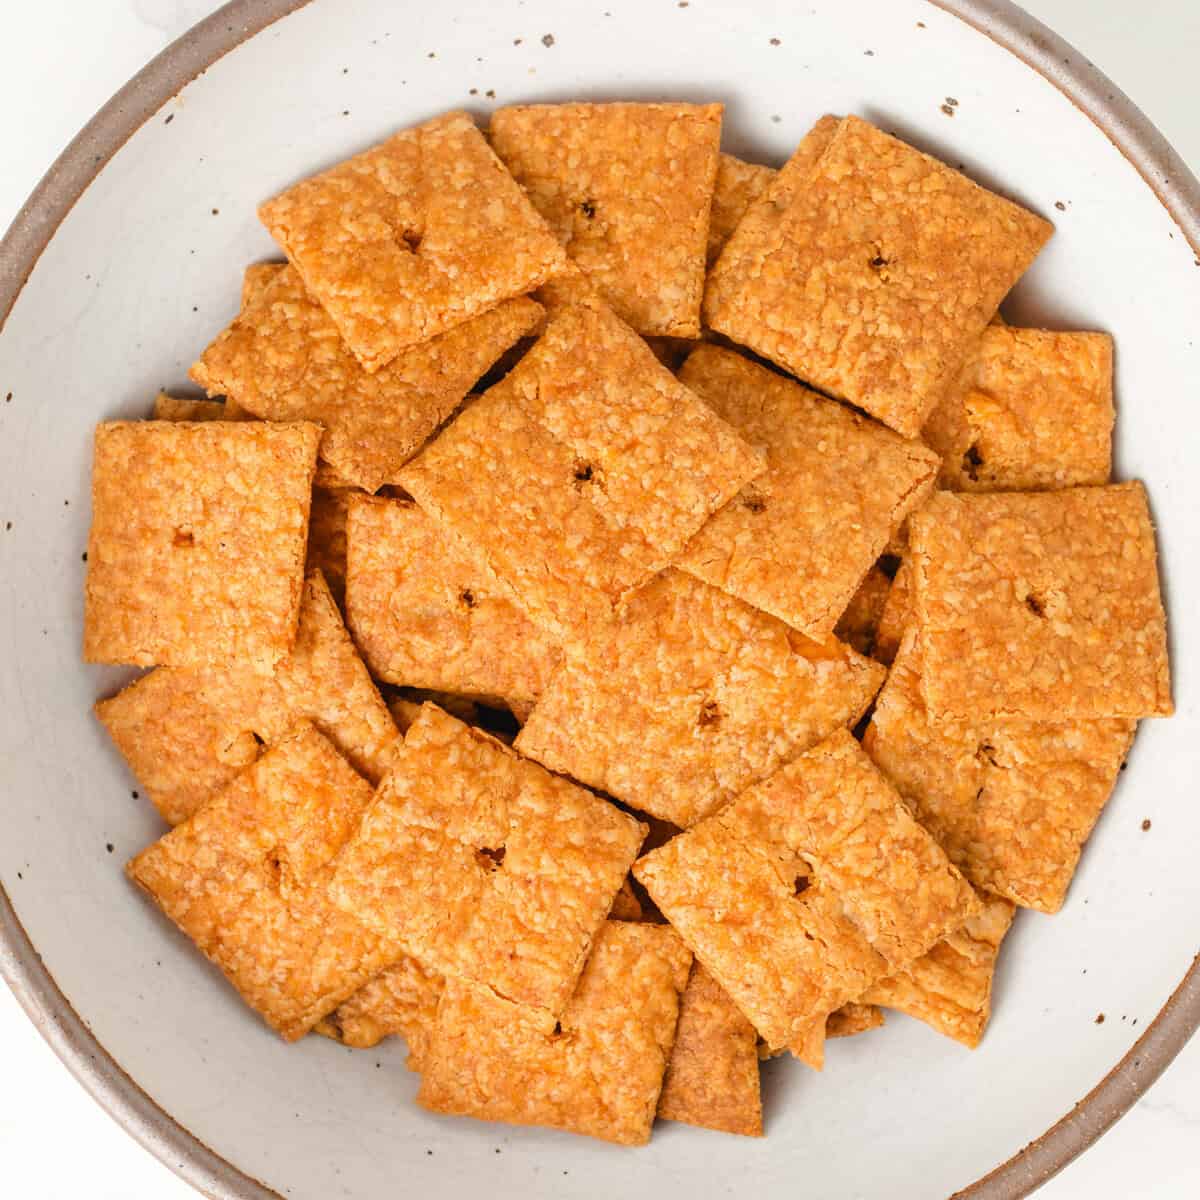

Store-bought cheese crackers are convenient, but homemade sourdough versions taste infinitely better—with real cheese flavor and a satisfying tang from fermented starter. If you have an active sourdough culture and basic pantry staples, you can create restaurant-quality crackers that cost a fraction of commercial brands. This recipe transforms your sourdough starter into addictive snacks that disappear faster than you can bake them.
How to Make Sourdough Cheez-Its from Scratch
These crackers combine the tangy depth of sourdough with sharp cheddar cheese for a complex, crunchy snack. The dough is remarkably forgiving and comes together in minutes.
Ingredients
- 1 cup active sourdough starter (fed 4-8 hours prior, bubbly and at peak)
- 1 1/2 cups sharp cheddar cheese, finely grated
- 2 cups all-purpose flour
- 1/2 teaspoon sea salt
- 1/4 teaspoon cayenne pepper (optional, for heat)
- 4 tablespoons softened butter
Method
Combine your base ingredients
In a large mixing bowl, combine your active sourdough starter, softened butter, and grated cheddar cheese. Stir vigorously until the butter is fully incorporated and the mixture is fairly uniform. The cheese should be distributed throughout without large clumps.
Incorporate dry ingredients
Add the flour, salt, and cayenne pepper (if using) to the wet mixture. Mix with a sturdy spoon or your hands until a stiff dough forms. The dough should come together quickly without requiring much kneading. It will feel slightly drier and less elastic than bread dough.
Knead briefly for cohesion
Turn the dough onto a clean work surface and knead gently for 1-2 minutes until it becomes smooth and holds together without cracking at the edges. Avoid over-working the dough, as this can make the final crackers tough rather than crispy. The dough should feel like Play-Doh consistency.
Roll the dough paper-thin
Place the dough between two sheets of parchment paper and roll it as thin as possible, aiming for about 1/8-inch thickness or thinner. The thinner you roll, the crispier your crackers will be. Use a rolling pin with even, firm pressure, rotating the parchment occasionally for uniform thickness.
Cut into squares and dock
Using a sharp knife or pastry wheel, cut the dough into small square shapes roughly the size of commercial cheese crackers (about 1 to 1.5 inches per side). Use a fork to prick each square several times—this prevents them from puffing up during baking and creates authentic texture.
Transfer to baking sheets
Carefully peel away the top parchment layer and slide the bottom parchment (with crackers still attached) onto a baking sheet. If your crackers break during transfer, simply press the pieces back together on the sheet. Leave minimal space between crackers since they won’t expand much.
Bake until deeply golden
Place in a preheated 375-degree F oven for 12-18 minutes, checking at the 12-minute mark. Bake until the edges turn deep golden brown and the centers feel crispy when pressed. Watch carefully in the final minutes, as they can brown quickly. Remove when they’re uniformly golden throughout.
Cool completely before serving
Transfer the baked crackers to a wire rack and let them cool for at least 10 minutes. They will continue to crisp up as they cool, so resist eating them immediately. Once completely cooled, store in an airtight container where they’ll stay crispy for up to 5 days.
- Make sure your sourdough starter is at peak activity (bubbly, doubled in size) before using—a sluggish starter will produce dense, flat crackers instead of light and crispy ones.
- Use the sharpest cheddar you can find; aged varieties like Cabot Vermont White Cheddar deliver more intense flavor than mild options.
- If your dough cracks while rolling, place it between the parchment sheets for 10 minutes and it will relax enough to roll without breaking.
What to Look For in Cheese Cracker Making Equipment
- Rolling Pin Weight and Balance: A heavier rolling pin (12-16 ounces) requires less pressure to roll thin, even dough and reduces hand fatigue. Look for solid construction rather than hollow pins, which can feel unbalanced.
- Parchment Paper Quality: Silicone-coated parchment withstands 450+ degrees F and won’t stick to wet dough like inferior papers do. It’s reusable multiple times, making it cost-effective for frequent bakers.
- Baking Sheet Material and Thickness: Aluminum baking sheets heat unevenly and promote over-browning on bottoms; commercial-grade steel or ceramic distributes heat more uniformly for even golden browning on all sides.
- Cheese Grater Design: A box grater with fine holes (microplane side) produces finely shredded cheese that distributes evenly throughout dough, while larger-holed graters create clumpy texture.
OXO Good Grips Stainless Steel Box Grater
Best for: Home bakers seeking reliable, versatile cheese preparation
This four-sided stainless steel grater features a fine microplane side perfect for achieving the consistent, fluffy shredded cheddar essential for even-textured Cheez-Its. The non-slip base keeps it stable while you work, and the comfortable handle reduces hand strain during the cheese-grating phase. OXO’s design includes a container that catches shreds, keeping your workspace clean. It’s dishwasher-safe and built to last through years of regular use.
Check Current Price on Amazon →Winco Aluminum Non-Stick Baking Sheet
Best for: Budget-conscious home bakers making multiple batches
Commercial-grade aluminum construction provides even heat distribution for consistently golden crackers without scorching bottoms. The non-stick coating minimizes sticking and reduces cleanup time after baking. At under $15, this sheet is affordable enough to buy multiple for batch baking, and it’s built with the durability professional bakers expect. Its 18-by-13-inch size accommodates a full dough batch with proper spacing.
Check Current Price on Amazon →Bellemain Marble Pastry Rolling Pin
Best for: First-time sourdough cracker makers
Marble naturally stays cool to the touch, preventing dough from warming and sticking during rolling. The weighted construction requires minimal hand pressure, making it forgiving for beginners still learning proper rolling technique. Its 8-inch barrel diameter is ideal for creating uniform thin sheets of cracker dough without excessive effort. The smooth surface glides effortlessly and feels luxurious to use.
Check Current Price on Amazon →Matfer Bourgeat Heavy-Duty Carbon Steel Baking Sheet
Best for: Serious bakers seeking professional-grade equipment
French-made carbon steel offers superior heat distribution compared to aluminum, creating perfectly even browning that avoids the dark-bottomed, pale-topped cracker problem. These sheets develop a natural seasoning over time, improving non-stick properties without harmful coatings. Built to withstand 500+ degrees F, they’re an investment that lasts decades. Professional bakeries choose this brand for its uncompromising quality and performance.
Check Current Price on Amazon →Homemade Sourdough Cheez-Its: Worth the Effort
Making homemade sourdough Cheez-Its transforms your leftover starter into something extraordinary—crispy, complex, and impossibly addictive. Unlike store-bought crackers packed with stabilizers and artificial flavoring, these versions contain only real ingredients: sourdough, cheese, butter, and salt. The tangy fermented flavor elevates simple cheese crackers into something genuinely special, and the cost per batch is a fraction of premium commercial alternatives. Once you master the basic technique, you’ll find yourself making batches weekly.
The equipment listed above isn’t required to succeed, but each tool meaningfully improves either the quality of your final crackers or the ease of the process. Start with what you already own, then invest gradually in pieces that address your specific pain points—whether that’s uneven rolling, inconsistent browning, or tedious cleanup. The most important factor remains your sourdough starter at peak activity. Everything else is simply supporting cast for creating crackers that disappear before they fully cool.
Frequently Asked Questions
Can I use inactive or refrigerated sourdough starter for this recipe?
No—inactive starter won’t provide enough lift or flavor. Feed your starter 4-8 hours before baking and use it at peak activity (doubled, bubbly, and just before it falls). Cold starter will produce dense, flat crackers that don’t crisp properly.
What’s the best cheese to use for maximum flavor?
Sharp aged cheddar (2+ year aged varieties) delivers the most authentic Cheez-Its flavor. Avoid pre-shredded cheese, which contains anti-caking agents that create a mealy texture. Freshly grate a block of Cabot Vermont White or Kerrygold Irish cheddar for superior results.
How thin should I roll the dough, and what happens if it’s too thick?
Aim for 1/8-inch or thinner for maximum crispiness. Thicker dough (over 1/4-inch) produces chewy rather than crunchy crackers. If you can see light through the rolled dough, you’re in the ideal range.
Why do my crackers puff up into pillows instead of staying flat?
You’re likely skipping the forking step or not pricking deeply enough. The fork holes release steam during baking, preventing puffing. Dock each square 4-6 times with firm pressure to create authentic crackers.
How should I store homemade sourdough Cheez-Its to keep them crispy?
Store completely cooled crackers in an airtight container or glass jar with a tight-fitting lid. They’ll maintain crispness for up to 5 days at room temperature. If they soften after a few days, refresh them in a 300-degree F oven for 5 minutes.
As an Amazon Associate, Build & Bloom earns from qualifying purchases. We only recommend products we genuinely think are useful. Prices and availability vary; check Amazon for the latest.
Leave a Reply