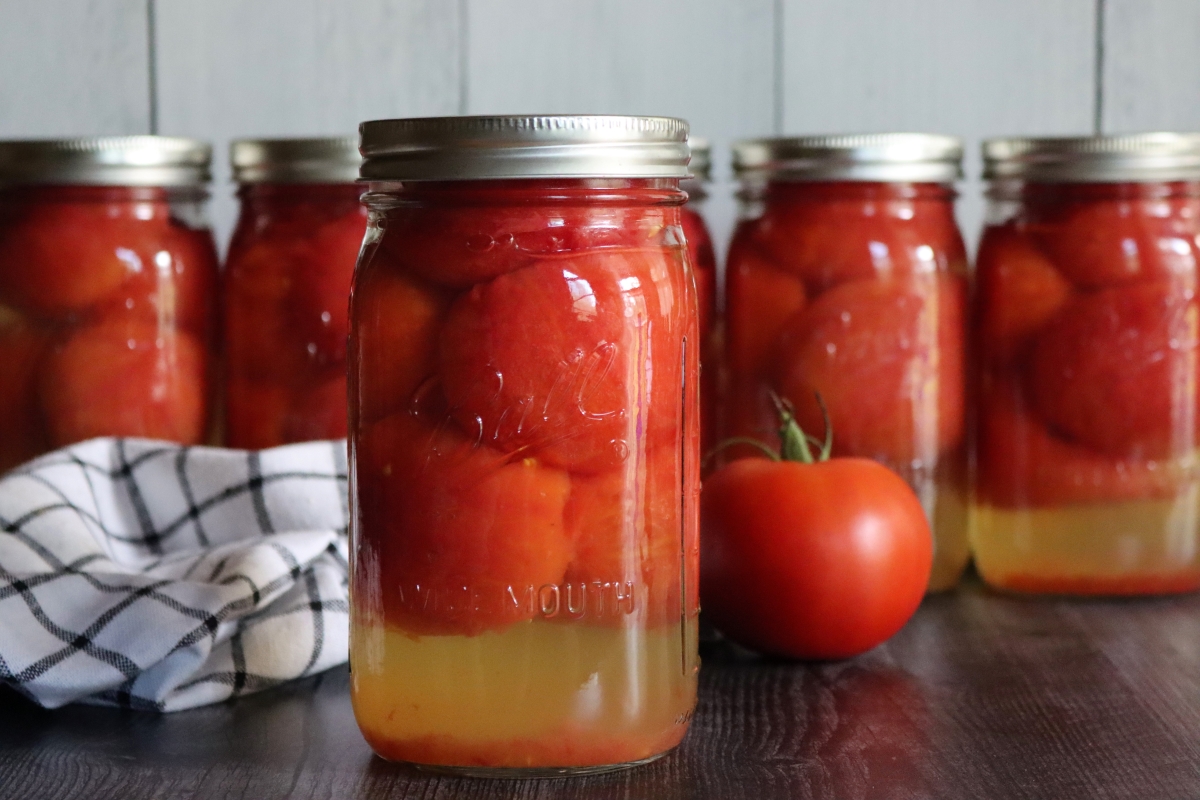

Canning tomatoes at home transforms your summer harvest into shelf-stable preserves that provide fresh tomato flavor year-round. Whether you’re preserving sauce, whole tomatoes, or juice, water bath canning is the safest method because the high acidity of tomatoes prevents botulism growth. This guide walks you through the tested process from harvest to sealed jar, so you can preserve tomatoes with confidence.
How to Water Bath Can Tomatoes
Water bath canning relies on heat to create an airtight seal that keeps tomatoes fresh for months. Follow these steps precisely for safe, delicious results.
Materials You Will Need
- Fresh ripe tomatoes (about 2.5 to 3 pounds per quart jar)
- Canning jars with two-piece lids (pint or quart size)
- Large pot with rack insert for boiling water bath
- Jar lifter tool for safely removing hot jars
- Wide-mouth funnel designed for filling jars
- Clean kitchen towels and white vinegar for jar preparation
Steps
Prepare and Sterilize Your Equipment
Wash all jars, lids, and bands in hot soapy water and rinse thoroughly. Place jars in your large pot with water and bring to a boil for 10 minutes to sterilize them. Keep jars hot in the water until you’re ready to fill them. This prevents thermal shock and ensures safety.
Prepare the Tomatoes
Select firm, ripe tomatoes without blemishes. Wash them under cool running water. To remove skins easily, blanch tomatoes in boiling water for 30-60 seconds, then transfer to an ice bath. The skins will slip off. Core the tomatoes and cut them into quarters or halves depending on your jar size preference.
Pack Jars with Tomatoes and Liquid
Using your funnel, fill hot jars with prepared tomatoes, leaving half an inch of headspace at the top. Add bottled lemon juice (1 tablespoon per pint, 2 tablespoons per quart) for acidity safety. Pour hot tomato juice or cooking liquid over tomatoes to maintain headspace. Remove air bubbles by sliding a clean knife around the inside edges of the jar.
Seal Jars with Lids and Bands
Wipe the jar rim with a clean, damp cloth to ensure a proper seal. Place a flat lid on each jar, then screw the band on until it’s snug but not overly tight. The lid needs slight give to allow air to escape during processing.
Process Jars in Boiling Water Bath
Place sealed jars on the rack in your large pot, ensuring they’re covered by at least 1-2 inches of boiling water. Cover the pot and maintain a rolling boil. Process pint jars for 35 minutes and quart jars for 45 minutes. Start timing once the water returns to a full boil after adding jars.
Remove and Cool Jars
Using a jar lifter, carefully remove each jar and place it on a folded kitchen towel. Do not retighten bands or move jars for at least 12 hours. As jars cool, you’ll hear a popping sound indicating the lid has sealed. The center of the lid will become concave or slightly indented.
Test Seals and Label
After 12-24 hours, press the center of each lid to verify the seal. It should not flex or move. Remove any bands that are difficult to remove (indicating a tight seal). Label jars with contents and the date. Store in a cool, dark place.
- Always use bottled lemon juice or vinegar for acidity—fresh lemon juice acidity varies and may not be safe for canning.
- Process times vary by altitude. If you live above 1,000 feet elevation, add 5 minutes for every 1,000 feet of elevation gain.
- Don’t skip the 12-hour cooling period. Seals can fail if jars are moved or disturbed before they’ve fully cooled and set.
What to Look For in Canning Equipment
- Pot Size and Rack Quality: Choose a pot deep enough to submerge jars by 1-2 inches. A sturdy metal rack insert prevents jars from touching the bottom and breaking. Look for pots specifically designed for canning rather than general cooking pots.
- Jar Quality and Consistency: Use only proper canning jars with threaded rims designed for two-piece lids. Regular drinking glasses or recycled jars may shatter or fail to seal. Consistent jar quality ensures reliable seal formation across batches.
- Specialized Tools: A jar lifter prevents burns and broken jars when handling hot containers. A canning funnel fits standard jar openings and prevents spills. These inexpensive tools dramatically improve both safety and efficiency.
- Lid and Band Reliability: Purchase new flat lids each canning season—they cannot be reused because the sealing compound only works once. Bands are reusable but must be clean and free of dents. Quality lids from established brands have higher seal rates.
Granite Ware Canning Kit with Canner Pot
Best for: First-time and regular canners
This complete kit includes a 21.5-quart stainless steel canning pot with lid, metal rack, jar lifter, and canning funnel. The large capacity fits up to 7 quart jars per batch. The included rack keeps jars off the pot bottom, and the metal handles stay cool during processing. This is the foundation of any safe canning operation.
Check Current Price on Amazon →Ball Canning Jar Lifter and Funnel Set
Best for: Canners watching their spending
This two-piece tool set from Ball includes a stainless steel jar lifter and wide-mouth canning funnel. The jar lifter has a secure grip and long handle to keep hands safely away from boiling water. The funnel fits both regular and wide-mouth jars and helps prevent spills. Essential tools at an affordable price point.
Check Current Price on Amazon →Ball Home Canning Essentials Kit
Best for: People starting their first canning project
Ball’s beginner kit includes clean kitchen towels, a timer, measurements, and an instructional guide in addition to basic tools. The kit is designed to walk new canners through the entire process. Everything fits in a compact storage box, making it easy to organize and store canning supplies in between seasons.
Check Current Price on Amazon →Victorio Stainless Steel Canning Pot Set
Best for: Serious canners producing large batches
This heavy-gauge stainless steel canning pot holds up to 24 quarts of water and accommodates 8-9 pint jars per batch. Premium construction resists corrosion and distributes heat evenly. The integrated spigot allows you to drain hot water safely without lifting the heavy pot. Durable enough for decades of regular use.
Check Current Price on Amazon →Ball Wide Mouth Mason Jars, Quart Size (12-Pack)
Best for: Bulk canning projects
These durable wide-mouth quart jars are the workhorses of home canning. The 12-pack offers excellent value for serious canners. Wide mouths make filling and removing contents easier than regular jars. These are reusable for years, making them economical for repeat batches.
Check Current Price on Amazon →Ball Regular Mouth Mason Jars, Pint Size (12-Pack)
Best for: Smaller portions and sauces
These classic pint-size jars are perfect for preserving tomato sauce or smaller portions. The regular mouth requires a standard jar lifter but seals reliably. The 12-pack provides flexibility for mixed canning projects. These are the traditional choice for tomato preserves.
Check Current Price on Amazon →Kerr Canning Lids and Bands Bundle
Best for: Canners who preserve frequently
Kerr lids are compatible with most standard canning jars and offer reliable sealing. This bundle includes fresh lids and reusable bands. Unlike jars, lids must be replaced each season for safety, making bulk purchasing economical. Quality sealing compound ensures consistent results batch after batch.
Check Current Price on Amazon →Norpro Stainless Steel Canning Funnel
Best for: Minimalist canners and those with limited space
This single stainless steel funnel fits both regular and wide-mouth jars and clips onto jar rims for hands-free operation. The durable construction withstands repeated use and high temperatures. Its compact design stores easily in a drawer or small cabinet.
Check Current Price on Amazon →Start Preserving Your Tomato Harvest Today
Water bath canning tomatoes is one of the most rewarding preservation methods available to home gardeners and farmers market shoppers. The process is straightforward once you understand the safety principles, and the reward of opening a jar of homemade tomato sauce in January makes the effort worthwhile. With proper equipment, fresh tomatoes, and attention to detail, you’ll produce shelf-stable preserves that taste far superior to most commercial alternatives.
Begin with a single batch to build confidence, then scale up as you refine your technique. Invest in quality equipment—particularly a reliable canning pot with rack and proper lids—because these items will last for decades. Keep detailed notes on your recipes and processing times, and don’t hesitate to reference USDA guidelines if you ever feel uncertain about safety. Your first successful batch of home-canned tomatoes will inspire you to preserve again and again.
Frequently Asked Questions
Is it safe to can tomatoes without adding lemon juice?
No. Tomatoes are not naturally acidic enough for water bath canning safety. You must add bottled lemon juice (1 tablespoon per pint, 2 per quart) or white vinegar to prevent botulism. Commercial canned tomatoes are acidified for this reason. Never skip this step.
How long do home-canned tomatoes last?
Properly sealed and stored home-canned tomatoes last 1-2 years at peak quality. Store them in a cool, dark place (50-70 degrees Fahrenheit is ideal). After 2 years, they’re still safe but may lose flavor. Always check seals before opening and discard any jars with broken seals or signs of mold.
What happens if my jars don’t seal?
If a lid doesn’t seal within 24 hours (indicated by a flexible center), refrigerate that jar and use the contents within 2-3 weeks, or reprocess it immediately with a new lid. Do not store unsealed jars at room temperature. Prevention is better than dealing with failed seals.
Can I use a pressure cooker instead of a water bath for canning tomatoes?
A pressure cooker is not necessary for tomatoes because their acidity makes water bath canning safe. However, a pressure cooker processes faster. If you use one, follow USDA guidelines specific to pressure canning, as timing and safety rules differ significantly.
Do I need special equipment, or can I use kitchen pots I already own?
A proper canning pot with a rack is essential—regular pots may allow jars to touch the hot bottom and break. You also need a jar lifter to safely handle hot jars and a canning funnel to prevent spills. These specialized tools are inexpensive and worth the investment for safety and reliability.
As an Amazon Associate, Build & Bloom earns from qualifying purchases. We only recommend products we genuinely think are useful. Prices and availability vary; check Amazon for the latest.
Leave a Reply