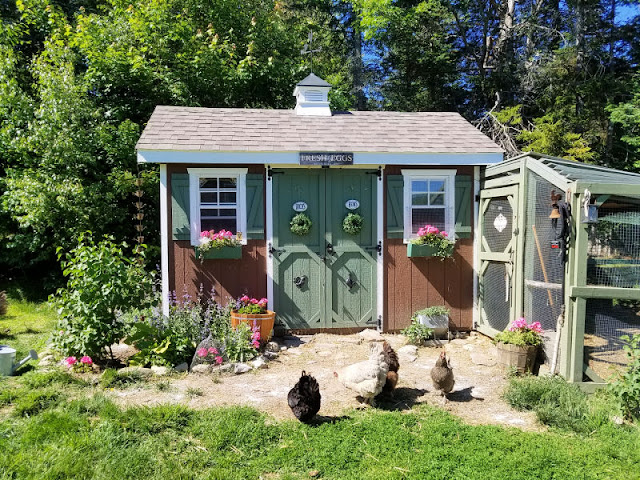

Selecting the right spot for your chicken coop is one of the most critical decisions you’ll make as a backyard poultry keeper. A poorly positioned coop leads to sick birds, predator losses, muddy living conditions, and frustrated daily chores. The good news? With a simple assessment of your property and some thoughtful planning, you can find an ideal location that keeps your flock healthy, happy, and productive for years to come.
Steps to Select Your Ideal Chicken Coop Location
Follow these practical steps to evaluate potential spots and choose the location that checks all the boxes for safety, health, and convenience.
What You Will Need
- Measuring tape or smartphone measurement app to assess distance and space
- Compass or phone compass app to identify sun direction and hours
- Shovel or soil auger to test drainage and soil conditions
- Notebook and pen to record observations about each potential site
- Water bucket to perform a simple drainage test
- Level or smartphone level app to check for slope and drainage potential
Selection Process
Map sun exposure throughout the day
Walk your property and observe which areas receive the most consistent sunlight. Your coop needs at least 6 hours of direct sun daily to support healthy vitamin D production in birds and to dry out moisture. Avoid heavily shaded spots under thick tree canopy, but some afternoon shade in hot climates is beneficial. Mark 2-3 promising locations and note the sun pattern at different times of day.
Test drainage and soil conditions
Dig a small hole about 12 inches deep at each potential location. Pour water into the hole and observe how quickly it drains. Muddy, waterlogged ground will become a disease breeding ground for your flock. Well-draining soil should absorb water within 30 minutes. If drainage is poor, consider raised coop platforms or look for higher ground elsewhere on your property.
Assess wind protection and exposure
Walk around each candidate location and note natural windbreaks like hedges, buildings, or terrain elevation. While chickens need air circulation to prevent respiratory issues, strong prevailing winds can increase heating costs and stress your birds. Ideally, position the coop where it’s exposed to gentle breezes but shielded from harsh winds by existing structures or vegetation.
Evaluate predator security and visibility
Check sightlines from your house and common outdoor areas. You want to see the coop during daily activities so you notice problems quickly. Also scan for predator access points: Are there gaps in fencing? Dense brush where foxes could hide? Water sources attracting hawks? A location near your home with clear visibility deters predators and makes monitoring easier.
Measure distance to utilities and property lines
Use a measuring tape to check how far the location is from underground utilities, septic systems, and wells. Most jurisdictions require chicken coops to be 10-25 feet from property lines and utilities. Call your local utility locating service before digging footings. Document measurements to ensure you meet local zoning regulations.
Consider convenience and accessibility
Choose a spot you can reach easily in any weather. If the coop is too far from your house or buried in muddy terrain, daily chores become burdensome and you’ll skip essential tasks. Look for firm, accessible ground with a natural path to your home. The more convenient the location, the more consistent your care will be.
Verify adequate space for your flock size
Ensure the location has enough room for your current coop plus potential expansion. Plan for at least 3 square feet per bird inside the coop and 8-10 square feet per bird in an outdoor run. A cramped location with no expansion room limits your flock’s growth and creates overcrowding issues. Mark out the perimeter of your planned coop structure to verify fit.
Make a final site selection decision
Review your notes on all candidate locations and score each against your criteria: sunlight, drainage, wind protection, predator security, accessibility, and space. The best location will rarely be perfect, but aim for a spot that excels in at least 5 of 6 categories. Once selected, mark the spot clearly and plan your coop construction accordingly.
- Avoid low-lying areas where water pools during rain — these become mud pits and disease hotspots. Higher ground with natural slope is always superior.
- Consider seasonal sun angles; winter sun is lower, so a south-facing slope gets more winter warmth when your birds need it most.
- Position the coop entrance away from prevailing winds and morning frost; orient the door to face morning sun to encourage early waking and egg laying.
What to Look For in Chicken Coop Site Preparation Tools
- Measuring and Assessment Accuracy: Invest in a quality measuring tape (25-50 feet) and digital level to ensure precise distances and slope calculations. Accurate measurements prevent costly mistakes when positioning your coop relative to utilities and property lines.
- Soil Testing Capability: A soil auger or sturdy garden spade lets you safely assess drainage and soil conditions at multiple depths. This helps identify hidden clay layers or water tables that could compromise your coop location.
- Durable Ground Preparation Equipment: Heavy-duty shovels and soil tampers are essential for leveling sites, improving drainage, and preparing foundations. Choose tools with reinforced handles that won’t break under repeated use.
- Visibility and Documentation Tools: A quality compass and notebook system helps you accurately map sun patterns, wind direction, and site features. Consider a smartphone app suite for photos, measurements, and site notes all in one device.
Stanley FatMax 25-Foot Tape Measure
Best for: Homesteaders measuring coop placement and distances to utilities
The Stanley FatMax 25-foot tape measure is an industry standard for accuracy and durability. Its reinforced blade extends without bending, making it ideal for measuring coop dimensions, distances to property lines, and identifying utility locations. The magnetic hook catches on metal objects and the bold, easy-to-read markings ensure precise measurements in sunlight. This is the tool you’ll use repeatedly when staking out your coop location and verifying it meets setback requirements.
Check Current Price on Amazon →Fiskars Digging Shovel with Fiberglass Handle
Best for: Testing soil drainage and digging drainage test holes
This Fiskars shovel combines a sharp, reinforced blade with a lightweight fiberglass handle that won’t crack or split. The sharp edge cuts through compacted soil cleanly, making it perfect for digging 12-inch test holes to assess drainage conditions. The slightly curved blade design reduces strain during repeated digging, essential for evaluating multiple potential coop locations. Its ergonomic design prevents fatigue during site assessment work.
Check Current Price on Amazon →AmazonBasics Digital Level 24-Inch
Best for: Checking slopes and drainage potential across potential sites
This affordable 24-inch digital level features an easy-to-read LCD display showing exact degree angles and horizontal/vertical balance. The magnetic backing attaches to metal tools or surfaces, and the bubble vials serve as backup if batteries die. Perfect for identifying slight slopes that affect water drainage around your future coop location, it’s a no-frills, reliable tool that does exactly what you need without premium pricing.
Check Current Price on Amazon →Bosch Digital Compass with Digital Display
Best for: Accurately mapping sun direction and wind patterns throughout the day
The Bosch digital compass provides precise directional readings with a backlit LCD display readable in bright sunlight. Its digitally stabilized needle ensures accuracy even near metal objects or in complex magnetic fields. The rotating bezel helps you mark sun paths, and the durable construction withstands outdoor weather. This premium option is ideal for serious homesteaders mapping seasonal sun exposure and prevailing wind directions across their property.
Check Current Price on Amazon →Truper Soil Auger 4-Inch Diameter
Best for: Quick soil testing and drainage assessment without full-depth digging
This soil auger makes drainage testing quick and easy without requiring a full shovel hole. The 4-inch diameter corkscrew design twists through soil layers, bringing up samples from multiple depths in seconds. You can assess clay content, compaction, and moisture conditions faster than digging. The wooden handle provides good leverage, and the auger design prevents soil from compacting around the tool, giving you an accurate view of subsurface conditions.
Check Current Price on Amazon →Milwaukee Cordless Right Angle Drill with Magnetic Level
Best for: Heavy-duty site preparation and foundation work for coop installation
While primarily a drill, this Milwaukee 18V model includes an integrated magnetic level and enough power to auger soil for test holes or drive ground-anchoring hardware. The right-angle design fits tight spaces when evaluating difficult site conditions. The integrated level saves carrying separate tools, and the powerful motor handles tough soil. It’s a premium option for homesteaders who already have Milwaukee’s battery platform and want a multi-purpose site preparation tool.
Check Current Price on Amazon →Kraft Tool Garden Soil Tamper with Long Handle
Best for: Leveling ground and compacting soil after identifying the ideal location
This long-handled soil tamper features a flat steel plate head ideal for leveling and compacting uneven ground at your selected coop location. The 48-inch handle provides leverage to compress soil without excessive stooping, protecting your back during site preparation. The weight is balanced for efficient strokes, and the durable steel head won’t crack or deform. Essential once you’ve chosen your location and need to prepare level, well-draining ground.
Check Current Price on Amazon →Leica Disto E7500i Laser Measuring Device
Best for: Fast, accurate distance measurements without extending tape measures across large areas
This premium laser distance meter measures up to 656 feet with +/-1.5-inch accuracy, perfect for measuring to distant utilities, property lines, or identifying sun angles. The smartphone app integration lets you document measurements with photos and notes. While expensive, it eliminates human measurement error and works in bright sunlight. Ideal for homesteaders with larger properties or those seeking professional-grade accuracy for coop positioning.
Check Current Price on Amazon →Finding Your Perfect Coop Spot
Selecting the best location for your chicken coop is foundational to years of healthy, productive birds and manageable daily care. Take time to evaluate multiple spots on your property against the criteria in this guide: adequate sunlight, good drainage, wind protection, predator security, accessibility, and expansion room. Use the measuring and assessment tools recommended above to make informed, accurate decisions rather than guessing. One afternoon spent properly evaluating potential sites will prevent months of frustration, muddy conditions, disease problems, and regret.
Once you’ve identified your ideal location using these methods, mark it clearly and begin planning your coop construction. Share your site selection with local beekeeping or chicken-keeping groups for feedback — your neighbors may have valuable insights about wind patterns, predators, or soil conditions in your specific area. With your perfect location chosen and properly prepared, you’re ready to build a coop that will serve your flock and your homestead for years to come.
Frequently Asked Questions
How many hours of sunlight does a chicken coop actually need?
Chickens need a minimum of 6 hours of direct sunlight daily for healthy vitamin D production, strong immune function, and consistent egg laying. More sunlight (8-10 hours) is ideal in most climates, though afternoon shade becomes essential in extremely hot regions to prevent heat stress.
Can I put a chicken coop in a shaded area under trees?
Heavy shade is problematic for chicken health and creates damp, muddy conditions that breed disease. However, partial shade (2-3 hours daily) in a mostly sunny location can be beneficial in hot climates. Avoid deep forest shade or areas under thick tree canopy year-round.
How far must a chicken coop be from my house and property lines?
Most municipalities require chicken coops be 10-25 feet from property lines and 15-50 feet from occupied buildings. Check your local zoning ordinances before selecting a location, as rules vary significantly by region. Some areas prohibit backyard chickens entirely, so verify legality first.
What’s the best direction to face a chicken coop entrance?
Orient the coop entrance to face south or southeast to capture morning warmth and sunlight, which encourages early waking and egg production. This direction avoids harsh afternoon heat in summer and provides natural frost protection in winter. Wind direction should also be considered when possible.
How do I test if my chosen location has good drainage?
Dig a 12-inch hole at your proposed coop location and pour water into it. If water drains within 30 minutes, drainage is adequate. If it pools or takes longer to drain, the spot is too wet and will become muddy and disease-prone. Look for a higher, better-draining location instead.
As an Amazon Associate, Build & Bloom earns from qualifying purchases. We only recommend products we genuinely think are useful. Prices and availability vary; check Amazon for the latest.
Leave a Reply