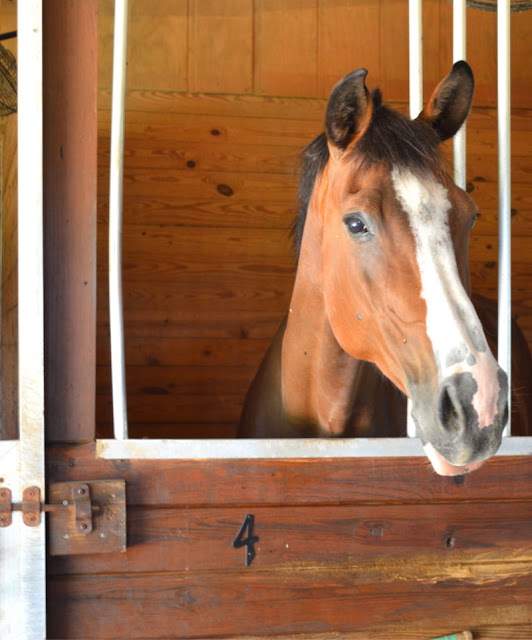

You have a horse stall sitting empty, and you’re wondering if you could repurpose it for chickens. The good news: horse stalls are actually ideal structures for conversion. They already have solid walls, roof protection, and drainage considerations. With some practical modifications for ventilation, predator protection, and nesting infrastructure, you can transform that unused structure into a thriving chicken home in just a weekend.
How to Convert a Horse Stall into a Chicken Coop
This conversion leverages the stall’s existing structure while adding the specific requirements chickens need: secure housing, proper airflow, safe roosting, and protected outdoor access.
Materials You Will Need
- Heavy-gauge welded wire fencing (1/2 inch or smaller mesh to prevent predator access)
- Pressure-treated lumber for framing roosts and nesting boxes (2x4s and 1x12s)
- Wood screws (2.5 inch and 1.5 inch), nails, and a power drill
- Roofing material or corrugated panels for a covered run extension (optional but recommended)
- Hinges and handles for access doors and clean-out panels
- Sand, shavings, or straw for floor bedding and nesting material
Conversion Steps
Inspect and Repair the Structure
Walk through the stall thoroughly, looking for gaps in walls, broken boards, or sharp objects. Patch any holes larger than 1/4 inch with wire mesh or wood. Check the roof for leaks and repair if necessary. A solid, secure structure prevents predator entry and weather damage.
Secure All Openings with Predator-Proof Fencing
Install heavy-gauge wire mesh over windows, vents, and any openings larger than 1/2 inch. Bury fencing at least 12 inches into the ground around the perimeter if the stall touches earth, or secure it tightly to the base. This stops raccoons, rats, and other predators from entering.
Install Roosts at Appropriate Heights
Build or install horizontal roosting bars 2-3 feet off the ground using sturdy wood poles or 2×4 lumber. Space multiple roosts 12-14 inches apart vertically and 14-16 inches apart horizontally so chickens don’t soil each other overnight. Ensure roosting bars are smooth and splinter-free for bird safety.
Build or Install Nesting Boxes
Create enclosed nesting boxes using wood, with interior dimensions of roughly 12 x 12 x 12 inches per box. Plan for one box per 3-4 hens. Mount boxes 18-24 inches above the floor in a darker corner of the stall. Add sloped roofs to discourage roosting on top, and include a lip at the entrance to contain bedding.
Create a Clean-Out and Access Door
Cut a door opening (at least 18 inches wide) into the lower part of the stall wall for daily access, egg collection, and bedding changes. Install a hinged, lockable door that seals tightly at night. Include a small pop door (6 x 8 inches) with an automatic opener if you want hands-free morning/evening routines.
Improve Ventilation Without Drafts
Ensure air circulation by adding vents high on opposite walls, well above roosting height. Cover vents with wire mesh to keep predators out. Proper ventilation reduces moisture and ammonia buildup, critical for respiratory health. Avoid creating direct drafts across the roost area.
Prepare the Run and Outdoor Access
Attach a covered run or chicken wire enclosure to the stall’s south-facing side, creating a sheltered outdoor space. Use sturdy fencing to extend at least 20 feet out if possible. Cover the top with shade cloth or roofing material to protect from hawks and weather while allowing light and airflow.
Layer Bedding and Test for Safety
Spread 3-4 inches of coarse bedding (sand, shavings, or straw) on the stall floor. Walk the perimeter inside and out one final time, checking for sharp wire edges, loose boards, or remaining gaps. Lock all doors and leave them closed overnight to verify security before introducing your flock.
- Install roosts at different heights so lower-ranking hens can find safe sleeping spots away from dominant birds–this reduces stress and injury.
- Use sand in the run area rather than shavings; it drains faster, stays cleaner longer, and chickens enjoy dust bathing in it to control parasites.
- Add a removable droppings board under roosts to simplify cleaning and reduce ammonia odors–simply slide it out and scrape weekly.
What to Look For in Chicken Coop Materials
- Wire Mesh Size: Use 1/2-inch or smaller welded wire to exclude adult raccoons and rats. Avoid chicken wire alone, as raccoons can tear through it. Hardware cloth or welded wire provides superior predator protection.
- Wood Quality and Treatment: Select pressure-treated lumber for ground contact and rot resistance, or cedar for visible roosts and nesting areas. Avoid treated wood in areas where chickens peck or nest, as chemicals can leach; use untreated pine for interior framing instead.
- Ventilation Capability: Ensure your conversion allows opposing vents at the roof line to create cross-ventilation without drafts. Poor airflow leads to moisture buildup, mold, and respiratory disease, especially in winter.
- Predator Access Prevention: Secure all gaps, bury fencing, and use sturdy latches on doors. Weak points invite predators. Test security by attempting to push or pry every edge; if you can create a gap, a determined predator can exploit it.
Fortex Industries Chicken Nesting Box (Plastic 12×12)
Best for: Any backyard flock conversion
Durable plastic nesting boxes save hours of DIY construction while providing perfect interior dimensions for layer hens. These lightweight boxes resist rot, moisture, and pest damage far longer than wood alternatives. Easy to clean, stackable for space efficiency, and the sloped design naturally prevents chickens from roosting on top. One box handles 3-4 birds comfortably, making it simple to calculate quantity for your stall size.
Check Current Price on Amazon →Midwest Homes for Pets Chicken Roost Bar Kit
Best for: First-time converters wanting pre-cut solutions
Pre-drilled wooden roost kits eliminate measurement and cutting errors while ensuring appropriate spacing. Includes multiple bar lengths and all mounting hardware needed for secure installation. Smooth, splinter-free wood protects bird feet and legs. The kit takes guesswork out of roost height and spacing, critical factors for flock comfort and egg production.
Check Current Price on Amazon →Garden Gear 1/2 Inch Galvanized Hardware Cloth (50 Feet Roll)
Best for: Budget-conscious stall converters
Heavy-duty welded wire in 50-foot rolls provides substantial predator protection without premium pricing. Galvanized coating resists rust and corrosion through multiple seasons. Works equally well for covering window openings, sealing wall gaps, and burying perimeter defense. One roll covers most stall conversion projects with material left for future repairs.
Check Current Price on Amazon →Snapdragon Automatic Chicken Coop Door Opener
Best for: Owners wanting convenient, predator-safe routines
Solar-powered automatic openers release birds at dawn and secure the coop at dusk, eliminating human error and protecting flocks from nocturnal predators. Weather-resistant electronics work reliably across seasons. Fits most pop-door openings and reduces daily labor while improving biosecurity. Premium option for serious homesteaders.
Check Current Price on Amazon →Spear & Jackson Stainless Steel Garden Fork (4-Tine)
Best for: Weekly coop maintenance and bedding work
Stainless steel construction resists rust from damp bedding environments while providing superior durability over carbon steel. Four-tine design efficiently turns and fluffs shavings, clears droppings, and spreads fresh bedding. Lightweight yet strong enough for weekly maintenance tasks that keep your converted stall healthy and odor-free.
Check Current Price on Amazon →Red Brand Welded Wire Fence 4ft Height (50 Feet)
Best for: Building secure outdoor runs attached to stalls
Welded wire fencing combines strength with flexibility, creating predator-proof runs that attach seamlessly to your converted stall. Pre-sized 4-foot height suits most stall conversions perfectly. Half-inch openings prevent entry from determined raccoons and weasels. Heavy-gauge construction withstands seasons of outdoor exposure without sagging or deteriorating.
Check Current Price on Amazon →DeWalt Impact Driver Compact Drill Kit
Best for: Owners tackling structural modifications alone
Compact impact drivers handle the repetitive fastening required for roosts, nesting boxes, and hardware cloth installation without operator fatigue. Brushless motors deliver consistent power through long project days. Compact size navigates tight stall spaces while battery runtime completes most conversion tasks on a single charge.
Check Current Price on Amazon →Behlen Manufacturing Galvanized Horse Stall Panels (12ft x 5ft)
Best for: Complete stall reinforcement or subdivision
Heavy-duty galvanized steel panels provide industrial-strength infrastructure if your original stall boards require replacement or reinforcement. Rust-proof construction guarantees decades of service. Modular design allows reconfiguration if you later subdivide the stall into multiple smaller coops. Professional-quality durability justifies premium pricing for serious installations.
Check Current Price on Amazon →Your Horse Stall Conversion Awaits
Converting a horse stall into a chicken coop transforms unused infrastructure into a productive homestead asset with surprisingly minimal effort. The stall’s existing walls, roof, and drainage already provide the foundation for a superior chicken home compared to building from scratch. By following these eight steps and addressing predator protection, ventilation, and nesting infrastructure, you’ll create a secure, comfortable space that your flock will thrive in for years.
The key to success lies in anticipating predator vulnerabilities, prioritizing airflow, and investing modest time upfront in secure construction. Whether you’re raising layers for daily eggs or broilers for meat, a properly converted stall eliminates the most common problems new chicken keepers face: inadequate predator protection, poor ventilation, and insufficient roosting space. Your weekend project yields a lifetime of functional infrastructure that your future flocks will benefit from long after the initial conversion work is complete.
Frequently Asked Questions
How many chickens can I fit in a converted horse stall?
A standard 10 x 10 foot horse stall safely houses 12-15 medium-sized chickens with proper roosts and nesting boxes. Plan for minimum 3-4 square feet per bird inside the stall and 8-10 square feet per bird in the outdoor run. Overcrowding increases aggression, disease spread, and bedding management challenges.
Do I need to remove the stall’s dividers and doors?
Removing interior dividers opens up usable space, though leaving one divider creates a useful separation for quarantine or separate flocks. Remove the original stall door and replace it with a smaller chicken-access door. Existing wall structures provide excellent predator protection, so preserve them where possible.
What’s the best bedding material for a converted stall?
Coarse sand drains fastest and discourages ammonia buildup, making weekly maintenance easier. Pine shavings offer good absorbency but require more frequent changes. Avoid cedar and oak, which contain oils toxic to chickens. Layer 3-4 inches deep and refresh weekly or when visibly soiled.
How do I prevent predators from digging under the stall?
Bury wire fencing 12 inches deep around the perimeter, extending outward 6-8 inches from the wall base before burying. Alternatively, lay a buried apron of wire mesh 12 inches wide around the structure’s perimeter. Motion-activated lights and removing nearby brush piles also deter nocturnal predators.
Can I use my converted stall for both horses and chickens seasonally?
Seasonal sharing requires removable infrastructure (nesting boxes, roosts) stored when horses occupy the space. Thoroughly clean and disinfect between uses to prevent cross-species disease transmission. Many homesteaders find permanent conversion more practical, as horses and chickens have conflicting spatial needs and behavioral patterns.
As an Amazon Associate, Build & Bloom earns from qualifying purchases. We only recommend products we genuinely think are useful. Prices and availability vary; check Amazon for the latest.
Leave a Reply