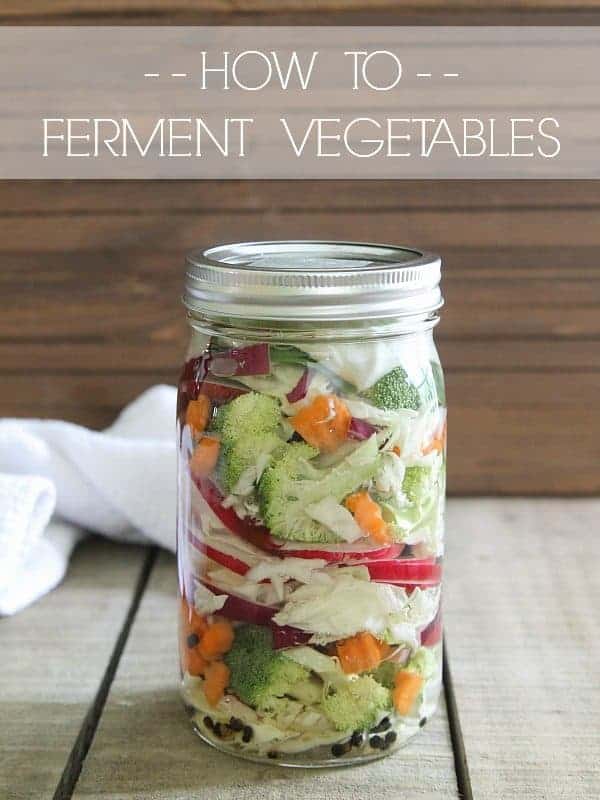

Fermentation is one of the oldest food preservation methods, and it’s making a major comeback for good reason. Homemade fermented vegetables boost gut health with probiotics, add tang and complexity to meals, and cost just pennies to make. Whether you’re a fermentation beginner or looking to expand beyond basic sauerkraut, this guide walks you through every step to create crispy, delicious fermented vegetables in your own kitchen.
How to Ferment Vegetables Step by Step
Vegetable fermentation relies on a simple chemical process: salt inhibits harmful bacteria while allowing beneficial lactobacillus to thrive. The result is tangy, probiotic-rich vegetables ready in less than two weeks.
What You Will Need
- Fresh vegetables (cabbage, carrots, cucumbers, green beans, or mixed varieties)
- Non-iodized salt (sea salt or pickling salt works best)
- Filtered or dechlorinated water at room temperature
- Glass jar with an airtight seal (quart or larger)
- Weight or follower to keep vegetables submerged below the brine
- Cloth or coffee filter to cover the jar opening during fermentation
Steps
Prepare Your Vegetables
Wash all vegetables thoroughly and cut them into uniform pieces roughly 1/4-inch thick. Uniform sizes ensure even fermentation. Keep harder vegetables like carrots in larger chunks, and softer vegetables like tomatoes in smaller pieces. Remove any bruised or damaged portions and set aside the best outer leaves of cabbage or leafy greens to use as a cap later.
Calculate and Mix Your Brine
Weigh your vegetables and prepare a 2-5% salt brine by dissolving non-iodized salt in water. For a beginner batch, use 3% salt (3 grams salt per 100 grams water). This ratio prevents spoilage while allowing fermentation to proceed. Mix salt and water thoroughly until fully dissolved, then allow the brine to cool to room temperature before use.
Pack Your Jar
Layer prepared vegetables into a clean glass jar, adding aromatics like garlic, dill, peppercorns, or hot peppers between layers if desired. Pack the vegetables tightly, leaving about 2 inches of headspace at the top. Pour the prepared brine over the vegetables until they are completely submerged.
Weigh Down the Vegetables
Submerged vegetables stay fresher and resist mold better. Place a weight, glass weight, or even a clean cabbage leaf folded to fit inside the jar to hold everything below the brine surface. The vegetables should remain fully submerged throughout the fermentation process. Jar weights designed for fermentation work best, but a small glass filled with brine or a clean ceramic object works in a pinch.
Cover and Set in a Cool Location
Place a clean cloth, coffee filter, or cheesecloth over the jar opening and secure it loosely with a rubber band or ring. This prevents dust and debris from entering while allowing gases to escape during fermentation. Set the jar on a shelf or counter away from direct sunlight, ideally between 60-75 degrees Fahrenheit. Cooler temperatures slow fermentation (7-14 days), while warmer temperatures speed it up (3-5 days).
Monitor for Signs of Fermentation
Within 24-48 hours, you’ll notice tiny bubbles rising through the brine and a cloudy appearance as beneficial bacteria multiply. This is exactly what you want. Taste a piece after 3 days, then every day after until the flavor reaches your preference. You may notice white yeast on the surface or cloudy brine; both are normal. Skim off any mold that appears on top, but don’t discard the batch if the vegetables below remain submerged.
Taste and Harvest When Ready
Fermentation typically completes between 3-10 days depending on temperature and vegetable type. Start tasting after the third day. The vegetables should taste pleasantly tangy without being overly sour. Once you reach your desired level of fermentation, cap the jar with an airtight lid and move it to cold storage to dramatically slow fermentation.
Store in the Refrigerator
Seal your fermented vegetables with an airtight lid and refrigerate. Cold temperature halts fermentation almost entirely, keeping your vegetables at peak flavor for months. They’ll continue to develop subtle flavors over time. Fermented vegetables stored this way easily last 3-6 months, though they’re often consumed much faster. Always use clean utensils when removing portions to prevent contamination.
- Start with cabbage or mixed vegetables if you’re a beginner—they’re forgiving and nearly impossible to ruin. Cabbage releases its own juices, creating brine naturally.
- Temperature is your control dial: keep ferments at 70-75F for faster results (3-5 days), or 60-65F for slower fermentation with more complex flavor development.
- Save the leftover brine from successful batches to start new ferments, or use it as a probiotic drink or salad dressing base.
What to Look For in Fermentation Jars and Supplies
- Jar Size and Shape: Choose wide-mouth quart or larger jars for easier packing and vegetable removal. Wide openings let you fit vegetables without crushing them. Avoid narrow-mouth designs that make layering difficult and require you to force vegetables through a small opening.
- Airtight Sealing Capability: Your jar must seal completely once fermentation finishes to preserve your work and prevent oxidation. Glass lids with rubber gaskets or metal screw bands create proper seals. Avoid jars with metal lids that corrode from acidic brine or loose-fitting lids that allow air exchange.
- Weight or Follower System: Keeping vegetables submerged prevents mold and surface spoilage. Look for jars designed with built-in fermentation weights, or purchase glass weights separately. Some jars feature special airlocks or follower caps designed to hold vegetables down while allowing gas to escape upward.
- Salt Type and Quality: Non-iodized salt is essential because iodine inhibits fermentation bacteria. Sea salt and pickling salt both work excellently. Avoid table salt or kosher salt with anti-caking agents. Buy from reputable suppliers and store salt in dry conditions to maintain purity.
Fermentation Crock by Schmitt
Best for: Anyone serious about making fermented vegetables regularly
This traditional ceramic fermentation crock features a water-seal moat design that creates a one-way valve for gas escape while preventing oxygen entry. The built-in follower keeps vegetables submerged automatically, and the wide 11-inch diameter opening makes packing easy. The ceramic construction is inert and food-safe, lasting decades with proper care. Holds up to 3 liters and includes everything needed to start fermenting immediately. Superior to jars for serious fermentation enthusiasts seeking consistent results and authentic flavor development.
Check Current Price on Amazon →Fermentation Kit by Cultures for Health
Best for: First-time fermenters who want guidance
This comprehensive starter kit includes a wide-mouth quart jar, glass weights, cloth covers, and detailed instruction guide covering multiple fermentation styles. The kit removes guesswork with measured salt packets and vegetable preparation suggestions for five different fermented vegetable recipes. Glass weights are essential for success and included here. The instruction booklet covers troubleshooting and shelf-life management. Perfect for someone who has never fermented before and wants organized, foolproof results from their first batch.
Check Current Price on Amazon →Ball Wide Mouth Quart Jars (Pack of 12)
Best for: Budget-conscious fermenters who already have supplies
These classic wide-mouth canning jars are inexpensive, durable, and work perfectly for vegetable fermentation. The wide opening (2.75 inches) accommodates large vegetable pieces and weighing systems easily. The two-piece lid system seals tightly for refrigerator storage once fermentation completes. At roughly $1 per jar when buying in bulk, they’re ideal for making multiple batches or giving fermented vegetables as gifts. You’ll need to purchase weights and cloth covers separately, but the jar cost is unbeatable.
Check Current Price on Amazon →Fido Jar by Bormioli Rocco (2 Liter)
Best for: Home fermenters who value Italian design and durability
This Italian-made glass jar features an elegant wire bail closure and rubber gasket that creates an excellent airtight seal for post-fermentation storage. The 2-liter capacity is perfect for larger batches or family use. Bormioli Rocco glass is thicker and more durable than typical canning jars, resisting temperature shock and lasting through decades of use. The design looks attractive on shelves, making it suitable for gifting finished fermented vegetables. Premium pricing reflects exceptional quality and timeless aesthetic appeal.
Check Current Price on Amazon →Start Your Fermentation Journey Today
Fermented vegetables are one of the easiest and most rewarding homestead projects. With just vegetables, salt, water, and a jar, you’ll create probiotic-rich foods that improve digestion, boost immunity, and transform simple meals into gourmet experiences. The process is foolproof once you understand the few essential principles: salt ratio, complete submersion, room temperature, and patience. Your first batch will be ready in less than two weeks, and you’ll quickly find yourself fermenting everything from cabbage and carrots to cucumbers and green beans.
Whether you start with a simple mason jar and glass weights or invest in a traditional ceramic crock, you’re joining centuries of food traditions that sustained communities before refrigeration. The equipment matters far less than consistent practice and attention to the three pillars: proper salt concentration, submerged vegetables, and appropriate temperature. Begin today with ingredients already in your kitchen, taste success within days, and watch fermentation become a permanent, cherished part of your homestead routine.
Frequently Asked Questions
How long does fermentation take?
Fermentation typically takes 3-10 days depending on room temperature, vegetable type, and your taste preference. Warmer kitchens (70-75F) ferment faster, while cooler environments (60-65F) develop more complex flavors over 7-14 days. Start tasting after day three and move to cold storage when the flavor reaches your liking.
Is the white coating on top mold or yeast?
White fuzzy growth on the surface is usually mold and should be skimmed off immediately. However, a thin white film is typically kahm yeast, which is harmless though slightly unpleasant in taste. Either way, if vegetables below the brine remain submerged and smell pleasant, the batch is safe. Remove any unwanted surface growth with a clean spoon.
What salt percentage should I use for fermentation?
Use 2-5% salt by weight: 2% for mild flavor (faster fermentation), 3% for balanced results, and 5% for traditional sauerkraut (slower fermentation, tangier taste). For beginners, 3% is ideal. Calculate by weighing vegetables and dissolving salt in water at that ratio before mixing with vegetables.
Can I ferment vegetables without a weight?
Weights are strongly recommended because submerged vegetables resist mold and spoilage far better than exposed ones. If you lack a weight, use a clean cabbage leaf folded to fit the jar opening, or fill a small glass with brine and set it inside to hold vegetables down. Improvisation works, but proper weights eliminate guesswork.
How long do fermented vegetables last in the refrigerator?
Properly fermented and sealed vegetables last 3-6 months in the refrigerator, though most are eaten within weeks because they’re so delicious. Cold temperature nearly halts fermentation, preserving them at peak flavor. Use clean utensils when removing portions to prevent contamination and extend shelf life.
As an Amazon Associate, Build & Bloom earns from qualifying purchases. We only recommend products we genuinely think are useful. Prices and availability vary; check Amazon for the latest.
Leave a Reply