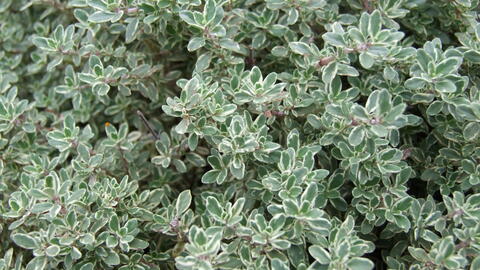

You clicked on ‘How to Grow Thyme’ because you’re ready to add this versatile culinary herb to your garden—but you’re not sure where to start. The good news: thyme is genuinely one of the most forgiving herbs you can grow, even if you’ve killed every plant you’ve ever touched. This guide walks you through every step, from seed selection through harvest, so you’ll have fresh thyme thriving on your windowsill or in your garden bed within weeks.
Growing Thyme: A Step-by-Step Process
Thyme thrives with minimal fuss. Follow these steps to cultivate healthy, productive plants from seed or transplants.
What You Will Need
- Seeds or seedlings (thyme varieties like Common Thyme, Lemon Thyme, or Creeping Thyme)
- Seed-starting mix or well-draining potting soil
- A shallow seed tray or small pots with drainage holes
- A warm, sunny location (south-facing window or grow light)
- Watering can or mister for gentle moisture application
- Garden soil or potting mix for transplanting
Steps
Start seeds indoors 6-8 weeks before your last frost date
Fill a shallow seed tray with moist seed-starting mix. Scatter thyme seeds on the surface and press gently into the soil—do not bury them, as thyme seeds need light to germinate. Cover the tray loosely with plastic wrap or a humidity dome and place in a warm spot (65-70°F ideally) with consistent moisture.
Provide light as seeds germinate
Once seedlings emerge (typically 7-14 days), remove the plastic covering and move the tray to a bright location. A south-facing window or grow light works well. Keep the soil moist but never waterlogged—thyme seedlings are small and delicate. Thin seedlings if they become crowded, keeping the strongest plants.
Harden off seedlings before transplanting
About 1-2 weeks before your last spring frost, begin acclimating seedlings to outdoor conditions. Place the tray outside in a sheltered, shaded spot for 1-2 hours, gradually increasing exposure to wind and direct sun over a week. This prevents transplant shock.
Plant in full sun with well-draining soil
Choose a garden location or container that receives at least 6-8 hours of direct sunlight daily. Thyme demands excellent drainage—amend heavy clay soil with sand or compost to prevent root rot. Space plants 12 inches apart to allow air circulation, which keeps foliage dry and disease-free.
Water sparingly once established
Water newly transplanted seedlings gently until they root into the surrounding soil (about 2 weeks). Once established, thyme is drought-tolerant—water only when the top inch of soil feels dry. Mediterranean-origin herbs like thyme actually prefer drier conditions and suffer in constantly wet soil.
Pinch back growth to encourage bushiness
When plants are 4-6 inches tall, pinch off the top inch of new growth using your fingers or pruning shears. This forces the plant to branch sideways rather than grow tall and leggy, creating a fuller, more productive shape. Repeat pinching 2-3 times through early summer.
Harvest regularly starting midsummer
Once plants are established (usually by midsummer), begin harvesting sprigs by pinching off 3-4 inches of stem just above a leaf node. Regular harvesting encourages continued bushiness and prevents flowering. Use fresh or hang-dry bundles in a warm, dark spot for culinary or medicinal use.
Overwinter or propagate for next season
In cold climates, protect plants with a light mulch layer in late fall. In mild regions, thyme often persists year-round. To expand your patch, take stem cuttings in summer, strip lower leaves, and press into moist sand or perlite for rooting. Most varieties root within 3-4 weeks.
- Container-grown thyme is easier to manage and prevents leggy sprawl; use a pot at least 6-8 inches deep with drainage holes and refresh potting soil annually.
- Thyme flowers are edible and beloved by pollinators—allow some plants to bloom in late spring/summer to attract bees while continuing to harvest others.
- In humid climates, improve air circulation by spacing plants wider and avoiding overhead watering; morning drip irrigation is ideal for preventing fungal issues.
What to Look For When Setting Up Your Thyme Garden
- Seed-Starting Mix Quality: Look for a sterile, lightweight blend specifically formulated for seedlings—it should contain peat, coco coir, or compost combined with perlite or vermiculite for drainage. Avoid garden soil, which compacts and harbors pathogens.
- Drainage in Pots and Soil: Thyme’s biggest enemy is moisture retention. Choose containers with multiple drainage holes and amend garden beds with sand or perlite if your soil is clay-heavy. A 1:1 ratio of potting mix to perlite works excellently for containers.
- Sunlight Access: Thyme requires 6-8+ hours of direct sunlight daily. South-facing locations or unobstructed garden spots are ideal. If starting indoors, a grow light positioned 2-3 inches above seedlings for 12-16 hours daily produces stocky, healthy plants.
- Seed or Seedling Variety: Common Thyme is most versatile for culinary use, while Lemon Thyme adds citrus flavor and Creeping Thyme works as groundcover. Select disease-resistant strains if available. Seedlings are faster (flowering in 60-90 days) but seeds are economical for large-scale planting.
Espoma Organic Seed Starter Mix
Best for: Starting thyme seeds indoors
This premium, certified organic seed-starting mix is specifically formulated for young seedlings with a light texture that promotes root development without compacting. It contains no synthetic fertilizers and includes beneficial mycorrhizae fungi that help thyme establish strong root systems. The moisture-retention balance prevents both damping-off diseases and drought stress, making it ideal for beginners starting thyme indoors. A 8-quart bag covers multiple seed trays.
Check Current Price on Amazon →Jiffy Seed Starting Kit with Peat Pellets
Best for: Cost-conscious growers
This economical system includes 36 compressed peat pellets, a tray, and a humidity dome—everything needed to start thyme seeds indoors. Simply add water to expand the pellets, sow seeds, and place under lights. While less premium than bagged mixes, Jiffy pellets work reliably for thyme, which is forgiving of less-refined growing media. Great for testing the thyme-growing process before investing in larger supplies.
Check Current Price on Amazon →Burpee Herb Seed Collection (includes Thyme)
Best for: First-time herb growers
This curated seed packet collection includes Common Thyme, Basil, Parsley, and Chives—all beginner-friendly herbs. Burpee seeds are tested for high germination rates, and the packet includes basic planting instructions. The thyme seeds are viable and consistently produce plants within the 7-14 day germination window. Perfect for growers who want confidence in seed quality without research.
Check Current Price on Amazon →Ferry’s Thyme Seeds (Common Thyme)
Best for: High seed count per dollar
A single, focused seed packet containing 5,000+ viable thyme seeds at an economical price point. Ferry’s has bred vegetable and herb seeds for over 140 years, and their thyme strain is reliable and prolific. One packet supplies seedlings for an entire herb garden or allows for succession planting throughout the season. Excellent for growers who prefer depth in a single variety.
Check Current Price on Amazon →Ready to Grow Your Own Thyme
Thyme is genuinely one of the most rewarding herbs for new gardeners because it forgives mistakes and produces abundantly with minimal intervention. Whether you start from seed indoors under lights or plant seedlings directly into a sunny garden bed, you’ll have fresh thyme ready to harvest within weeks. The investment is minimal—a packet of seeds costs less than two fresh bunches from the grocery store—and each plant produces for years, especially if you grow in containers and overwinter them.
The key to success is embracing thyme’s Mediterranean DNA: full sun (6-8+ hours daily), well-draining soil, and restraint with watering. Avoid the temptation to keep thyme wet or cossetted; this herb thrives on benign neglect. Start with the seed-starting kit and potting supplies recommended above, follow the step-by-step planting process, and pinch back your seedlings as they grow. By midsummer, you’ll be harvesting aromatic sprigs for roasted vegetables, herbal teas, and fresh flavor that no store-bought thyme can match. Once you see how easy it is, you’ll likely expand to Lemon Thyme and Creeping Thyme varieties—the beginning of a lifelong herb garden.
Frequently Asked Questions
Can I grow thyme indoors year-round?
Yes, thyme tolerates indoor growing if you provide 6-8 hours of direct sunlight daily (south-facing window or grow light) and allow soil to dry between waterings. Indoor plants produce less vigorously than outdoor plants but provide fresh harvests. Rotate pots occasionally to ensure even light exposure.
How long does it take thyme to grow from seed to harvest?
Thyme seeds germinate in 7-14 days and seedlings reach transplant size (4-6 inches) in 6-8 weeks. Once planted outdoors, expect your first significant harvests 8-10 weeks later (midsummer). Total time from seed to harvest is approximately 4-5 months.
Why is my thyme turning brown or looking wilted?
Brown foliage usually signals overwatering or poor drainage—thyme’s most common killer. Reduce watering frequency and ensure pots drain freely. Yellow leaves may indicate nitrogen deficiency; apply light, balanced fertilizer monthly during growing season. If the entire plant wilts despite moist soil, root rot has likely occurred and the plant cannot be saved.
Is thyme cold-hardy, or do I need to bring it indoors for winter?
Most thyme varieties are extremely cold-hardy (USDA zones 5-9+) and survive winters outdoors with minimal protection. In zones 4 and colder, apply a light mulch layer in late fall to protect roots. Container thyme in cold climates should be moved to unheated garages or wrapped with burlap for insulation.
Can I propagate thyme from cuttings instead of seeds?
Absolutely. Take 3-4 inch stem cuttings from mature plants in summer, remove lower leaves, and press into moist perlite or sand. Cover loosely with plastic to retain humidity, and roots develop in 3-4 weeks. Cuttings mature faster than seedlings and guarantee the same flavor profile as the parent plant.
As an Amazon Associate, Build & Bloom earns from qualifying purchases. We only recommend products we genuinely think are useful. Prices and availability vary; check Amazon for the latest.
Leave a Reply