
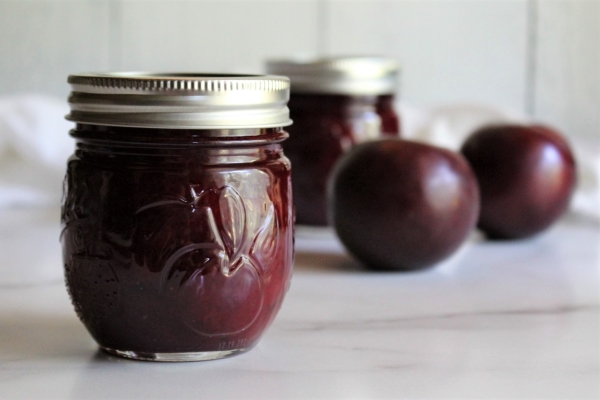
Homemade jam tastes infinitely better than store-bought versions, but the canning process feels intimidating if you’ve never done it before. The good news: jam is one of the easiest foods to preserve at home, and once you understand the basic science of gel formation and safe processing, you can make any fruit variety in any quantity. This guide walks you through every step so you can confidently preserve your harvest or farmers market haul.
How to Make and Can Jam at Home
Jam-making relies on three key elements: fruit, sugar, and heat. The process involves cooking fruit down until it reaches the gel stage, then safely preserving it in sealed jars.
What You Will Need
- Fresh fruit, ripe but not overripe, prepared by washing, hulling, and chopping as needed
- Granulated white sugar (usually equal parts fruit and sugar by weight, though this varies)
- Fresh lemon juice to increase pectin and add flavor
- A large, heavy-bottomed pot or Dutch oven for cooking
- Mason jars with two-piece lids and bands, sterilized before use
- A water bath canner or large pot with a rack for processing jars
Steps
Prepare and Sterilize Equipment
Wash your jars, lids, and bands in hot soapy water and rinse thoroughly. Place jars in a boiling water bath for 10 minutes to sterilize them, or run them through a dishwasher’s hot cycle. Keep them hot until you’re ready to fill them. This prevents contamination and helps create proper seals.
Combine Fruit, Sugar, and Lemon Juice
In your large pot, combine prepared fruit with sugar in a ratio that typically ranges from 1:1 to 3:4 fruit to sugar, depending on the fruit type and desired sweetness. Add the juice of one lemon per 4-5 pounds of fruit. Stir well to combine and allow the mixture to sit for 30 minutes so the sugar begins extracting juice from the fruit.
Cook the Jam to Gel Stage
Bring the mixture to a rolling boil over medium-high heat, stirring frequently to prevent sticking and burning on the bottom. As it cooks, a foam will form on the surface; skim this off periodically. Continue cooking for 15-45 minutes depending on fruit type and quantity. The jam reaches gel stage when a small spoonful dropped onto a cold plate wrinkles slightly when pushed with your finger.
Perform the Wrinkle Test
Place a small plate in the freezer before you start cooking. When you think your jam is ready, drop a teaspoon of hot jam onto the cold plate and let it cool for 1 minute. Push it gently with your finger; it should wrinkle and not flow back. If it runs smoothly, continue cooking and test again in 2-minute intervals.
Fill Jars and Remove Air Bubbles
Once gel stage is reached, remove the pot from heat and let it cool for 5 minutes. Using a clean ladle or funnel, carefully pour hot jam into sterilized jars, leaving 1/4 inch headspace at the top. Run a clean knife or bubble remover around the inside of each jar to release trapped air bubbles, which could prevent proper sealing.
Apply Lids and Process in Water Bath
Wipe the rim of each jar with a clean, damp cloth to remove any jam that could interfere with sealing. Place a warm lid on top of each jar and screw the band down until it’s finger-tight (not overly tight). Arrange jars on the rack in your water bath canner, ensuring they’re covered by at least 1 inch of boiling water. Process pint jars for 10 minutes, adjusting time upward by 5 minutes for every 1,000 feet of elevation above sea level.
Cool and Check Seals
Remove jars from the boiling water using a jar lifter and place them on a clean towel, leaving at least 1 inch of space between jars. Do not tighten the bands further; allow them to cool undisturbed for 12-24 hours. As they cool, you’ll hear a satisfying ‘pop’ as the lids seal. Once fully cooled, press the center of each lid; it should be slightly concave and not flex.
Store and Label Your Jam
Remove the bands from sealed jars and wipe away any residue. Store in a cool, dark place for up to one year. Label each jar with the jam variety and date made. Any jars that didn’t seal (flat or flexing lids) should be refrigerated and used within a few weeks.
- Use a combination of ripe and slightly underripe fruit; underripe fruit contains more natural pectin, helping the jam set without added pectin powder
- Don’t skip the water bath canning step if you want shelf-stable jam; refrigerator jam requires no processing but must be stored cold and consumed within 2-3 weeks
- Invest in a thermometer that reads the exact temperature of your jam; gel stage typically occurs at 220F, though this varies slightly with altitude and fruit type
What to Look For in Jam-Making Equipment
- Pot Size and Material: Choose a pot with at least 6-8 quart capacity and heavy bottom to distribute heat evenly and prevent scorching. Stainless steel and enameled cast iron work best; avoid reactive metals like bare aluminum.
- Lid Quality: Use only new, flat lids designed for canning; reusing flat lids compromises sealing reliability. Two-piece lids with rubber gaskets are the industry standard and most affordable option.
- Canner Type: A water bath canner is essential for high-acid foods like jam. It’s a large pot with a fitted rack that keeps jars off the bottom and allows water to circulate freely for even processing.
- Testing and Monitoring Tools: A candy or jam thermometer ensures accurate gel-stage detection, while a specialized jar lifter prevents burns and dropped jars. A bubble remover and funnel reduce mess and contamination risk.
Cuisinart MultiClad Pro Stainless Steel 8-Quart Stockpot
Best for: Serious jam makers and preservers
This 8-quart pot features a heavy 3-ply bottom that distributes heat evenly and prevents scorching, the primary concern when cooking down fruit. The tall sides contain splattering, and the stainless steel construction resists staining from acidic fruits. Loop handles stay cool during cooking, and it’s dishwasher safe for easy cleanup. It’s the single most important piece of equipment for successful jam making and will last decades with proper care.
Check Current Price on Amazon →Ball Wide Mouth Mason Jars 16-oz (Pack of 12)
Best for: Beginner canners and small-batch jam makers
These reliable wide-mouth pint jars are the workhorse of home canning and the most affordable entry point. The wide opening makes filling and cleaning simple, and the standard threads accept any modern two-piece lid. This 12-pack provides enough jars for multiple batches without breaking the budget. Wide-mouth jars are easier to work with than narrow-mouth, making them ideal for beginners.
Check Current Price on Amazon →Presto 01784 23-Quart Water Bath Canner
Best for: First-time canners wanting an all-in-one system
This large-capacity water bath canner comes with a rack, jar lifter, and lid lifter, eliminating the need to purchase accessories separately. The 23-quart capacity accommodates 7 pint jars simultaneously, speeding up batch production. Heavy metal construction withstands years of use, and the flat bottom works reliably on all stovetop types. The included tools mean beginners have everything needed to start canning safely without guessing about equipment.
Check Current Price on Amazon →Oxo Good Grips Stainless Steel Candy/Deep-Fry Thermometer
Best for: Precision-focused jam makers who want guaranteed results
This premium thermometer features a stainless steel probe, easy-to-read dial, and a wide temperature range from 100F to 400F, covering all jam-making scenarios. The clip attachment securely fastens to pot rims without slipping, and the design allows you to read the temperature without removing it. At the critical gel-stage temperature of 220F, precision matters for consistency, and this thermometer’s accuracy gives you confidence in every batch.
Check Current Price on Amazon →Ball Canning Lid and Band Set (12-Count)
Best for: Repeat canners who preserve regularly
Fresh lids are essential every time you can, and this 12-count pack of Ball’s standard flat lids and bands is the most reliable option available. Bands are reusable indefinitely, but flat lids must be new for each canning session. Buying lids in bulk reduces per-unit cost and ensures you’re never caught without supplies mid-project. Ball lids work with any standard mason jar and have the highest success rate in home kitchens.
Check Current Price on Amazon →Norpro Stainless Steel Canning Jar Lifter
Best for: Safety-conscious canners avoiding burns and breakage
This specialized tool grips jar necks securely and lifts them safely from boiling water without risk of slipping or dropping. The stainless steel construction resists corrosion, and the handle stays cool during repeated use. While it may seem like a luxury item, preventing a jar of boiling jam from dropping on your hand or foot makes it essential safety equipment. Most canners agree it’s the single best accessory for the water bath process.
Check Current Price on Amazon →Victorio Bubble Remover and Headspace Measuring Tool
Best for: Detail-oriented canners wanting professional results
This 2-in-1 tool removes trapped air bubbles from filled jars and simultaneously measures the correct 1/4-inch headspace, ensuring proper sealing and food safety. The flat design is comfortable to grip, and the stainless steel won’t react with acidic preserves. Proper headspace is critical for jar sealing success, and this tool takes the guesswork out of the process while preventing air pockets that could compromise shelf stability.
Check Current Price on Amazon →All American Model 941 Pressure Canner
Best for: Advanced preservers wanting to expand beyond jam to lower-acid foods
While not strictly necessary for jam, this heavy-duty pressure canner expands your canning capabilities to include pickles, vegetables, and meats. Its American-made aluminum construction with stainless steel gauges represents premium quality. At a higher price point, it’s an investment for serious preservers planning to can beyond jam. It includes all necessary components and will provide decades of reliable service for exploring advanced preservation projects.
Check Current Price on Amazon →Start Making Jam Today
Making jam at home is simpler than you think, and the superior flavor of homemade preserves justifies the effort. Begin with this straightforward process: combine fruit, sugar, and lemon juice, cook to gel stage while monitoring temperature, and process jars in a water bath canner. The chemistry is forgiving, and your first batch will likely succeed even if it’s not perfectly set. Once you’ve made one successful batch, you’ll understand the process deeply enough to troubleshoot any issues.
Investing in a quality pot and water bath canner eliminates the two most common failure points: uneven heating that causes scorching, and improper processing that fails to seal jars. The equipment listed above represents the genuine necessities plus a few smart accessories that make the work safer and more reliable. Start with basics, preserve your harvest or farmers market finds, and join thousands of home gardeners who’ve rediscovered the satisfaction of making their own jam.
Frequently Asked Questions
Why didn’t my jam set properly?
Common causes include not cooking the jam long enough, using overripe fruit (low pectin), or inaccurate temperature reading. Overripe fruit has less natural pectin and won’t gel firmly. Always test for gel stage using the cold-plate method, and consider adding powdered pectin or lemon juice if using very soft fruits like strawberries.
Can I reuse flat canning lids?
No. Flat lids have a rubber gasket that loses integrity after one use and won’t seal reliably on a second attempt. Bands are fully reusable, but new flat lids are required for every canning session. This is a food-safety requirement, not a suggestion.
How long does homemade jam last?
Properly processed and sealed jam stored in a cool, dark place lasts up to one year. Once opened, refrigerate and consume within 2-3 weeks. Any jars that didn’t seal should be refrigerated immediately and used within 2-3 weeks as well.
Do I need to use commercial pectin?
Not necessarily. Underripe fruit contains natural pectin, and lemon juice boosts gel formation. However, soft fruits like strawberries benefit from added pectin or longer cooking times. Powdered pectin is inexpensive insurance for consistent results, especially for beginners.
What’s the difference between jam, jelly, and preserves?
Jam contains crushed or chopped fruit cooked into a thick spread, preserves contain whole fruit pieces suspended in gel, and jelly is a clear gel made from strained fruit juice. Jam is the most forgiving for beginners since it requires no straining and tolerates texture variations.
As an Amazon Associate, Build & Bloom earns from qualifying purchases. We only recommend products we genuinely think are useful. Prices and availability vary; check Amazon for the latest.
Leave a Reply