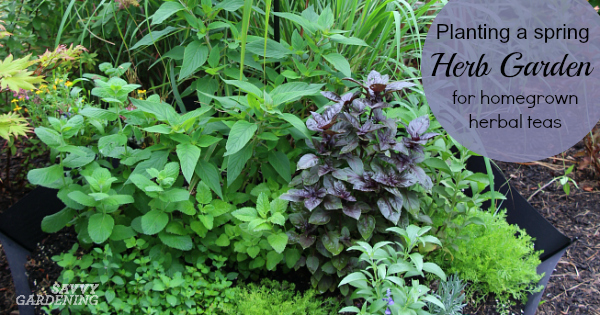

If you’ve grown mint, chamomile, lemon balm, or lavender in your garden, you’re already halfway to creating delicious homemade herbal teas. Most gardeners don’t realize their herb harvest can be transformed into personalized tea blends that rival store-bought varieties–and cost just pennies per cup. The secret isn’t complicated: proper harvesting, complete drying, and smart flavor pairing. Let’s walk through exactly how to do it.
How to Create Custom Herbal Tea Blends
Making herbal tea blends is a straightforward process that requires minimal equipment but benefits from attention to detail at each stage. Follow these steps to harvest, prepare, and blend your garden herbs into shelf-stable tea.
Materials You Will Need
- Fresh herbs from your garden (mint, chamomile, lavender, lemon balm, rose petals, or other culinary herbs)
- A harvesting tool like scissors or pruning shears for clean cuts
- A drying rack, clean cloth, or paper bags for moisture removal
- A dry, dark storage area with low humidity
- Airtight glass containers for finished blends
- A kitchen scale for measuring precise ratios
Steps
Harvest at Peak Flavor
Pick herbs in the early morning after dew dries but before afternoon heat, typically mid-to-late morning. Harvest the top 1/3 of each plant, cutting just above leaf nodes to encourage bushier growth. Focus on tender new growth rather than woody stems, as these dry more effectively and provide better flavor.
Rinse and Inspect
Gently rinse harvested herbs under cool water to remove any dust or garden debris, then lay them on a clean cloth to air-dry for 5-10 minutes. Inspect each bunch and remove any damaged, yellowed, or insect-affected leaves. Pat away excess surface moisture with paper towels if needed.
Dry Your Herbs Completely
Spread herbs loosely on a clean drying rack in a warm, dark location with good air circulation–ideally between 95-115 degrees Fahrenheit with 20-30% humidity. Avoid direct sunlight, which degrades color and flavor. Drying typically takes 1-2 weeks depending on humidity and herb type. Herbs are ready when leaves crumble easily between your fingers with no moisture remaining.
Strip Leaves from Stems
Once completely dry, rub dried herb bunches gently between your hands over a clean bowl to release leaves from woody stems. Discard stems and any brown or degraded material. This step ensures your final blend has optimal flavor and texture without bitter woody bits.
Design Your Blend Combination
Choose a primary herb that provides the base flavor–chamomile for calm blends, mint for refreshing ones, or lavender for floral notes. Add complementary herbs at 20-30% of the total volume, such as lemon balm with chamomile or rose petals with lavender. Start with a simple two-or-three herb blend to understand flavor profiles before experimenting.
Measure and Mix Your Blend
Weigh your dried herbs to ensure consistent batches, aiming for roughly 60-70% primary herb and 30-40% supporting herbs. Combine in a clean bowl and mix gently but thoroughly to distribute flavors evenly. Measure by weight rather than volume for best consistency from batch to batch.
Store in Airtight Containers
Transfer your finished blend into dark glass jars with airtight seals, filling them completely to minimize air exposure. Label each jar with the blend name and date created. Store in a cool, dark cabinet away from heat sources and direct light, which degrade both flavor and color over time.
Brew and Enjoy
Use one teaspoon of dried blend per 8 ounces of hot water, steep for 5-7 minutes, and adjust strength to taste. Fresh herbal blends remain flavorful for 6-12 months when stored properly. Experiment with steeping times and ratios to personalize each blend for your preference.
- Harvest herbs just before they flower for maximum essential oil content and strongest flavor impact in your finished blends.
- Keep detailed notes on your blend ratios and brewing times so you can recreate your favorites and refine recipes over time.
- Double-check herb identification before drying–some plants look similar when dried, so label bunches immediately after harvesting to avoid confusion.
What to Look For in Herbal Tea Blending Equipment
- Drying Racks: Choose food-grade racks with mesh or screen surfaces that allow air to flow underneath herbs. Stainless steel or BPA-free plastic materials are ideal to prevent rust or chemical transfer. Stackable designs save space while allowing multiple batches to dry simultaneously.
- Storage Containers: Dark glass jars with airtight lids protect dried herbs from light degradation and moisture absorption. Amber or cobalt blue glass is superior to clear, and silicone or rubber seals outlast plastic ones. Choose containers sized appropriately for your blend quantities to minimize excess air space.
- Kitchen Scale: A digital scale with 0.1-gram precision enables consistent blending ratios and reproducible recipes. Look for scales that display weight in grams and ounces, with a tare function to zero between ingredients. Capacity of 500-1000 grams is sufficient for home tea blending.
- Harvesting Tools: Sharp pruning shears or herb scissors make clean cuts that heal quickly and encourage plant bushiness. Stainless steel blades resist rust and require less frequent cleaning than carbon steel. Ergonomic handles reduce hand fatigue during longer harvesting sessions.
Excalibur Food Dehydrator 3926TB
Best for: Serious gardeners with large herb harvests
This 15-tray commercial-grade dehydrator offers precise temperature control from 105-165 degrees Fahrenheit, perfect for drying delicate herbs without damaging flavor or color. The horizontal air flow system ensures even drying across all trays simultaneously, reducing variability between batches. With 3600 square inches of drying space, you can process pounds of herbs in a single session. Stainless steel construction and nonstick trays make cleanup effortless, and the quiet operation won’t disturb your household.
Check Current Price on Amazon →COSORI Premium Food Dehydrator Machine
Best for: Beginners wanting reliable equipment without major investment
This compact five-tray dehydrator provides precise temperature control between 95-158 degrees Fahrenheit with 200-minute timer settings. The stainless steel construction and removable trays make it easy to dry herbs, flowers, and complementary ingredients. Despite its smaller footprint, it delivers consistent results across all trays with even heat distribution. Energy-efficient operation and quiet performance make it ideal for home use, and the removable drip tray catches any debris.
Check Current Price on Amazon →Secura Food Dehydrator Machine
Best for: First-time herb driers seeking simplicity
Featuring six clear trays and straightforward temperature settings, this dehydrator removes the complexity from home drying. The preset programs include a dedicated herb setting that takes guesswork out of temperature and timing. Digital display shows remaining time clearly, and the compact size fits standard kitchen counters without dominating space. ETL certification ensures safety, and the quiet operation allows year-round use without noise concerns.
Check Current Price on Amazon →Etekcity Digital Kitchen Scale
Best for: Tea blenders who prioritize exact ratios
This stainless steel digital scale displays weight to 0.1-gram precision with a 5000-gram capacity, enabling consistent tea blend recipes across multiple batches. The tare button zeros the scale between ingredients, simplifying the measurement process and reducing math. Large LCD display shows measurements clearly, and the premium construction resists moisture from humid herb storage areas. Compact design stores easily in drawers or cabinets.
Check Current Price on Amazon →Start Blending Your Garden into Custom Teas
Creating homemade herbal tea blends transforms your garden harvest into a year-round supply of personalized beverages that rival expensive store-bought varieties. The process requires minimal equipment and investment but rewards you with fresh, flavorful teas whenever you want them. By following proper harvesting, drying, and storage techniques, you’ll maximize the flavor potential of every herb you grow and develop blends tailored to your exact taste preferences.
The best time to start is right now, during your next harvest. Pick a simple two-herb blend like chamomile and lemon balm, dry it using your chosen method, and create your first batch. As you gain experience and confidence, experiment with more complex flavor combinations, seasonal blends, and custom ratios. Within a few harvest cycles, you’ll have developed signature blends that friends and family will request by name, all while enjoying the satisfaction of transforming your garden’s abundance into something truly special.
Frequently Asked Questions
How long do homemade herbal tea blends stay fresh?
Properly dried and stored herbal blends remain flavorful for 6-12 months when kept in airtight, light-protected containers in cool conditions. Over time, essential oils gradually evaporate and flavors mellow. Make smaller batches if you prefer maximum freshness, or label containers with creation dates to use oldest blends first.
Can I use fresh herbs instead of dried for tea blending?
Fresh herbs can be used immediately for tea, but they’re more dilute than dried versions, so you’ll need 2-3 times the volume. For blending and storage, dried herbs are superior because they concentrate flavors and last much longer without spoilage. Most experienced tea makers dry their harvests for this reason.
What’s the best way to dry herbs without a dehydrator?
Bundle small groups of herbs with twine and hang them upside-down in a warm, dark, well-ventilated area like a closet or pantry. Alternatively, spread herbs on paper towels or screens in a single layer in the same environment. Air drying takes 2-3 weeks depending on humidity and herb type. Avoid direct sunlight and ensure good air circulation to prevent mold.
Which herbs from my garden are safe for tea blending?
Popular culinary tea herbs include chamomile, mint, lemon balm, lavender, rose petals, hibiscus, and calendula. Always verify herb identification before drying, and research safety if you’re unfamiliar with a plant. Some ornamental plants are toxic, so only use herbs you’ve grown intentionally for consumption and can positively identify.
Should I store my herbal tea blends in the refrigerator or freezer?
Keep herbal blends in cool, dark cabinets at room temperature rather than refrigerators or freezers, which expose them to moisture condensation when containers warm up. Consistent, cool cabinet storage (50-70 degrees Fahrenheit) maintains color and flavor longer than fluctuating cold storage. Ensure your storage area is also dark, as light degrades the aromatic compounds that give tea its character.
As an Amazon Associate, Build & Bloom earns from qualifying purchases. We only recommend products we genuinely think are useful. Prices and availability vary; check Amazon for the latest.
Leave a Reply