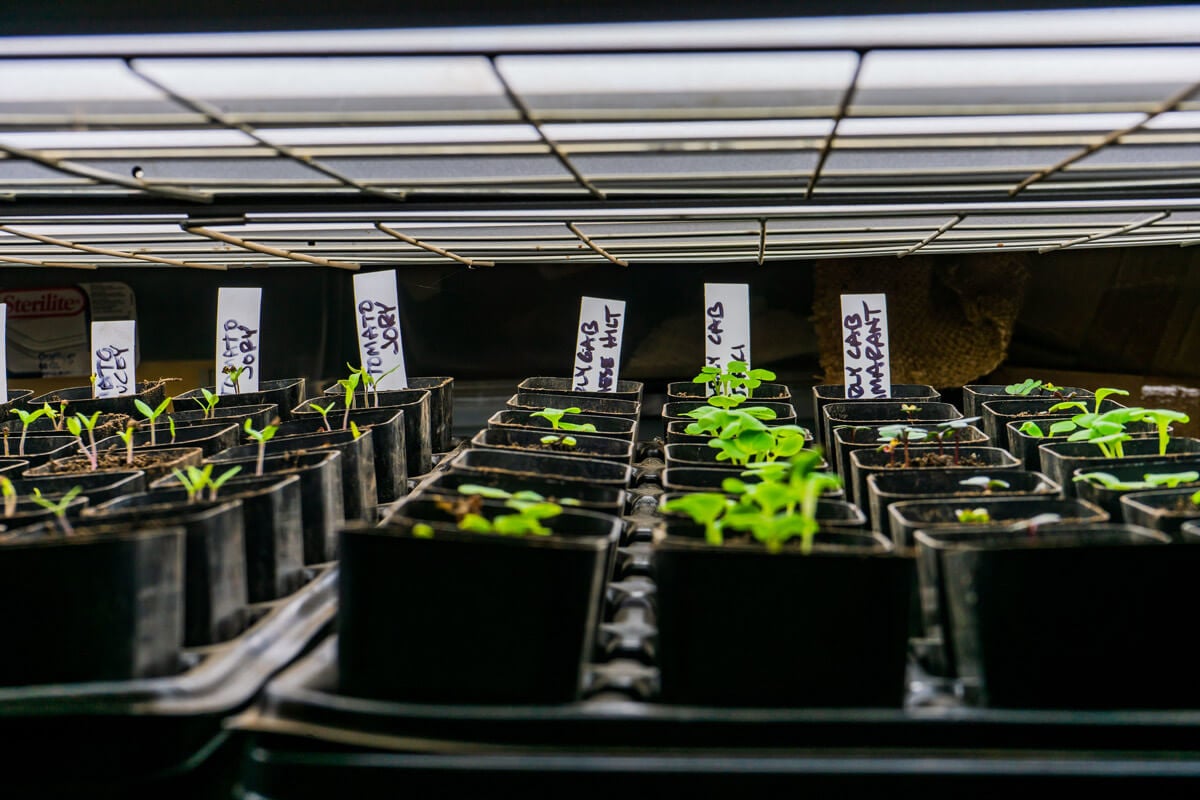

Spring gardening starts long before the soil warms up—and it happens right in your home. If you’ve been buying expensive transplants at the garden center or struggling with weak, pale seedlings that never thrive outdoors, you’re not alone. Starting seeds indoors gives you healthier plants, saves money, and lets you grow varieties your local nursery doesn’t carry. But success hinges on understanding a few critical factors: the right growing medium, proper lighting, correct watering, and ideal temperature. Get these right, and you’ll have stocky, vigorous seedlings ready to transform your garden.
How to Start Seeds Indoors Successfully
Follow this straightforward process to grow strong seedlings indoors that will thrive when transplanted to your garden.
What You Will Need
- Seed-starting mix (sterile, lightweight, peat-free or peat-based)
- Seed trays, cell packs, or small pots with drainage holes
- Grow lights or a sunny south-facing windowsill
- Watering can with a fine mist or spray nozzle
- Heat mat (optional but helpful for warm-season crops)
- Seed packets with planting depth and germination information
Steps
Choose Your Timing
Count backward from your region’s last expected frost date. Most vegetables and flowers need 6-8 weeks of indoor growth before transplanting. Check your seed packets for specific timing recommendations. Starting too early creates leggy, overgrown plants; starting too late means stunted growth.
Fill Containers With Seed-Starting Mix
Use a sterile, soilless medium designed for seed starting—never use garden soil or potting mix, which retain too much moisture and harbor disease. Moisten the mix slightly before filling your containers, then press gently to eliminate air pockets. Fill to about 1/2 inch below the rim.
Plant Seeds at the Correct Depth
Follow the seed packet instructions precisely; most seeds should be planted at a depth equal to twice their thickness. Tiny seeds like petunias need only a light press into the surface, while larger seeds like beans go deeper. Cover gently and mist with water so the medium settles around the seeds without washing them away.
Provide Consistent Moisture Without Overwatering
Water gently so the mix stays evenly moist but never waterlogged. A spray bottle works well for delicate seedlings. Check daily, especially if using a heat mat, which speeds evaporation. Poor drainage and constant wetness cause damping-off fungus, which kills young seedlings at the soil line.
Maintain Warm Germination Temperature
Most seeds germinate fastest in 70-75 degrees Fahrenheit. A heat mat placed under trays accelerates germination, especially for warm-season crops like tomatoes and peppers. Once seedlings emerge, they can tolerate slightly cooler temperatures (65-70 degrees), but avoid cold drafts.
Provide Strong Light as Soon as Sprouts Appear
This is critical: seedlings need 14-16 hours of bright light daily from the moment they emerge. A sunny windowsill often isn’t enough, resulting in weak, pale, leggy plants that stretch toward the light. Position grow lights 2-3 inches above seedlings and raise them as plants grow.
Thin Overcrowded Seedlings
Once seedlings develop their first true leaves, snip out weaker plants with scissors rather than pulling them out, which disturbs roots of neighbors. Space seedlings so they have room to develop into stocky, sturdy plants rather than crowded, spindly ones competing for light.
Harden Off Before Transplanting
One week before moving seedlings outdoors, gradually expose them to outdoor conditions. Start with 2-3 hours of gentle outdoor shade on day one, then increase time and sun exposure daily. This acclimates plants to wind, direct sun, and temperature swings, preventing transplant shock.
- Label everything immediately with seed variety and planting date using a permanent marker on the container or a stake—you’ll forget what you planted, and all seedlings look similar at two weeks old.
- Use a small fan on low speed near seedlings a few hours daily to simulate outdoor wind, which strengthens stems and reduces damping-off disease.
- Water from below by setting trays in a shallow pan of water for 10-15 minutes, allowing roots to draw moisture up through drainage holes—this prevents overwatering and fungal disease.
What to Look For in Seed-Starting Equipment
- Seed-Starting Mix Quality: Choose sterile, soilless mixes designed specifically for seeds—avoid garden soil or general potting mix. Look for peat-free options if sustainability matters, or traditional peat blends for reliability. The medium should be fine-textured, drain well, and retain moisture without becoming waterlogged.
- Light Intensity and Duration: Seedlings require 14-16 hours of bright light daily. LED grow lights are energy-efficient and produce less heat than fluorescent; choose full-spectrum lights. Position lights 2-3 inches above seedlings and adjust as plants grow. Insufficient light is the most common cause of failure.
- Watering System: A fine-mist spray bottle or moisture meter prevents overwatering, the deadliest seedling killer. Alternatively, bottom-watering trays eliminate guesswork—water from below so roots pull moisture upward naturally. Avoid overhead watering that splashes soil and promotes damping-off fungus.
- Heat Mat Compatibility: A heat mat accelerates germination for warm-season crops and maintains ideal soil temperature (70-75°F). Choose mats with thermostat control to prevent overheating. Not essential for all seeds, but invaluable for peppers, eggplant, and basil that germinate slowly in cool homes.
Vivosun LED Grow Light Panel (Dual Switch, Dimmable)
Best for: Serious seed starters who need reliable, full-spectrum lighting
This dimmable LED grow light delivers full-spectrum output ideal for all growth stages, from germination through transplant readiness. The dual-switch design lets you control light independently from two panels, maximizing flexibility for multiple seedling trays. At just 1.5 inches thick, it mounts easily above seed trays with adjustable hanging chains. The 50,000-hour lifespan and energy efficiency make it a smart long-term investment. Most seed-starting failures trace to insufficient light—this panel solves that problem definitively.
Check Current Price on Amazon →Burpee Seed Starting Mix (10 Quart Bag)
Best for: Budget-conscious gardeners starting seeds for the first time
This peat-based, sterile seed-starting mix is formulated to retain moisture while providing excellent drainage for delicate seedling roots. The 10-quart bag fills multiple seed trays affordably and is readily available at garden centers and online. Burpee’s reputation ensures consistent quality without premium pricing. Perfect for gardeners trying seed starting before investing in specialized equipment. The lightweight, fine texture is ideal for small seeds like petunias and impatiens.
Check Current Price on Amazon →Seed Pod Starter Kit with Humidity Dome
Best for: New seed starters who want an all-in-one solution
This complete kit includes 60 biodegradable seed pods, a sturdy plastic tray, and a clear humidity dome that maintains moisture and warmth without constant misting. Simply fill pods with seed-starting mix, plant seeds, water gently, and close the dome. The dome’s vents allow air circulation to prevent fungal disease while maintaining humidity. Perfect for windowsill growing if supplemented with grow lights. Biodegradable pods eliminate transplant shock since seedlings go directly into the ground.
Check Current Price on Amazon →Growzilla Seedling Heat Mat with Thermostat (10×20 inches)
Best for: Growers starting peppers, eggplant, or other heat-loving seeds
This waterproof heat mat maintains optimal 70-75°F soil temperature for rapid, reliable germination of warm-season crops. The built-in thermostat prevents overheating, and the 10×20-inch size fits standard seed trays perfectly. Heavy-duty construction resists moisture damage, and the non-slip surface keeps trays stable. Growzilla’s reputation for durability justifies the premium price. Users report 2-3 week reductions in germination time compared to room-temperature starting, making this mat invaluable for short-season gardeners.
Check Current Price on Amazon →Espoma Organic Seed Starting Mix (8 Quart Bag)
Best for: Organic gardeners seeking peat-free alternatives
This certified organic, peat-free mix uses coconut coir and compost instead of peat moss, reducing environmental impact without sacrificing performance. Espoma adds beneficial mycorrhizae and Bacillus subtilis (a beneficial bacterium) that promote healthy root development and disease resistance. The 8-quart bag covers multiple seed trays and is lighter than traditional peat mixes. Slightly higher cost than conventional mixes is offset by enhanced seedling vigor and reduced disease problems.
Check Current Price on Amazon →Contoured Seed Tray with Cells (72 Cell, Reusable Plastic)
Best for: Gardeners starting multiple varieties who want organization and reusability
These durable, reusable plastic trays hold 72 individual cells—perfect for starting diverse varieties while maximizing space. The contoured design prevents water pooling and promotes drainage. Unlike disposable peat pots, these trays last decade after decade with proper storage. Each cell accommodates one seedling, eliminating crowding and competition. The trays stack neatly for storage and fit under standard grow lights. Growers love them for reducing waste and simplifying the watering routine.
Check Current Price on Amazon →Mister Bottle Spray (12 oz Fine Mist)
Best for: Seed starters with limited space or those preferring gentle watering
This fine-mist spray bottle delivers water as a gentle fog rather than heavy drops, preventing soil disturbance and fungal splashing. The 12-ounce capacity is perfect for seedlings, which need frequent but light watering. The ergonomic trigger reduces hand fatigue during daily misting. Glass construction is durable and won’t degrade from repeated use. At under $10, it’s an essential tool that prevents overwatering disasters and damping-off fungus.
Check Current Price on Amazon →Jump Start T5 2-Foot Fluorescent Fixture with Stand
Best for: Dedicated indoor gardeners who want a complete growing station
This professional-grade T5 fixture includes two high-output bulbs (6500K for seedlings), an adjustable stand with casters, and a sturdy metal frame perfect for growing multiple seed trays simultaneously. The stand height adjusts easily as seedlings grow, and the two-bulb design provides even light distribution. T5 fluorescents run cooler than incandescent and more affordable than premium LEDs. This system transforms a corner into a complete seed-starting station, making spring propagation efficient and enjoyable.
Check Current Price on Amazon →Start Your Seeds with Confidence
Indoor seed starting transforms your garden while saving money and expanding your plant variety. The process is surprisingly forgiving once you understand the essentials: sterile seed-starting mix, adequate drainage, consistent moisture without waterlogging, strong light for 14-16 hours daily, and proper timing. Most failures stem from insufficient light or overwatering—avoid these two mistakes and you’ll succeed dramatically more often. The initial investment in a quality grow light and seed-starting supplies pays dividends year after year.
Start small if you’re new to seed starting. Choose 3-4 reliable varieties (tomatoes, peppers, basil) and learn the rhythm before expanding. Keep detailed notes on planting dates, germination times, and which varieties perform best in your home. By spring three, you’ll have a proven system that produces stocky, vigorous seedlings ready to thrive outdoors. Your garden—and your budget—will thank you.
Frequently Asked Questions
When should I start seeds indoors for my garden?
Count backward 6-8 weeks from your region’s last expected frost date (check your local extension office or almanac). Most vegetables and flowers need this timeframe to develop into transplant-ready size. Starting earlier creates overgrown, leggy plants; starting later produces stunted seedlings.
Why are my seedlings pale and stretching toward the light?
This ‘leggy’ growth indicates insufficient light. Seedlings need 14-16 hours of bright light daily—a windowsill is rarely enough. Install grow lights positioned 2-3 inches above seedlings and raise them as plants grow. This is the most common cause of failed indoor seed starting.
How do I prevent damping-off fungus that kills seedlings?
Damping-off thrives in wet, poorly ventilated conditions. Prevent it by using sterile seed-starting mix, avoiding overwatering (water from below rather than overhead), ensuring good air circulation with a small fan, and removing infected seedlings immediately. Bottom-watering is especially effective.
Can I use regular potting soil or garden soil for seed starting?
No. Regular potting soil and garden soil retain too much moisture and harbor disease organisms. Use sterile, soilless seed-starting mix specifically formulated for seedlings. It’s lighter, drains better, and dramatically improves germination and seedling health.
What is hardening off and why is it essential?
Hardening off gradually exposes seedlings to outdoor conditions (wind, sun, temperature swings) one week before transplanting. Start with 2-3 hours of shade on day one, then progressively increase time and sun exposure. This acclimates plants to outdoor stress and prevents transplant shock or death.
As an Amazon Associate, Build & Bloom earns from qualifying purchases. We only recommend products we genuinely think are useful. Prices and availability vary; check Amazon for the latest.
Leave a Reply