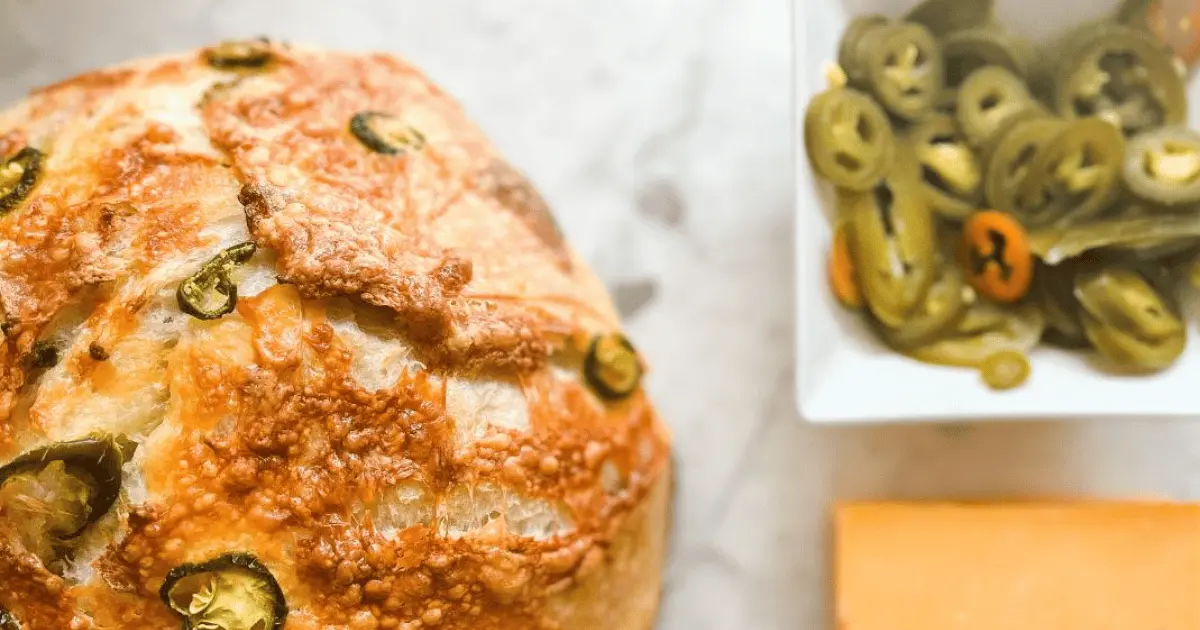

Making sourdough at home intimidates many bakers, but a flavorful loaf like jalapeño cheddar bacon sourdough is entirely achievable with patience and a reliable starter. This recipe builds on classic sourdough techniques while adding three powerhouse ingredients that transform your bread from plain to unforgettable. Whether you’re a seasoned sourdough baker or stepping up from basic loaves, these instructions will guide you through each phase of fermentation, shaping, and baking.
How to Make Jalapeño Cheddar Bacon Sourdough
This sourdough requires two days of fermentation, but most of that time is passive resting. Active hands-on work totals about 30 minutes spread across the timeline.
Ingredients
- 500g bread flour (or all-purpose flour)
- 350ml water at room temperature
- 100g active sourdough starter (fed 4-8 hours prior)
- 10g salt
- 150g sharp cheddar cheese, cut into small cubes
- 8-10 strips bacon, cooked until crispy and chopped
- 2-3 fresh jalapeños, thinly sliced and seeds removed for less heat (optional)
Method
Mix the dough base
Combine flour and water in a large bowl and let sit for 30 minutes (this resting period is called autolyse). After resting, add your active starter and salt, then mix thoroughly until all flour is incorporated and you have a shaggy dough. Use a dough scraper to fold and turn the dough several times until it becomes cohesive.
Bulk fermentation with additions
During the first two hours of bulk fermentation, perform 4-5 sets of stretch and fold (grab the dough from one side, stretch it up and fold it over itself, rotate the bowl, repeat). After the second set of folds, begin incorporating your cheese, bacon, and jalapeños by folding them into the dough gradually across subsequent folds. This prevents them from getting lost in the dough.
Complete bulk fermentation
Continue bulk fermentation at room temperature (68-72F is ideal) for 4-6 hours total. You’re looking for the dough to increase in volume by about 50-75%, become slightly puffy, and show visible bubbles on the surface. The dough should pass the poke test: when you poke it gently, the indentation should slowly spring back halfway.
Pre-shape and rest
Turn your dough onto a lightly floured work surface and gently pre-shape it into a round by folding the edges toward the center. Let it rest for 20-30 minutes under a cloth. This bench rest allows the gluten to relax before final shaping, making it easier to work with.
Final shape for scoring
Flip the dough so the smooth side is facing down. Fold the top third down and seal with the heel of your hand, then fold the left and right sides toward the center and seal. Finally, roll the dough toward you, sealing the seam with each rotation. Place seam-side up in a floured banneton or bowl lined with a cloth.
Cold proof overnight
Cover your shaped dough and place it in the refrigerator for 12-18 hours. This extended cold fermentation develops deeper flavor and makes the dough easier to score. Cold dough also holds its shape better during baking, resulting in better oven spring and a more defined crust.
Preheat and score
About 30 minutes before baking, preheat your oven to 500F with a Dutch oven inside. Turn your cold dough onto parchment paper, score the top with a sharp blade using a decisive single slash or an artistic cross pattern, then carefully transfer it (with parchment) into the preheated Dutch oven.
Bake with steam and finish
Cover the Dutch oven and bake for 20 minutes at 500F to trap steam, which creates a beautiful crust. Remove the lid, reduce heat to 450F, and bake for another 25-30 minutes until the crust is deep golden brown. Cool on a wire rack for at least one hour before slicing to allow the crumb to set properly.
- Keep your sourdough starter at peak activity by feeding it 4-8 hours before mixing and watching for it to double with visible bubbles. A sluggish starter leads to slow fermentation and flat bread.
- Toast your bacon the day before and store it in an airtight container. This prevents moisture from the bacon affecting your dough hydration and makes handling easier during bulk fermentation.
- If your kitchen is cold, place your dough in an oven with the light on, a proofing box, or an insulated cooler with a warm water jug to maintain consistent 72-74F temperature for faster fermentation.
Essential Tools for Sourdough Baking
- Dutch oven: A heavy covered pot that traps steam during baking, creating the crispy, crackling crust characteristic of artisan sourdough. Look for enameled cast iron with a tight-fitting lid that can handle 500F heat.
- Banneton proofing basket: A fabric-lined basket that supports your shaped dough during cold fermentation without sticking. Prevents the dough from spreading sideways and helps you achieve a tall, round loaf with proper structure.
- Digital kitchen scale: Sourdough baking relies on precise flour and water measurements by weight rather than volume. A reliable scale ensures consistent dough hydration and fermentation timing across batches.
- Bench scraper: A flat tool that helps you fold dough during bulk fermentation, move dough without tearing, and perform pre-shaping and final shaping. Makes handling sticky, wet sourdough dough significantly easier.
Le Creuset Enameled Cast Iron Dutch Oven, 5.5-Quart
Best for: Serious home sourdough bakers
The gold standard for artisan bread baking. This 5.5-quart Le Creuset Dutch oven features superior heat retention and even distribution, creating perfectly steamed crusts with exceptional color and crackle. The enamel coating won’t chip, and the heavy lid seals tightly to trap optimal steam. Available in iconic flame orange or classic black, this is a one-time investment that lasts decades.
Check Current Price on Amazon →Tramontina Enameled Cast Iron Dutch Oven, 6-Quart
Best for: Budget-conscious beginners
A practical alternative that performs nearly identically to premium brands at half the price. This 6-quart Tramontina Dutch oven heats evenly, maintains temperature well, and the enamel coating is durable. Perfect for testing whether sourdough baking is for you before investing in a luxury option. Available in multiple colors and consistently rated highly by home bakers.
Check Current Price on Amazon →Banneton Proofing Basket Set by Wayfair Basics, 9-Inch
Best for: First-time sourdough makers
An affordable, beginner-friendly banneton with a removable cloth liner and dust cover. The 9-inch diameter fits most home recipe yields. The cloth is naturally flour-dusted to prevent sticking, and the simple round shape supports your dough shape without confusion. Includes a basic dough scraper and care instructions, making it an all-in-one starter kit.
Check Current Price on Amazon →Staub Enameled Cast Iron Cocotte, 3.75-Quart, Black
Best for: High-end bakers seeking French craftsmanship
Staub’s reputation rivals Le Creuset with meticulous French manufacturing. This 3.75-quart model is slightly smaller, ideal if you prefer smaller loaves or have limited oven space. The matte black enamel interior resists chipping, and the design is elegant enough to go from oven to table. Each piece is hand-inspected, justifying the investment for dedicated bakers.
Check Current Price on Amazon →Final Recommendation
Jalapeño cheddar bacon sourdough is a flavor-packed project that rewards patience with an exceptional homemade loaf. The two-day timeline seems long until you realize most of it is passive fermentation while you live your life. By investing in just one quality Dutch oven and a banneton basket, you’ve equipped yourself to produce bakery-level bread at home indefinitely. The flavors work in perfect harmony: the jalapeños provide a lingering heat, the cheddar adds umami richness, and the bacon delivers smokiness and textural contrast against the tender crumb.
Begin with your sourdough starter in peak condition, follow the cold fermentation overnight for maximum flavor development, and don’t skip the full cooling time after baking. Once you master this recipe, you’ll return to it again and again. It’s the kind of bread that makes people ask, “Where did you buy this?” when the honest answer is: your own kitchen. Start your batch today and prepare to impress yourself and everyone lucky enough to receive a slice.
Frequently Asked Questions
How do I know when my sourdough starter is ready to use?
A ready starter should double in volume within 4-8 hours of feeding, smell pleasantly sour or slightly alcoholic, and display visible bubbles throughout. If you feed it and it doesn’t rise noticeably within this timeframe, it needs more development or more frequent feedings.
Can I add other ingredients besides jalapeños, cheddar, and bacon?
Absolutely. Try roasted garlic, sun-dried tomatoes, caramelized onions, herbs like rosemary, or different cheese varieties (gruyere, smoked gouda, sharp manchego). Add ingredients gradually during bulk fermentation and don’t exceed 30% additions by weight, or they’ll compromise gluten development.
What if my kitchen is too warm or too cold for fermentation?
If it’s too cold, use an oven with the light on, a proofing box, or a cooler with a warm water jug to maintain 72-74F. If it’s too warm, ferment in a cooler or basement, or reduce fermentation time by 1-2 hours and watch for the poke test instead of relying on timing alone.
Why is my crust not crispy or crackly?
You likely need more steam during baking. Always preheat your Dutch oven and ensure the lid is on for the first 20 minutes. If your oven runs cool, add 25F to the temperature. Allow bread to cool completely before slicing, as the crust continues to set as it cools.
Can I freeze my sourdough dough or finished bread?
Yes. Freeze shaped dough directly in the banneton for up to one week, then bake directly from frozen (add 10-15 minutes to baking time). Baked bread freezes well for two months. Thaw at room temperature or wrap in foil and reheat in a 350F oven for 15-20 minutes.
As an Amazon Associate, Build & Bloom earns from qualifying purchases. We only recommend products we genuinely think are useful. Prices and availability vary; check Amazon for the latest.
Leave a Reply