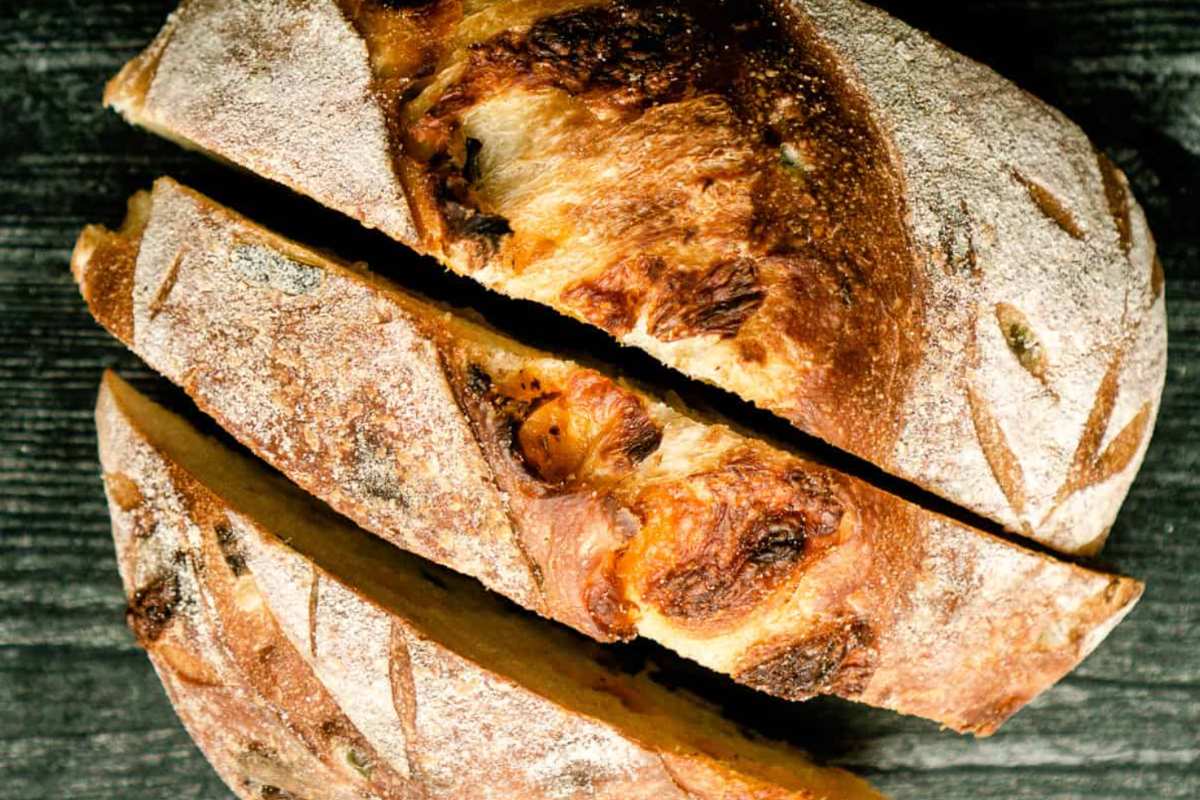

Jalapeño cheddar sourdough brings bold, savory flavor to your sourdough routine—but only if you understand when to add the mix-ins and how to maintain dough strength during fermentation. Many home bakers add ingredients too early, causing them to break down, or they skip proper shaping, resulting in a dense crumb. This guide walks you through the exact timing and technique to deliver a beautiful, flavorful loaf with the complex tang of true sourdough.
How to Make Jalapeño Cheddar Sourdough
This recipe produces one large rustic loaf with a crackling crust and open crumb structure. Plan for a 12-16 hour bulk fermentation followed by overnight cold retarding for maximum flavor development.
Ingredients
- 500g bread flour (or all-purpose flour)
- 350ml water at room temperature
- 100g active sourdough starter (fed 4-8 hours prior)
- 10g sea salt
- 2-3 fresh jalapeños (about 75g), seeded and finely diced
- 100g sharp cheddar cheese, finely shredded
Method
Mix the Base Dough
Combine flour, water, and active starter in a large mixing bowl. Stir until no dry flour remains and the mixture becomes a shaggy mass. Let this autolyse (rest) for 30-60 minutes at room temperature. This resting period allows the flour to fully hydrate and develops gluten naturally before you add salt.
Incorporate Salt and Begin Bulk Fermentation
Sprinkle salt over the dough and pinch it in, distributing evenly throughout. After the salt is fully incorporated, allow the dough to rest for 30 minutes. Then perform your first set of stretch-and-folds: wet your hand, grab one side of the dough, stretch it up and fold it over the center. Rotate the bowl 90 degrees and repeat four times. This builds dough strength without aggressive kneading.
Add Jalapeños and Cheese Strategically
After 2-3 hours of bulk fermentation (once the dough shows visible volume increase and slight dome shape), perform another round of stretch-and-folds. This time, as you work the dough, scatter the diced jalapeños and shredded cheddar across the surface and fold them in gradually. The dough is now strong enough to hold these additions without them breaking apart during fermentation.
Continue Bulk Fermentation
Return the dough to the bowl and let it bulk ferment for another 8-12 hours at room temperature (or until it increases by 50-75% in volume and jiggles when you gently shake the bowl). Perform one more round of stretch-and-folds halfway through this period if the dough seems sluggish. Your kitchen temperature heavily influences timing—warmer environments ferment faster.
Shape and Cold Retard
Turn the dough onto a lightly floured surface. Using a bench scraper, fold the dough in half, then in half again to build tension on the surface. Flip it seam-side up, then use your hands to shape it into a taut round by dragging it toward you. Place it seam-side up in a banneton basket (or bowl lined with a floured towel) and refrigerate overnight or up to 48 hours. Cold fermentation develops flavor complexity and makes scoring easier.
Score and Bake
Preheat your oven to 450F and place a Dutch oven inside for 45 minutes. Turn the cold dough out onto parchment paper seam-side down. Using a very sharp blade, score the top with a single confident slash or cross pattern about 1/4 inch deep. Carefully transfer the dough (still on parchment) into the preheated Dutch oven, cover, and bake for 20 minutes to trap steam.
Finish Baking
Remove the Dutch oven lid and continue baking for another 25-35 minutes until the crust turns deep golden brown. The loaf is finished when it sounds hollow when tapped on the bottom and the internal temperature reaches 205-210F. Remove from the oven and cool completely on a wire rack for at least 1-2 hours before slicing—this allows the crumb to set properly.
- Use fresh jalapeños that are firm and vibrant green; older peppers contain excess moisture that can affect dough hydration and fermentation speed.
- Keep your sourdough starter at peak activity (doubled or tripled after feeding) before mixing—weak starter leads to sluggish fermentation and flat bread.
- Mark your bulk fermentation container with a tape line at the starting height so you can visually track the 50-75% rise without guessing.
Essential Equipment for Sourdough Success
- Dutch Oven: A heavy covered pot is non-negotiable for sourdough baking. It traps steam during the first phase of baking, creating the crackling crust and open crumb that defines great sourdough. Look for one that’s oven-safe to at least 500F and has a tight-fitting lid.
- Kitchen Scale: Sourdough baking relies on precise ratios of flour, water, and starter. A digital scale that measures to 1 gram ensures consistency batch after batch. Volumetric measurements (cups and spoons) introduce too much variability for professional results.
- Banneton Proofing Basket: This shaped basket supports your dough during final cold fermentation and prevents it from spreading into a pancake. It keeps the loaf’s surface flour-dusted and makes transfer to your Dutch oven straightforward. A round or oval option works depending on your loaf preference.
- Bread Lame or Scoring Tool: A sharp blade designed specifically for scoring allows you to cut a precise, deep slash that controls where the dough expands in the oven. This is what creates the signature ear and open crumb structure of artisan sourdough.
Staub 4-Quart Round Cocotte (Cherry Red)
Best for: Serious home bakers who want restaurant-quality results
The Staub cocotte is the gold standard for sourdough baking. Its heavy cast iron construction distributes heat evenly, the tight-fitting black matte lid traps steam perfectly during the critical first 20 minutes of baking, and the enameled interior won’t react with acidic sourdough. The 4-quart capacity fits standard loaves with room to spare. While premium-priced, this is a lifetime investment that will outlast your oven.
Check Current Price on Amazon →Lodge Enameled Cast Iron Dutch Oven 5.5 Quart
Best for: Budget-conscious bakers who refuse to sacrifice quality
Lodge’s enameled Dutch oven delivers 90% of the performance at a fraction of Staub’s cost. The cast iron body is thick and retains heat beautifully, and the enamel coating resists chipping during years of use. The 5.5-quart capacity is generous for larger loaves. It may not have the polished interior of premium brands, but it produces exceptional sourdough. An outstanding value for the money.
Check Current Price on Amazon →Cuisinart Advantage Ceramics 4-Quart Dutch Oven
Best for: First-time sourdough bakers testing the waters
Cuisinart’s ceramic-coated Dutch oven is lighter than cast iron, making it easier to handle when transferring hot dough. The colorful enamel coating adds kitchen appeal, and the price point won’t sting if you decide sourdough isn’t for you. Heat retention is adequate for home use, though not quite as stable as cast iron during the final baking phase. A low-risk entry point into serious bread baking.
Check Current Price on Amazon →Le Creuset Signature Round Dutch Oven 5.5 QT
Best for: Collectors and bakers who view tools as heirlooms
Le Creuset represents the pinnacle of Dutch oven craftsmanship. Hand-enameled in France, each pot is inspected individually. The sand-colored interior shows off your beautiful bakes, and the color options (Caribbean Blue, Cherry Red) make this a showpiece kitchen item. Performance is identical to Staub, but Le Creuset’s heritage and aesthetic appeal justify the premium for those who bake regularly and want a tool that doubles as decor.
Check Current Price on Amazon →OXO Good Grips Digital Kitchen Scale
Best for: Bakers who want accuracy without bells and whistles
The OXO scale is reliable, simple, and accurate to 1 gram. The large digital readout is easy to read, it has a tare button for measuring multiple ingredients into one bowl, and it runs on two AAA batteries. No Bluetooth, no fancy features—just precise measurement every time. The rubberized base prevents sliding on countertops during high-stress baking moments. A perfect companion to any Dutch oven.
Check Current Price on Amazon →Hario V60 Drip Scale with Timer
Best for: Precision-obsessed bakers who also brew coffee
Hario’s scale is built for maximum accuracy and dual-purpose use. It weighs to 0.1 gram precision and includes a built-in timer—perfect for tracking fermentation phases. The Japanese engineering is evident in every detail, and the rechargeable battery eliminates constant battery replacement. If you’re the type who tracks bulk fermentation times down to the minute and measures flour by the gram, this is your scale. Compact design saves counter space.
Check Current Price on Amazon →Banneton Proofing Basket 10 Inch Round (Natural Rattan)
Best for: Home bakers who proof one loaf at a time
This natural rattan banneton basket is the workhorse of sourdough baking. The 10-inch round shape accommodates most home-scale loaves, and the tight weave prevents dough sticking while flour dusting works beautifully. The open bottom design allows air circulation during cold retard, preventing moisture buildup that ruins crust. Pre-shaped for round loaves, this basket becomes part of your routine after the first bake.
Check Current Price on Amazon →Lame Artisan Bread Scoring Tool with 5 Blades
Best for: Bakers who want professional scoring control
This professional-grade bread lame features a handle weighted for control and comes with five replaceable blades for different scoring angles. The carbon steel blades stay razor-sharp through dozens of loaves, and the ergonomic handle fits naturally in your hand. Precise scoring determines oven spring and crust ear development. If you’re baking weekly and want that bakery-perfect ear on every loaf, this tool delivers. Replaceable blades mean years of use ahead.
Check Current Price on Amazon →Final Recommendation
Jalapeño cheddar sourdough belongs in your rotation. The sharp, spicy flavor of fresh jalapeños paired with melted cheddar creates depth that plain sourdough can’t match, and the 24-48 hour fermentation develops a tang that makes every slice taste intentional. Start with the fundamentals: a reliable Dutch oven to trap steam, a kitchen scale to measure accurately, and a banneton to support your shaped dough. These three tools form the foundation of reproducible sourdough success.
The ingredient timing is crucial—add your jalapeños and cheese only after 2-3 hours of bulk fermentation, when dough strength can hold them without breaking them apart. Cold retard overnight in the refrigerator before baking. This final step dramatically improves flavor and makes your loaf easier to score and shape. Your first attempt might not be perfect, but the second and third will show marked improvement once you understand how your kitchen’s temperature affects fermentation. Sourdough rewards patience and precision.
Frequently Asked Questions
How do I know when my sourdough starter is ready to use?
Your starter should double or triple in volume within 4-8 hours of feeding with equal parts flour and water. It should smell pleasantly sour and show lots of bubbles throughout. Do the float test: drop a small spoonful into water—if it floats, it’s at peak activity and ready to mix.
Can I use frozen or canned jalapeños instead of fresh?
Fresh jalapeños work best because they retain their texture and flavor. Frozen jalapeños often become mushy and release excess water. If using canned, drain them thoroughly and reduce the total water in your recipe slightly to account for added moisture.
What if my dough isn’t doubling during bulk fermentation?
Dough rises slower in cool kitchens. If your kitchen is below 70F, fermentation can take 16-18 hours instead of 12-14. You can speed things up by placing the dough in a turned-off oven with the light on (creates gentle warmth) or using warmer water when mixing. Watch for dough behavior, not clock time.
How do I store leftover sourdough?
Wrap the fully cooled loaf in a clean kitchen towel and store at room temperature for 3-4 days. For longer storage, slice the bread and freeze it in an airtight container for up to 3 months. Reheat frozen slices directly in the toaster—no thawing needed.
Why is my crust not crispy?
A dull, soft crust usually means insufficient steam during the first 20 minutes of baking. Ensure your Dutch oven is fully preheated for 45 minutes, and keep it covered for the entire first phase. If your Dutch oven lid is loose, steam escapes and crust development fails. A tight-fitting lid is essential.
As an Amazon Associate, Build & Bloom earns from qualifying purchases. We only recommend products we genuinely think are useful. Prices and availability vary; check Amazon for the latest.
Leave a Reply