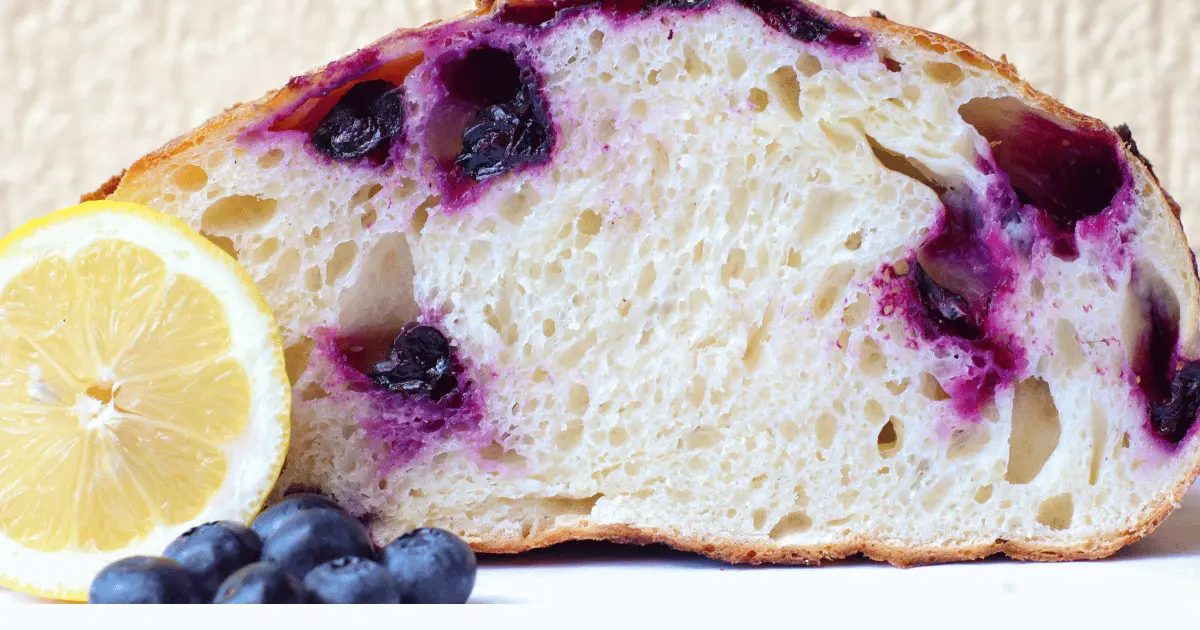

Making lemon blueberry sourdough bread at home sounds intimidating, but the process is surprisingly forgiving once you understand the rhythm of sourdough fermentation. Whether you’re new to sourdough baking or looking to expand your flavor repertoire, this combination of tart lemon zest, sweet blueberries, and complex sourdough tang creates a loaf that’s perfect for breakfast, snacking, or gifting. The key is patience with your starter and attention to dough temperature throughout the process.
How to Make Lemon Blueberry Sourdough Bread
This recipe yields one beautiful, rustic loaf with a crispy crust and tender crumb studded with bursts of berry and citrus flavor.
Ingredients
- 500g bread flour
- 350ml water (room temperature)
- 100g active sourdough starter (fed 4-8 hours prior)
- 10g fine sea salt
- Zest of 2 lemons (about 2 tablespoons)
- 150g fresh or frozen blueberries
Method
Mix the dough
Combine water and sourdough starter in a large mixing bowl, stirring until the starter dissolves. Add flour and lemon zest, mixing until all dry ingredients are incorporated and no flour remains visible. The dough will be shaggy. Let this mixture rest for 30 minutes at room temperature (this resting phase is called autolyse and improves gluten development).
Add salt and begin folding
Sprinkle salt over the dough and fold it in with wet hands, working the salt throughout. Then perform a series of stretch-and-fold motions by grabbing one side of the dough, stretching it up, and folding it over the center. Rotate the bowl and repeat 4-6 times. This builds strength without intensive kneading.
Incorporate blueberries gently
After 30 minutes, perform another round of stretch-and-fold. Gently pat the blueberries dry with a clean cloth, then carefully fold them into the dough during the next series of folds. Work slowly to avoid crushing the berries. Perform one more round of folds after 30 minutes without adding berries.
Bulk fermentation
Place the dough in a lightly oiled container and let it rise at room temperature (68-72F is ideal) for 4-6 hours. You’re looking for the dough to increase by about 50 percent in volume and show visible bubbles on the surface. The timing depends on how active your starter is and your kitchen temperature.
Shape the dough
Turn the dough out onto a lightly floured surface. Gently shape it into a round by folding the edges toward the center, then flip it seam-side down. Cup your hands around the dough and drag it toward you in short motions to build surface tension. This creates the characteristic round loaf shape.
Cold proof overnight
Place the shaped dough seam-side up into a floured cloth-lined banneton basket or bowl. Cover with plastic wrap and refrigerate for 8-16 hours. This slow, cold fermentation develops deeper flavor and makes scoring easier. You can also do a shorter room-temperature proof of 1-3 hours if you’re short on time.
Preheat and score
About 30 minutes before baking, preheat your oven to 500F with a heavy baking vessel (such as a Dutch oven) inside. Remove the dough from the refrigerator, invert it onto parchment paper, and make a bold slash across the top with a sharp blade at a 30-degree angle. This controlled cut directs the oven spring.
Bake with steam
Carefully place the dough (on parchment) into the hot vessel. Reduce oven temperature to 450F, cover with the lid, and bake for 20 minutes to trap steam. Remove the lid, reduce heat to 425F, and bake for another 20-25 minutes until the crust is deep golden brown. Cool completely on a rack before slicing (this allows the interior to set properly).
- Keep your sourdough starter at peak activity (doubled in size, bubbly, with a pleasant sour smell) before mixing dough. A weak starter leads to sluggish fermentation and dense bread.
- Use frozen blueberries directly from the freezer without thawing; they’re easier to incorporate gently and won’t bleed color into the dough as readily.
- A heavy cast iron or enameled vessel creates the best oven spring by trapping steam. If you don’t have one, create steam by placing a pan of hot water on the lower rack during baking.
What to Look For in Sourdough Baking Equipment
- Dutch Oven or Baking Vessel: Essential for creating the steam environment that develops a crispy, golden crust. Look for enameled cast iron or stainless steel that can handle 500F temperatures. A 5-7 quart capacity is ideal for standard sourdough loaves.
- Banneton Proofing Basket: Provides structure during cold overnight proofing and prevents spreading. Choose one sized for your loaf (9 inches is standard) with sturdy cloth construction that won’t stick to wet dough.
- Digital Scale: Sourdough baking is a science requiring precise ingredient ratios. A scale accurate to 1 gram with both ounce and gram modes ensures consistency from batch to batch.
- Bread Lame or Scoring Tool: A sharp blade creates controlled cuts that direct oven spring and create the distinctive scoring pattern. Professional bread lames offer better control than knives and reduce the risk of finger injuries.
Lodge Enameled Cast Iron Dutch Oven 5.5 Qt
Best for: Home sourdough bakers seeking reliability
Lodge’s enameled Dutch oven is the gold standard for home bread baking. The 5.5-quart capacity perfectly fits a standard sourdough loaf, and the heavy cast iron construction distributes heat evenly while the enamel coating prevents rust and eliminates seasoning maintenance. It handles temperatures up to 500F, making it ideal for high-heat sourdough baking. The matching lid traps steam effectively for that coveted crispy crust and beautiful oven spring.
Check Current Price on Amazon →COSORI Bread Proofing Box with Banneton Basket
Best for: New sourdough bakers managing fermentation timing
COSORI’s proofing box removes temperature guesswork by maintaining a consistent 75-95F environment. It comes with a 9-inch round banneton basket and built-in timer to track fermentation stages. The transparent door lets you monitor dough rise without opening the box, and the compact footprint fits any kitchen counter. This is especially valuable if your kitchen temperature fluctuates seasonally.
Check Current Price on Amazon →Pyrex Glass Measuring Bowl with Lids 8 Cup
Best for: Budget-conscious bakers using household items
Before investing in specialty equipment, Pyrex’s 8-cup glass bowls work perfectly for bulk fermentation. The clear glass lets you monitor dough rise easily, the lids prevent drying, and the bowls are durable enough for years of sourdough making. At under $15, it’s a practical entry point for testing your sourdough technique before buying dedicated equipment.
Check Current Price on Amazon →Staub Cast Iron Cocotte 5.5 L Graphite
Best for: Serious bakers investing in heirloom equipment
Staub’s French-made cocotte represents the premium end of baking vessels. The superior enamel coating in sophisticated colors, combined with thicker cast iron walls, provides even heat distribution and longer lifespan than most alternatives. The black matte interior hides scratches and discoloration, and the self-basting lid geometry creates superior steam circulation for restaurant-quality scores and crust.
Check Current Price on Amazon →Baking Your First Lemon Blueberry Sourdough
Lemon blueberry sourdough bread might seem like an advanced recipe, but it follows the exact same fermentation principles as plain sourdough. The brightness of lemon zest and burst of blueberries transform a basic loaf into something special enough for a farmers market or coffee shop. The equipment investment (particularly a Dutch oven and scale) pays dividends across all your future baking projects, making this recipe an excellent gateway into consistent, reproducible sourdough baking.
Start with one loaf to understand your specific kitchen’s temperature and humidity patterns, then you’ll develop an intuitive sense for timing on the second attempt. Keep notes on bulk fermentation time and oven spring results, and you’ll quickly develop the confidence to experiment with other flavor combinations. The beautiful thing about sourdough is that once you master the fundamental technique, the variations are endless.
Frequently Asked Questions
Can I use frozen blueberries instead of fresh?
Yes, frozen blueberries are actually preferable for sourdough because they’re easier to incorporate without breaking apart and bleeding color into the dough. Add them directly from the freezer without thawing during the folding stage.
What if my sourdough starter isn’t doubling in size?
Your starter may need more frequent feeding or warmer fermentation conditions. Feed it twice daily for 3-5 days and keep it at 70-75F. If it’s been inactive for months, it may need revival with daily feedings of equal parts flour and water by weight for 5-7 days.
How do I know when bulk fermentation is complete?
The dough should increase by roughly 50 percent in volume and show visible bubbles throughout when you gently poke the surface. If you poke it and the dent slowly springs back halfway, it’s ready. If it springs back completely, it needs more time; if it doesn’t spring back, you’ve slightly overproofed.
Can I skip the cold overnight proof and bake the same day?
Yes, you can do a room-temperature proof of 1-3 hours instead of overnight cold proofing. However, cold proofing develops more complex sour flavor and makes scoring easier, so it’s worth planning ahead when possible.
Why did my blueberries turn the dough gray or blue?
This happens when blueberry anthocyanins react with the alkaline sourdough dough. It’s harmless and purely cosmetic. To minimize this, use thawed frozen berries (they release less pigment) or add berries very late in fermentation, or fold them in after shaping.
As an Amazon Associate, Build & Bloom earns from qualifying purchases. We only recommend products we genuinely think are useful. Prices and availability vary; check Amazon for the latest.
Leave a Reply