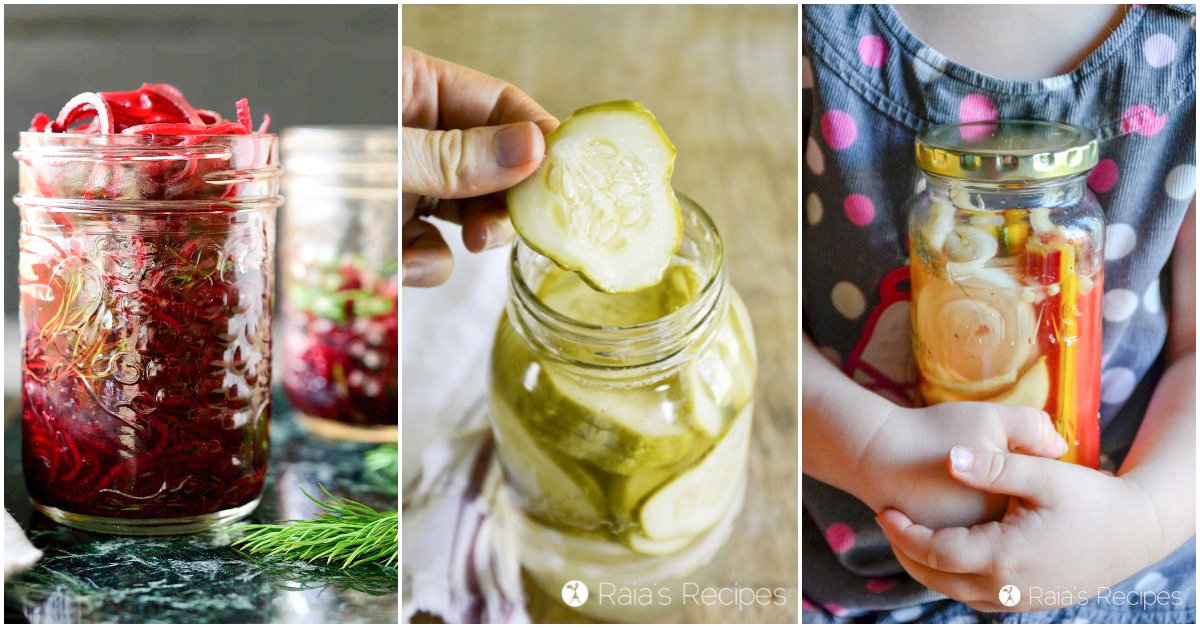

If you’ve scrolled past fermented veggie recipes and thought ‘that looks complicated,’ you’re about to discover it’s actually one of the easiest kitchen projects you can undertake. Whether you’re following a paleo diet, eating vegan, or simply want to boost your gut health with probiotics, fermented vegetables are shelf-stable, require minimal equipment, and deliver real flavor without any special culinary skills. In the next 10 minutes, you’ll understand exactly how to transform ordinary vegetables into tangy, probiotic-rich condiments that last for months.
How to Ferment Vegetables in a Jar
The fermentation process relies on salt, anaerobic conditions (no oxygen), and time. Here’s how to create the perfect environment for beneficial bacteria to thrive.
Ingredients & Materials
- Fresh vegetables (cabbage, carrots, cucumbers, peppers, or any produce you enjoy) – 2-3 cups chopped
- Sea salt or non-iodized salt – 2-3 tablespoons per quart
- Filtered or dechlorinated water – enough to cover vegetables
- A glass jar with a wide mouth – 1 quart or larger
- Weight or cover (glass weight, small jar, or fermentation lid) to keep vegetables submerged
- Optional seasonings – garlic cloves, ginger, turmeric, dill, or peppercorns
Method
Prepare Your Vegetables
Wash your chosen vegetables thoroughly under clean water and chop them into bite-sized pieces or thin slices. You want pieces small enough to eat easily but large enough not to turn to mush. If using cabbage, you can massage it slightly to help release its natural juices.
Mix Your Brine Solution
Combine salt and filtered water in a separate bowl, stirring until the salt fully dissolves. The standard ratio is 2% salt by weight of vegetables, which translates to roughly 2-3 tablespoons per quart. Taste the brine – it should be noticeably salty, similar to ocean water.
Layer Vegetables and Seasonings in Jar
Place your chopped vegetables into the clean glass jar. Add any optional seasonings between layers – minced garlic, ginger slices, or fresh herbs work beautifully. Pack the vegetables down gently as you layer them to help them release their own juices.
Pour Brine and Submerge Completely
Pour your brine solution over the vegetables until they are completely covered by at least one inch of liquid. Vegetables exposed to air can develop mold. If your vegetables float, use a weight or smaller jar to hold them beneath the surface.
Cover and Set in a Cool Location
Place a cloth, coffee filter, or breathable fermentation lid over the jar – you want airflow but not dust or insects. Set the jar in a cool, dark corner of your kitchen (60-75°F is ideal). Avoid direct sunlight, which can degrade flavor.
Monitor Fermentation Progress Daily
Watch for bubbles rising through the brine and a cloudy appearance in the liquid – these are signs of successful fermentation. You may see white film on the surface (kahm yeast), which is harmless and can be skimmed off. Taste a sample after 3 days, and continue fermenting until the flavor reaches your preference.
Transfer to Cold Storage
Once your vegetables reach desired tanginess (typically 3-7 days), seal the jar with a proper lid and move it to the refrigerator. The cold temperature slows fermentation dramatically, allowing your vegetables to maintain texture and flavor for up to 3 months.
- Use filtered or boiled-then-cooled water rather than chlorinated tap water, as chlorine can inhibit fermentation
- Keep a fermentation jar in your pantry at all times – once you start, you can continuously rotate batches every few days
- Start with cabbage or carrots if you’re new to fermentation; they’re forgiving and develop excellent flavor quickly
What to Look For in Fermentation Jars and Equipment
- Jar Size and Material: Choose glass jars with wide mouths (at least 2 inches opening) to easily insert vegetables and weights. Avoid metal lids that contact brine, as salt corrodes them. Quart-sized jars work well for beginners and yield enough for 2-3 servings.
- Weight System: Submerged vegetables are critical – select jars with built-in glass weights, or purchase separate ceramic or glass weights. Some jars have specialized lids with airlocks that hold vegetables down while allowing gas to escape.
- Breathability: Your jar cover must allow carbon dioxide to escape while keeping dust and insects out. Airlock lids, cloth covers, or coffee filters work; airtight seals prevent proper fermentation and can create pressure.
- Salt and Water Quality: Invest in sea salt or kosher salt specifically labeled as non-iodized – iodine inhibits fermentation. Filtered water is preferable to chlorinated tap water, though boiling and cooling tap water also works.
Fermentationculture.eu Wide Mouth Fermentation Jar with Airlock Lid
Best for: Serious fermenters wanting hands-off fermentation
This 1-quart borosilicate glass jar features an integrated airlock lid that allows gases to escape without introducing oxygen or contamination. The wide mouth (3+ inches) accommodates vegetables and weights easily. The glass weight keeps vegetables submerged effortlessly. Superior glass quality resists thermal shock, and the airlock system dramatically increases success rates for beginners by maintaining anaerobic conditions automatically.
Check Current Price on Amazon →Ball Wide Mouth Quart Mason Jars (Set of 12)
Best for: Budget-conscious gardeners fermenting multiple batches
Classic and affordable, these 32-ounce wide-mouth mason jars are perfect for fermentation with a simple cloth or coffee filter covering. Available in multipacks for batch fermentation. The threaded mouth accepts both standard lids and aftermarket airlock attachments. Made of durable borosilicate glass. While you’ll need to purchase a weight separately, the low cost makes this an excellent entry point.
Check Current Price on Amazon →Mortier Pilon Fermentation Kit with Weights and Cloth
Best for: First-time fermenters wanting complete guidance
This all-in-one kit includes two 1-liter jars, glass weights, unbleached cotton cloth covers, and a detailed recipe guide. Everything you need is included, eliminating guesswork about what to buy. The jars are food-safe borosilicate glass with wide openings. Cloth covers are reusable and washable. Perfect for someone wanting to try fermentation without hunting for individual components.
Check Current Price on Amazon →Kilner Clip Top Fermentation Jar with Built-In Weights
Best for: Premium users wanting European engineering
British-made Kilner jars feature a distinctive clip-top seal with integrated glass weights molded into the lid itself. Borosilicate glass construction withstands temperature fluctuations. The sealed design with airlock provision prevents contamination while allowing fermentation gases to escape. Larger 2-liter capacity reduces batch frequency. Beautiful enough to display on shelves.
Check Current Price on Amazon →Start Your Fermentation Journey Today
Fermented vegetables represent one of the oldest food preservation methods, now backed by modern science showing genuine probiotic and digestive benefits. The process itself is forgiving, inexpensive, and requires minimal equipment – you likely have most of what you need in your kitchen right now. Whether you choose a simple mason jar with a cloth cover or invest in a specialized fermentation system with airlocks, the bacteria will work their magic given salt, anaerobic conditions, and time.
The beauty of home fermentation lies in customization and control. You decide exactly which vegetables, spices, and herbs go into each batch, creating fermented products tailored to your paleo or vegan diet rather than accepting whatever the grocery store offers. Start small with a single quart jar and one simple recipe – perhaps cabbage with garlic – then expand once you’ve experienced your first successful batch. Within weeks, fermentation becomes automatic, and you’ll find yourself reaching for homemade fermented vegetables daily, enjoying both their tangy flavor and the knowledge that you’re actively supporting your gut health.
Frequently Asked Questions
How long does fermentation take?
Most vegetables ferment successfully in 3-7 days at room temperature (68-75°F). Taste daily starting on day 3 to find your preferred tanginess level. Cooler temperatures slow fermentation (may take 2-3 weeks), while warmer conditions accelerate it (ready in 2-3 days). Once refrigerated, fermentation nearly stops, preserving flavor and texture.
Is the white film that appears during fermentation dangerous?
No – that’s kahm yeast, a harmless surface yeast that develops in oxygen-exposed areas. Simply skim it off with a clean spoon. It tastes slightly unpleasant but won’t harm your fermentation. Keep vegetables submerged to minimize kahm yeast formation. True mold (fuzzy, dark, or discolored) indicates contamination and means discarding that batch.
Can I use tap water for fermentation?
Chlorinated tap water can slow fermentation since chlorine inhibits beneficial bacteria. Filter your tap water, or boil it and cool completely before use. If you must use tap water, let it sit uncovered for 24 hours to allow chlorine to evaporate. Filtered or spring water is ideal but not absolutely required.
How long do fermented vegetables stay fresh?
Properly fermented and refrigerated vegetables last 3-6 months in sealed jars. The cold temperature and acidic environment preserve them indefinitely, though flavor may evolve. If you notice significant mold growth, off-odors, or sliminess, discard that batch. Most people consume fermented vegetables much faster than they spoil.
Do I need special equipment or can I use any jar?
Any clean glass jar works, but wide-mouth jars (2+ inch opening) make filling and eating easier. You must keep vegetables submerged below the brine – use a weight or smaller jar to accomplish this. An airlock lid is helpful but not essential; cloth covers work fine. The key is anaerobic conditions, not specific equipment.
As an Amazon Associate, Build & Bloom earns from qualifying purchases. We only recommend products we genuinely think are useful. Prices and availability vary; check Amazon for the latest.
Leave a Reply