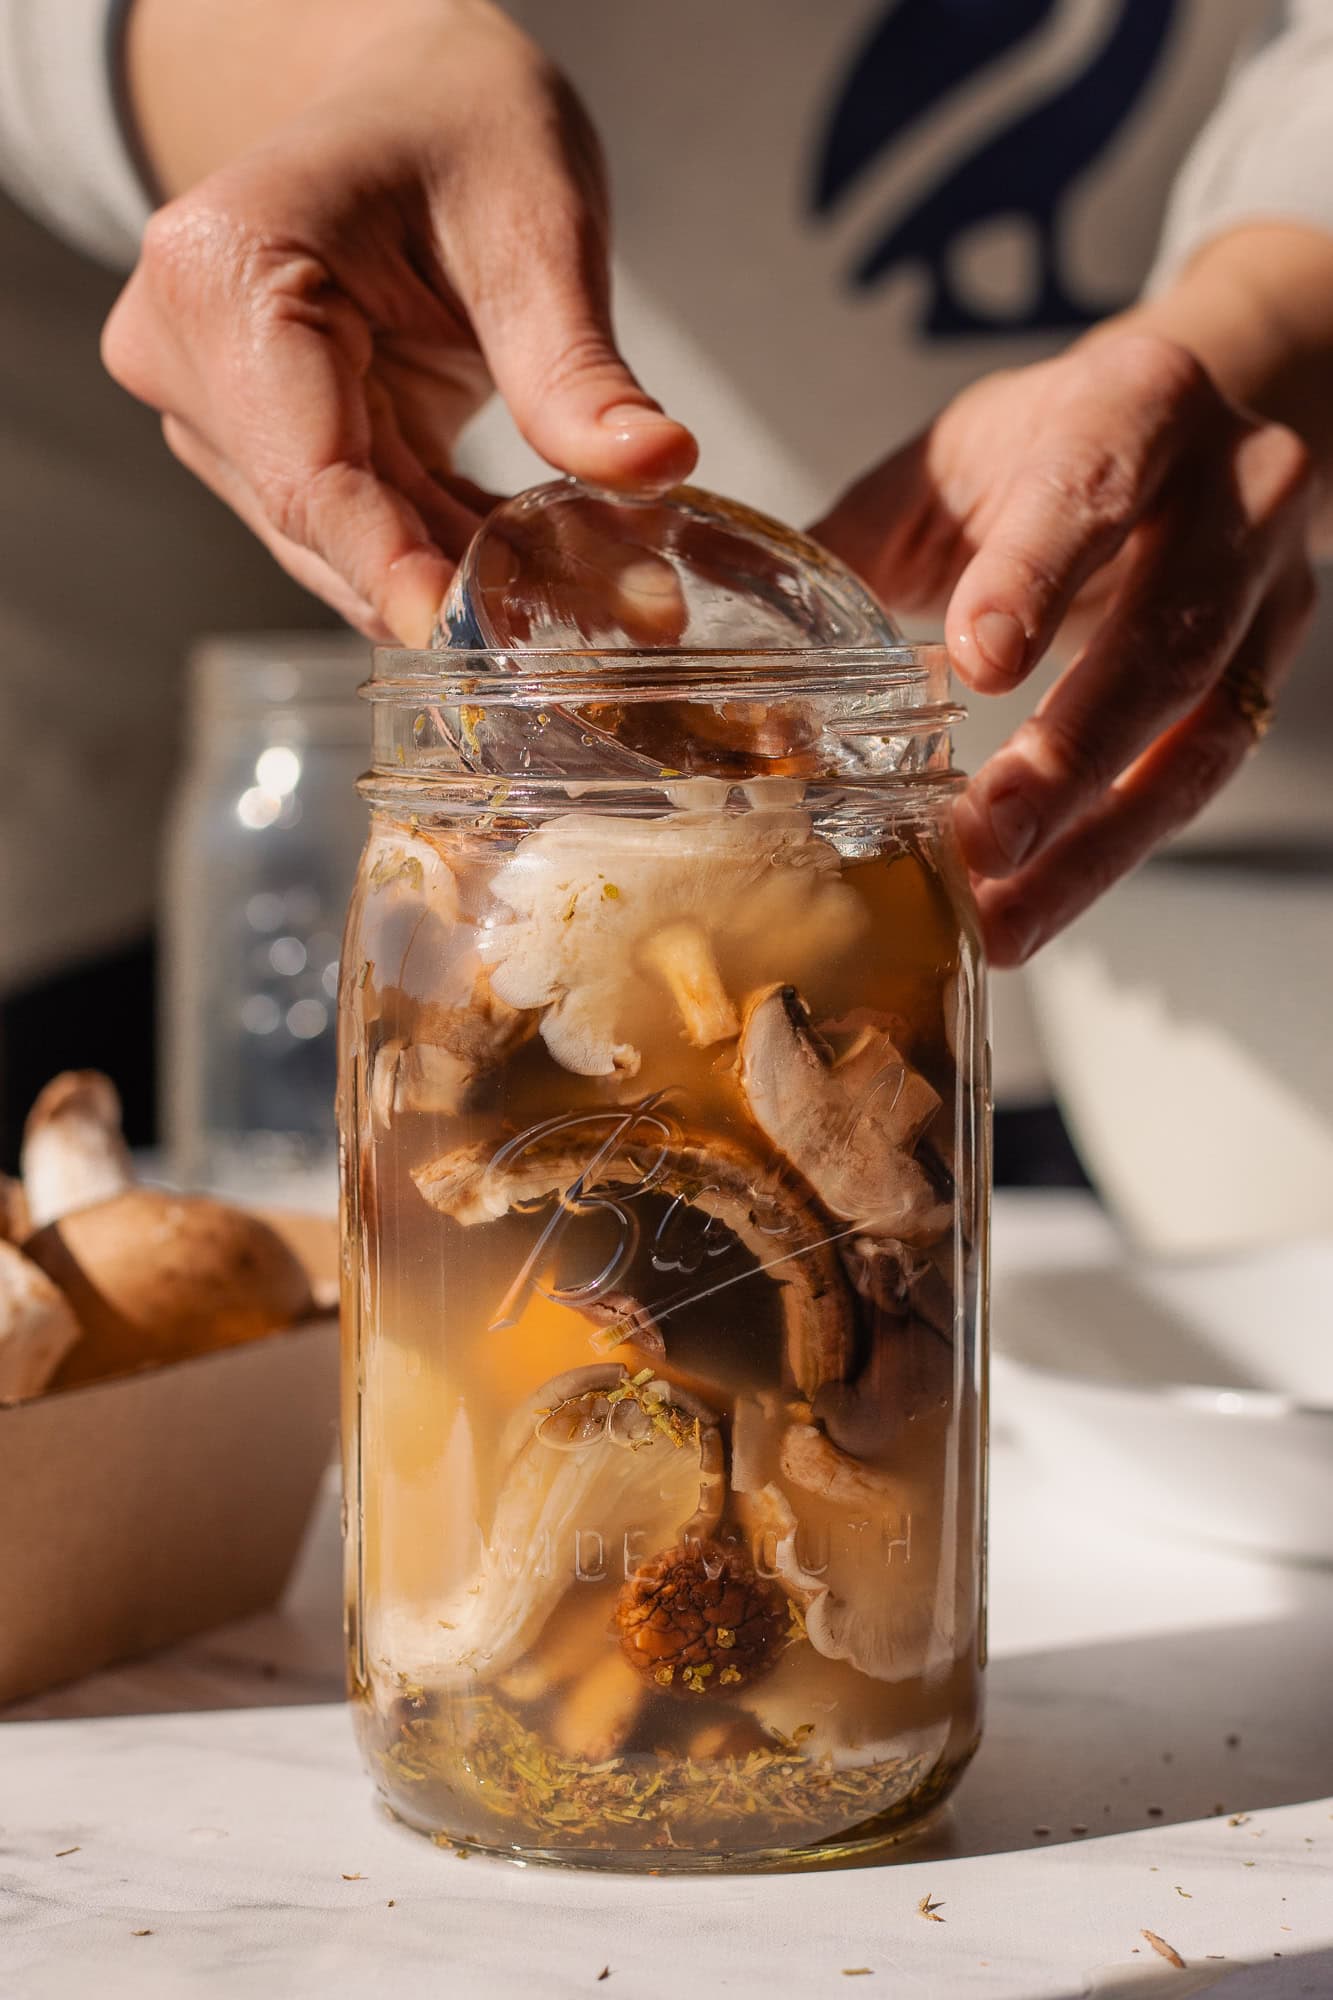

Fermented mushrooms are one of the easiest probiotic foods to make at home, requiring just a few ingredients and a jar. Unlike kombucha or sauerkraut, there’s no special starter culture needed—wild bacteria on the mushroom surface naturally kickstart the fermentation. If you’ve been curious about gut-friendly ferments but intimidated by complex recipes, this garlic and rosemary version is your perfect entry point.
How to Make Fermented Mushrooms with Garlic and Rosemary
This straightforward fermentation takes about a week and yields a tangy, umami-packed condiment perfect for charcuterie boards, pasta, or grain bowls.
Ingredients
- 1.5 pounds fresh mushrooms (cremini, button, or oyster), cleaned and halved
- 4-5 cloves garlic, peeled and sliced
- 3-4 fresh rosemary sprigs (or 1 teaspoon dried)
- 2 tablespoons sea salt or pickling salt
- 2 cups filtered water (chlorine-free)
- 1 clean glass jar with a lid (at least 32 ounces)
Method
Prepare the vegetables
Clean your mushrooms with a damp cloth or soft brush—avoid soaking, as they absorb water easily. Cut larger mushrooms in half and leave smaller ones whole. Slice your garlic thinly. Strip rosemary leaves from woody stems if using fresh herb. Pat everything dry with a clean towel.
Create the brine
Pour filtered water into a bowl and dissolve salt completely, stirring until no crystals remain. This salt solution prevents harmful bacteria while promoting beneficial lactobacillus growth. Set aside at room temperature.
Layer ingredients in jar
Start with a thin layer of mushrooms at the jar bottom, then distribute some garlic slices and rosemary pieces. Continue alternating layers until all ingredients are packed loosely—don’t compress them. The jar should be full but not overflowing.
Pour brine and submerge
Carefully pour your prepared brine over the layered vegetables until everything is covered by at least one inch of liquid. Use a clean weight—a fermentation weight, glass jar, or even a clean cabbage leaf—to keep mushrooms submerged below the brine surface. Submerged vegetables won’t develop mold.
Cover and ferment
Loosely cover your jar with a clean cloth or cheesecloth secured with a rubber band, or use an airlock fermentation lid if available. This allows gases to escape while preventing dust and debris from entering. Place the jar away from direct sunlight at room temperature (68-75 degrees Fahrenheit is ideal).
Monitor fermentation daily
Check your jar daily. You’ll notice bubbles rising within 24-48 hours, and the brine may become slightly cloudy—both signs of active fermentation. Taste a mushroom after day 3 or 4; fermentation is complete when flavors taste pleasantly tangy and complex, usually between days 5-7.
Seal and refrigerate
Once fermentation reaches your preferred flavor intensity, secure the jar with a proper lid and transfer to cold storage. Refrigeration dramatically slows fermentation, preserving your mushrooms for 2-3 months. Cold mushrooms develop deeper flavors over time as fermentation continues slowly.
- Use chlorine-free or filtered water; chlorine can inhibit beneficial bacteria growth and create off-flavors in your ferment.
- Keep mushrooms completely submerged throughout fermentation—any exposure to air creates opportunity for mold growth on the surface.
- Start tasting at day 5; fermentation speed varies by room temperature, so trust your palate over the calendar.
Essential Fermentation Equipment to Consider
- Glass jar with secure lid: A quality fermentation vessel is central to success. Look for jars with airtight lids that still allow gentle gas exchange, typically ranging from 32 to 64 ounces for home fermentation.
- Fermentation weights: Keeping vegetables submerged prevents surface mold. Dedicated weights made from glass or ceramic work better than improvised solutions and last indefinitely.
- Cheesecloth or breathable cover: During active fermentation, a breathable cloth lets gases escape while blocking dust and insects. This is cheaper than airlocks and works just as effectively for mushroom fermentation.
- Quality salt: Sea salt or pickling salt (without additives like iodine) promotes beneficial bacteria while preventing spoilage. Standard table salt can cloud your brine and affect flavor.
Bormioli Rocco Fido 1 Liter Glass Jar with Swing Lid
Best for: Home fermenters seeking reliability and aesthetic appeal
This Italian-made glass jar is the gold standard for home fermentation. The iconic wire-bail closure allows gentle gas exchange while maintaining a good seal, and the thick glass won’t crack from temperature fluctuations. At one liter, it’s perfect for small batches of fermented mushrooms. The clear glass lets you monitor progress without opening, and the timeless design works equally well in a pantry or on a kitchen counter. Food-safe and dishwasher-friendly.
Check Current Price on Amazon →Ball Wide Mouth Quart Mason Jars (Set of 12)
Best for: Beginners and batch fermenters
The classic American choice for food preservation and fermentation. These wide-mouth Mason jars make it easy to pack mushrooms and remove finished ferments without struggle. While traditional canning lids aren’t ideal for fermentation (they seal too tightly), you can use them loosely or pair with cloth covers. At less than a dollar per jar when buying in bulk, they’re economical for experimenting with different recipes and batches.
Check Current Price on Amazon →Mortier Pilon Fermentation Kit with Airlock Lid
Best for: First-time fermenters wanting foolproof results
This Canadian company specializes in fermentation vessels. Their kit includes a 33-ounce jar with a special airlock lid that prevents mold while allowing gas escape—removing guesswork from the process. Comes with clear instructions and a glass weight to keep vegetables submerged. The one-way valve is especially beginner-friendly, virtually eliminating the most common fermentation failure: mold growth from improper air exposure.
Check Current Price on Amazon →Kilner Clip Top Glass Jar with Accessories
Best for: Serious fermenters and food enthusiasts
This premium British brand offers beautifully designed fermentation vessels with all the extras. The 2-liter jar features a clip-top closure and comes bundled with glass weights, a cloth cover, and detailed fermentation guide. The superior glass quality and thoughtful design make this an heirloom piece you’ll use for years. Slightly pricier than alternatives, but the included accessories and elegant aesthetics justify the investment.
Check Current Price on Amazon →Start Your Fermentation Journey Today
Fermented mushrooms with garlic and rosemary represent the easiest entry point into home fermentation. With just salt, water, and time, you’ll create a living food packed with probiotics while developing complex umami flavors that elevate any meal. The process is forgiving, the results are delicious, and once you’ve made your first successful batch, you’ll find yourself experimenting with seasonal variations.
Invest in a quality jar and weights, source good salt, and you’re ready to begin. Within a week, you’ll have a shelf-stable condiment that tastes exponentially better than commercial versions and costs a fraction of the price. The real magic isn’t in expensive equipment—it’s in understanding the simple chemistry of salt, time, and beneficial bacteria working together. Start small, trust the process, and enjoy watching your first jar transform into something genuinely probiotic and delicious.
Frequently Asked Questions
How long do fermented mushrooms last once finished?
Once refrigerated, fermented mushrooms remain safe and delicious for 2-3 months. The cold slows fermentation to a crawl, preserving both the probiotics and flavor. Always keep them submerged in brine and store in a sealed jar away from light.
Can I use different mushroom varieties in one batch?
Yes, mixing mushroom types creates interesting texture and flavor contrasts. Cremini, button, oyster, and shiitake all ferment well together. Just ensure everything is cut to roughly similar sizes for even fermentation.
What does mold look like on fermented mushrooms?
True fermentation mold appears as fuzzy white or colored growth on the surface above the brine. A thin white film on the brine surface is usually kahm yeast, harmless and easily skimmed away. If you see fuzzy growth, discard the batch—it means vegetables weren’t fully submerged.
Do I need a special starter culture for mushroom fermentation?
No. Mushrooms naturally carry beneficial lactobacillus on their surface. Simply submerging them in salt brine triggers fermentation without added cultures, though adding a small amount of existing ferment speeds the process.
Can fermented mushrooms be canned for long-term storage?
Traditional water-bath canning destroys most beneficial probiotics through heat processing. For true probiotic benefits, keep them refrigerated in jars. For shelf-stable storage without probiotics, consult USDA canning guidelines, as fermented foods have specific safety protocols.
As an Amazon Associate, Build & Bloom earns from qualifying purchases. We only recommend products we genuinely think are useful. Prices and availability vary; check Amazon for the latest.
Leave a Reply