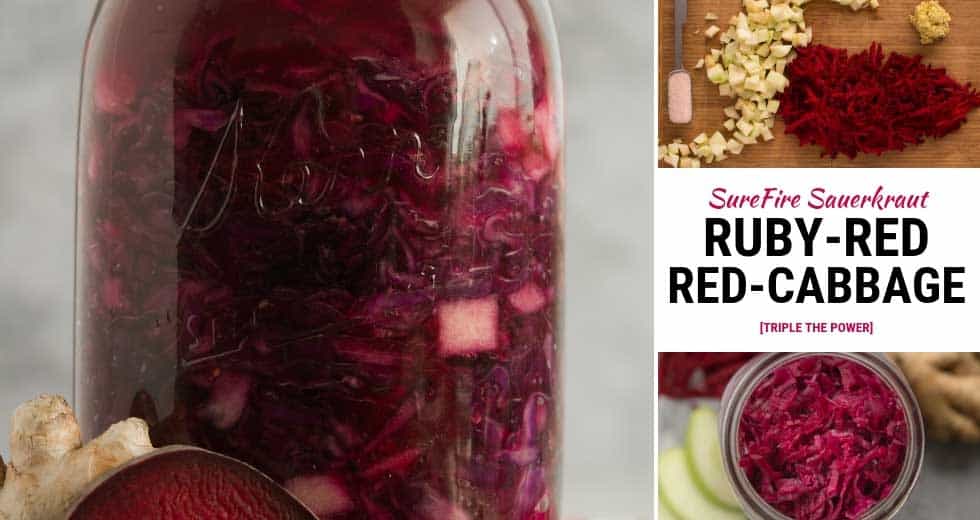

Homemade sauerkraut is one of the easiest ferments to master, and adding ginger and apple creates a naturally sweet, warming version that’s perfect for fall meals and immune support. If you’ve been intimidated by fermentation, this recipe proves how simple the process really is: just cabbage, salt, and time do all the work. In about a week, you’ll have a crunchy, probiotic-rich condiment that costs pennies to make and lasts for months in the fridge.
How to Make Red Cabbage, Ginger & Apple Sauerkraut
This traditional ferment requires minimal equipment and just five ingredients. The salt draws out the cabbage’s natural juices, creating a brine that prevents harmful bacteria while beneficial lactobacillus thrives.
Ingredients
- 1 large head of red cabbage (about 2 pounds), cored and sliced thin
- 1 tablespoon of sea salt or pickling salt per pound of cabbage
- 2 tablespoons of fresh ginger, peeled and minced
- 1 medium apple, peeled, cored, and cut into thin matchsticks
- Filtered or dechlorinated water (if needed for brine)
Method
Prepare and weigh your vegetables
Slice the red cabbage into thin ribbons using a sharp knife or mandoline slicer, discarding the core. Mince the ginger finely and cut the apple into thin matchsticks. Weigh your total cabbage to determine exact salt quantity—you’ll use 2% salt by weight for proper fermentation.
Combine and massage with salt
Place sliced cabbage in a large mixing bowl with the salt, ginger, and apple. Using your hands, massage the vegetables firmly for 5-10 minutes. You’ll notice the cabbage releases liquid and becomes wilted. This brine is essential for fermentation—don’t discard it.
Pack into a clean glass jar
Transfer the cabbage mixture and all released brine into a clean glass jar, pressing down firmly as you layer. The vegetables should be completely submerged in liquid. If the brine doesn’t fully cover the cabbage, top it off with filtered water mixed with a pinch of salt to match your brine strength.
Keep vegetables submerged
Use a fermentation weight, cabbage leaf, or small jar filled with water to hold the vegetables below the brine surface. Vegetables exposed to air can develop mold. Leave at least 1-2 inches of headspace in the jar for carbon dioxide buildup.
Cover loosely and ferment
Place a loose cloth, coffee filter, or specially designed fermentation lid on top of the jar. This allows gas to escape while preventing dust and insects from entering. Set the jar in a cool, dark place (60-75°F is ideal) away from direct sunlight.
Monitor and taste daily
Starting on day 3, open the jar and taste a small piece of cabbage. You’ll notice it becomes more sour and tangy as fermentation progresses. Fermentation typically takes 5-7 days depending on temperature. Warmer kitchens ferment faster than cool basements.
Seal and refrigerate when ready
Once the flavor reaches your preference, seal the jar tightly and move it to the refrigerator. The cold temperature dramatically slows fermentation, preserving your sauerkraut at its peak flavor. It will keep refrigerated for several months.
- If white or gray film (kahm yeast) forms on top, skim it off immediately—it’s harmless but affects flavor. Pink or orange mold means the batch failed and should be discarded.
- Use filtered or boiled-then-cooled water, as chlorine in tap water can inhibit beneficial bacteria. Dechlorinated water works just as well.
- Start with a cooler fermentation location (around 65°F) for slower, more complex flavor development. Quick ferments at 75°F taste tangier faster but with less nuance.
What to Look For in Fermentation Equipment
- Glass jar size and type: A 1-quart or 2-quart wide-mouth glass jar is ideal for sauerkraut fermentation. Wide mouths make packing and removing vegetables easier, while glass is chemically inert and won’t leach substances into your fermenting food. Avoid metal lids that corrode from salt and acid.
- Fermentation weight system: Keeping vegetables submerged is critical for safety and taste. Weights can be glass fermentation weights, ceramic discs, smaller jars filled with water, or even a clean cabbage leaf weighed down with a smaller jar. Any method that keeps vegetables below brine works.
- Salt quality and type: Use sea salt, pickling salt, or kosher salt without anti-caking agents or iodine, which inhibit fermentation. Fine sea salt dissolves evenly, while larger crystals require more stirring. Measure by weight for consistency rather than volume.
- Covering cloth or airlock lid: Fermentation jars need to breathe while staying protected from dust and pests. Use a clean cloth secured with a rubber band, a coffee filter, or invest in a specialized fermentation airlock lid that lets CO2 escape while preventing oxygen and contaminants from entering.
Bormioli Rocco Fido Glass Jar, 2-Quart Wide Mouth
Best for: First-time fermenters and serious enthusiasts
This Italian-made glass jar with a hinged glass lid and rubber gasket is engineered for fermentation. The wide mouth accommodates vegetables easily, and the airtight seal prevents contamination while allowing gas escape when loosened slightly. The durable construction handles years of repeated use, and its clear glass lets you monitor fermentation progress. An investment piece that becomes your go-to vessel for all fermentation projects.
Check Current Price on Amazon →Masontops Fermentation Kit with Airlock Lids
Best for: New fermenters wanting a complete system
This kit includes stainless steel airlock lids that fit standard mason jars (included or separate purchase). The one-way valve design automatically releases fermentation gases while preventing oxygen and contaminants from entering, removing the guesswork about jar coverage. The kit also includes a glass weight and detailed instructions. Perfect for someone who wants equipment that does the thinking for you.
Check Current Price on Amazon →Ball Wide Mouth Mason Jar, 1-Quart (Pack of 4)
Best for: Budget-conscious fermenters making small batches
Standard mason jars are the workhorse of home fermentation. These wide-mouth quart jars cost less than specialty equipment and work perfectly when loosely covered with cloth or a coffee filter. Buy multiple jars to ferment different flavors simultaneously. The transparent glass lets you watch your fermentation progress, and they’re widely available at any grocery or hardware store.
Check Current Price on Amazon →Mortier Pilon Glass Fermentation Jar, 2-Quart with Weights
Best for: Dedicated fermenters valuing design and durability
This Quebec-made glass fermentation vessel features a removable ceramic weight system inside the jar, ensuring vegetables stay submerged without external devices. The wide mouth and volume markings make batch tracking simple. A cloth cover with a drawstring is included. The hand-blown glass and premium construction make this a beautiful, long-lasting tool that transforms fermentation into an intentional kitchen practice.
Check Current Price on Amazon →Start Your Fermentation Journey Today
Red cabbage, ginger, and apple sauerkraut is the perfect entry point into fermentation. The recipe is forgiving, the process is transparent, and the results are delicious and nutritious. You don’t need fancy equipment—even a mason jar with a cloth cover works—but investing in one quality fermentation vessel pays dividends as you explore other ferments like kimchi, pickles, and cultured vegetables. The equipment listed above covers every budget and skill level, from absolute beginner to seasoned fermenter.
The beauty of homemade sauerkraut is that once you master the basic process, you’ll feel confident experimenting with flavors, batch sizes, and fermentation times. Your kitchen will develop its own microbial signature, creating uniquely delicious results that no store-bought version can match. Begin with one batch this week, and within days you’ll taste why fermentation has been a staple of human food preservation for thousands of years.
Frequently Asked Questions
How do I know if my sauerkraut has gone bad versus just developing normal fermentation flavor?
Good fermentation produces a pleasant sour smell and taste, along with white sediment (beneficial bacteria) on the bottom of the jar. Bad batches smell rotten or sulfurous, develop pink, orange, or black mold, or show sliminess. When in doubt, trust your nose—fermentation should smell sour and vegetal, never truly foul.
Can I use iodized table salt for fermentation?
No. Iodine and anti-caking agents inhibit the beneficial bacteria needed for fermentation. Always use sea salt, pickling salt, kosher salt, or himalayan salt without additives. Check the ingredient label to ensure pure salt is the only ingredient listed.
What temperature is best for fermenting sauerkraut?
Ideal fermentation occurs between 60-75°F. Cooler temperatures (60-65°F) produce more complex flavors over 7-10 days, while warmer kitchens (70-75°F) ferment faster in 3-5 days. Avoid temperatures above 80°F, which can create mushy texture and off-flavors.
How long does homemade sauerkraut last in the refrigerator?
Properly fermented and refrigerated sauerkraut lasts 4-6 months or longer. The cold dramatically slows fermentation, preserving flavor and probiotics. Over time it becomes softer and more sour, but it remains safe to eat as long as no mold or strange odors develop.
Do I need to cook sauerkraut to get the health benefits, or does heat kill the probiotics?
Heat does kill beneficial bacteria, so eat sauerkraut raw or add it to warm food at the last moment to preserve probiotics. Cooking sauerkraut (like adding it to hot soups) still provides enzymes and nutrients, but the live bacteria are lost. For maximum probiotic benefit, enjoy it straight from the jar as a condiment.
As an Amazon Associate, Build & Bloom earns from qualifying purchases. We only recommend products we genuinely think are useful. Prices and availability vary; check Amazon for the latest.
Leave a Reply