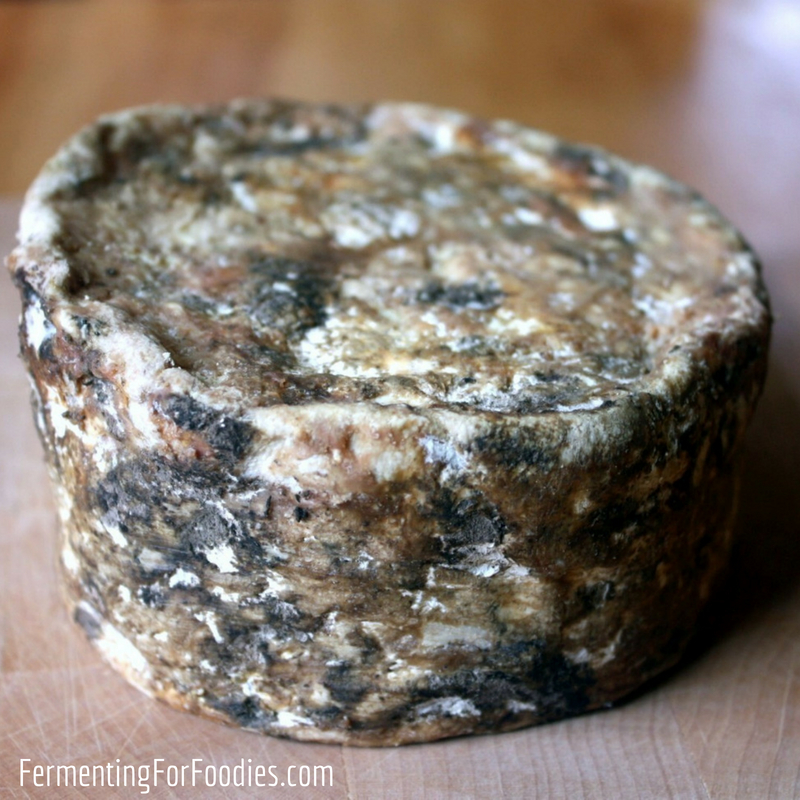

Making soft cheese at home sounds intimidating, but it doesn’t require expensive equipment or years of cheesemaking experience. With just fresh milk, a few kitchen staples you likely already own, and patience, you can create creamy, tangy farmhouse cheese that tastes infinitely better than commercial versions. This method bypasses the need for special molds, cheesecloth presses, or fancy cultures–just simple fermentation and gentle handling.
How to Make Farmhouse Soft Cheese
This recipe creates a mild, spreadable cheese with a slightly tangy flavor in about 24-48 hours. The process is forgiving and relies on temperature control and time rather than precision.
Ingredients
- 1 gallon of whole milk (cow, goat, or sheep milk works)
- 1/4 teaspoon liquid rennet diluted in 1/4 cup cool non-chlorinated water
- 1/2 teaspoon salt, plus more for finishing
- 1/8 teaspoon mesophilic culture powder (optional but helpful)
- Non-iodized salt for brining or finishing
Method
Heat the milk slowly
Pour milk into a large pot and heat to 86°F, stirring occasionally to ensure even temperature. This gentle warmth activates the milk proteins without damaging them. Use a reliable thermometer to monitor progress–this is the one step where precision matters.
Add culture and let rest
Sprinkle mesophilic culture over the surface and let it hydrate for 2 minutes without stirring. Then stir gently for 1 minute to distribute evenly. Cover and let sit at room temperature for 30 minutes while the culture begins its work.
Add rennet and create curds
Pour your diluted rennet into the milk using an up-and-down motion to distribute it throughout. Stir gently for 1 minute, then stop and let the pot rest undisturbed for 30-40 minutes. You’ll notice the milk beginning to thicken and separate into curds and whey.
Cut the curds gently
Using a long knife, cut through the curds in vertical lines, then at angles, then horizontally, creating roughly pea-sized pieces. Work slowly and let the knife do the work rather than forcing it. Let the cut curds rest for 5 minutes.
Raise temperature gradually
Slowly increase the temperature to 90°F over 15 minutes while stirring gently. This firms the curds further. Once you reach 90°F, maintain that temperature for another 30 minutes, stirring occasionally.
Drain whey and collect curds
Line a colander with cheesecloth or a clean kitchen towel and carefully pour the curds and whey through it. Save the whey–you’ll use it next. Gather the cloth corners and hang to drain for 8-12 hours at room temperature, allowing gravity to do most of the work.
Season and store
Transfer drained curds to a bowl and gently fold in salt to taste. Pack into a clean jar and cover with the reserved whey (or a salt brine) to keep it moist and fresh. Refrigerate for up to two weeks.
- Non-chlorinated water matters: chlorine can interfere with rennet’s coagulation. Use filtered or bottled water if your tap water is heavily chlorinated.
- Keep a log of temperatures and times during your first batch. Once you understand how your kitchen environment affects the process, you can adjust timing for consistency.
- Save your whey in a separate jar–it’s useful for future batches, fermented vegetables, and can even be used in baking for added nutrition.
What to Look For in Cheesemaking Equipment
- Thermometer accuracy and readability: A reliable thermometer is non-negotiable for cheesemaking success. Look for instant-read options that display clearly and maintain calibration over time, as temperature precision directly affects curd formation and final texture.
- Pot size and heat distribution: A heavy-bottomed pot with at least 2-gallon capacity prevents hot spots and scorching. Stainless steel or enameled cast iron distributes heat evenly, which is critical for maintaining stable temperatures throughout the process.
- Cheesecloth quality and weave: Fine-weave cheesecloth allows whey to drain while containing small curd particles. Avoid ultra-thin disposable versions that tear easily; invest in sturdy cloth that can be rinsed and reused for multiple batches.
- Culture and rennet source reliability: Fresher cultures produce more consistent results. Purchase from suppliers with high turnover and proper cold storage. Check expiration dates and storage instructions carefully, as viability decreases over time.
ThermoPro Digital Instant-Read Meat Thermometer
Best for: Home cheesemakers who need accuracy
The ThermoPro TempSpike offers fast, reliable temperature readings with a large backlit display visible from across the kitchen. Its waterproof design and durable stainless steel probe make it ideal for repeated use in cheesemaking. The wide temperature range handles everything from cold milk to hot whey, and the response time is quick enough to catch temperature changes as you heat the pot. This thermometer eliminates guesswork from the critical heating stage.
Check Current Price on Amazon →Calphalon Contemporary Stainless Steel 8-Quart Stock Pot
Best for: First-time cheesemakers
This 8-quart capacity pot provides ample room for one-gallon cheese batches with space for even heat distribution. The stainless steel construction resists staining from cultures and rennet, while the flat bottom sits securely on most stovetops. The large handles and pour spout make transferring curds and whey manageable. At an accessible price point, it’s perfect for testing your cheesemaking commitment without significant investment.
Check Current Price on Amazon →Regenstein’s Butter Muslin Cloth
Best for: Serious home cheesemakers
This genuine butter muslin is superior to disposable cheesecloth for repeated use. The tight weave contains fine curds while allowing efficient whey drainage, and the cotton construction is sturdy enough for multiple batches without tearing. Each package contains several yards, providing material for dozens of cheesemaking sessions. The durability and reusability make this the most economical long-term choice for your cheesemaking setup.
Check Current Price on Amazon →Demeyere Atlantis Stainless Steel 12-Quart Stockpot
Best for: Experienced cheesemakers scaling up
The Demeyere Atlantis pot features a tri-ply base that distributes heat evenly across the bottom surface, minimizing hot spots that can damage delicate curds. Its 12-quart capacity accommodates multiple batches or larger single batches. The polished exterior looks professional, while the stainless steel interior resists discoloration from repeated acid contact. This pot is a lifetime investment for serious fermentation and cheesemaking work.
Check Current Price on Amazon →Start Your Cheesemaking Journey Today
Making farmhouse soft cheese at home is far simpler than most people imagine. You don’t need a commercial kitchen, expensive equipment, or years of training–just fresh milk, a reliable thermometer, a good pot, and patience. The first batch might not be perfect, but it will teach you how your specific kitchen environment, milk source, and stove behave. Each subsequent batch becomes easier as you develop intuition for the process.
Invest in quality fundamentals: a precise thermometer that you’ll trust with your batches, a heavy-bottomed pot that distributes heat evenly, and good cheesecloth that won’t disintegrate mid-draining. These three items form the foundation of successful cheesemaking. Start with the simplest recipe using standard cultures and rennet, master the timing and temperature control, then experiment with variations like adding herbs, adjusting salt levels, or using different milk sources. Within a few months of monthly batches, you’ll be producing cheese that tastes noticeably better than store-bought versions at a fraction of the cost.
Frequently Asked Questions
Can I use ultra-pasteurized milk for cheesemaking?
Ultra-pasteurized milk is problematic because the high-heat treatment damages the protein structures that form curds. Use regular pasteurized milk or, ideally, raw milk for best results. Check the label carefully–many organic and premium milks are ultra-pasteurized even if not labeled as such.
What if my curds won’t form or they’re too soft?
Soft curds usually indicate the milk temperature dropped too much or the rennet was inactive. Ensure water is non-chlorinated and keep the milk at the specified temperature. If curds won’t form at all, your milk may be ultra-pasteurized, or the rennet may be expired–always check dates and storage conditions.
How long can I store finished farmhouse soft cheese?
When submerged in whey or brine and refrigerated, farmhouse soft cheese keeps for 2-3 weeks. If the surface develops mold or the smell becomes unpleasant, discard it. Always store in clean glass jars and keep the surface covered with liquid to prevent drying.
Do I really need mesophilic culture, or can I skip it?
Culture isn’t technically required if you’re willing to wait longer and accept more variable results. The culture accelerates the fermentation process and produces more consistent tang. For beginners, including culture makes the process more predictable and successful on your first attempts.
What’s the difference between mesophilic and thermophilic culture?
Mesophilic cultures thrive at lower temperatures (around 86-90°F) and produce milder, creamier cheeses. Thermophilic cultures require higher temperatures (above 100°F) and create firmer, tangier cheeses. For soft farmhouse cheese, mesophilic is the right choice and easier to manage in a home kitchen.
As an Amazon Associate, Build & Bloom earns from qualifying purchases. We only recommend products we genuinely think are useful. Prices and availability vary; check Amazon for the latest.
Leave a Reply