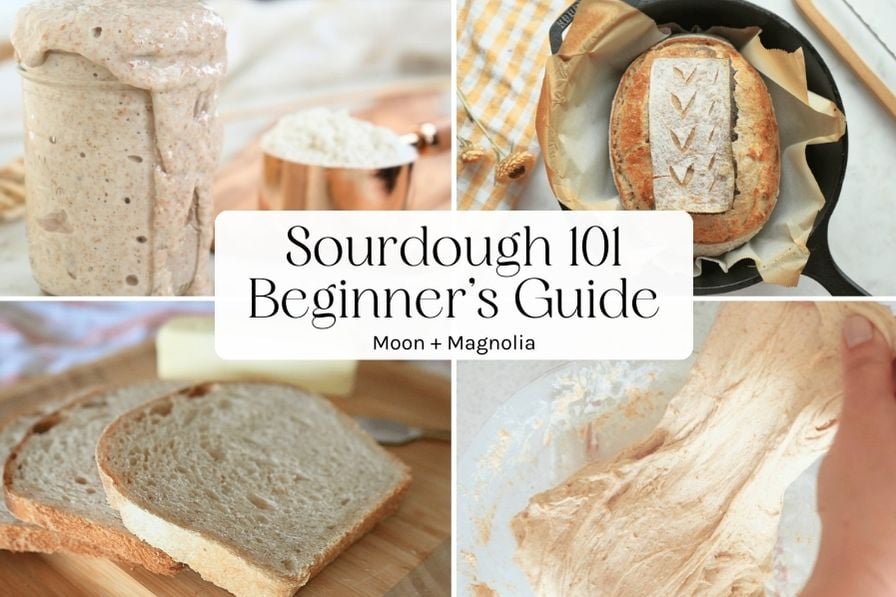

You’ve seen beautiful sourdough loaves online and want to try baking one, but the process seems intimidating with unfamiliar terms like ‘starter,’ ‘autolyse,’ and ‘bulk fermentation.’ The truth is that sourdough isn’t difficult once you understand the core concepts driving the process. Unlike regular bread that relies on commercial yeast packets, sourdough uses a living culture of wild yeast and beneficial bacteria to slowly ferment your dough, creating complex flavor and an open crumb structure. Let’s break down the essential principles so you can start baking with confidence.
The Five Core Concepts of Sourdough Baking
Sourdough mastery begins with understanding these foundational principles. Each one plays a critical role in transforming flour, water, and salt into exceptional bread.
Key Concepts
- A sourdough starter – a living culture of wild yeast and lactic acid bacteria maintained by regular feeding with flour and water
- Fermentation temperature – the ambient warmth that controls how quickly or slowly your dough develops flavor and rises
- Hydration ratio – the percentage of water relative to flour, typically 75-85% for sourdough, affecting dough texture and crumb structure
- Time management – the scheduling of your mixing, bulk fermentation, shaping, and final proof stages across 24-48 hours
- Gluten development – the network of protein strands created through mixing and stretching that gives bread its structure and chew
Principles
1. Build and Maintain Your Starter
Your sourdough starter is a living culture that ferments your bread. Begin by mixing equal parts flour and water in a jar, then feed it daily by discarding half and adding fresh flour and water. After 5-10 days, it will become bubbly and develop a pleasant tangy smell, indicating active wild yeast and bacteria. Once mature, you can refrigerate it between uses and feed it weekly, or leave it on the counter and feed it daily. This culture replaces commercial yeast entirely.
2. Understand Hydration and Its Effects
Sourdough dough uses significantly more water than sandwich bread, typically 75-85% hydration (meaning 75-85 grams of water per 100 grams of flour). Higher hydration creates open, irregular crumb holes and lighter texture, while lower hydration produces tighter crumb. Beginners should start at 75% and increase once comfortable handling wetter dough. The ratio determines not just final texture but also how sticky your dough feels during mixing and shaping.
3. Master the Bulk Fermentation Phase
After mixing dough with your active starter, it enters bulk fermentation, typically lasting 4-6 hours at room temperature. During this phase, yeast produces gas bubbles and bacteria create lactic acids that develop flavor. You’ll perform 4-5 ‘stretch and fold’ motions during the first two hours to build gluten without intensive kneading. Room temperature is critical: warmer kitchens ferment faster (3-4 hours), cooler ones slower (6-8 hours). Watch for visual cues like a 50% volume increase and visible bubbles rather than following exact times.
4. Shape and Cold Proof for Flavor Development
After bulk fermentation, shape your dough gently into a round or oval, then place it in a banneton or bowl lined with a floured cloth. Most sourdough benefits from a cold overnight proof in the refrigerator (8-16 hours) rather than a quick room-temperature final rise. Cold fermentation slows yeast activity while allowing bacteria to develop deeper flavor compounds, creating the tangy complexity sourdough is known for. This step also makes the dough easier to score before baking.
5. Score and Bake with Steam
Before baking, use a sharp blade to score your dough with a confident slash or pattern, controlling where the bread expands and creating an attractive crust. Bake in a preheated heavy pot or covered baking vessel that traps steam, which keeps the crust flexible during the first 20 minutes of baking and creates a crispy exterior. Total bake time is typically 45-50 minutes at 450-500 degrees Fahrenheit. The internal temperature should reach 205-210 degrees Fahrenheit when done.
- Use the float test to check starter readiness: drop a spoonful of starter in water – if it floats, it’s active and ready to bake with.
- Keep a simple log of your fermentation times and temperature during your first 5-10 loaves so you can dial in the schedule for your kitchen’s specific conditions.
- Invest in a Dutch oven or covered baking vessel early – the trapped steam it creates makes the difference between a thick, tough crust and a thin, crispy, bakery-quality one.
Essential Equipment for Sourdough Success
- Dutch Oven or Covered Baker: Traps steam during the critical first bake phase, creating a thin crispy crust instead of a dense thick one. Essential for authentic sourdough texture.
- Kitchen Scale: Sourdough requires precise flour and water ratios to control hydration and fermentation. Volume measurements lead to inconsistent results.
- Banneton Proofing Basket: Supports shaped dough during cold overnight fermentation, preventing spreading and creating definition. Also makes scoring and transferring easier.
- Bread Lame or Scoring Blade: Creates intentional cuts that control expansion and crust development. A sharp blade prevents dragging and tearing the dough surface.
Lodge Cast Iron Dutch Oven, 5.5 Quart
Best for: Every sourdough baker who wants reliable, lifetime-lasting steam trapping
Lodge’s cast iron Dutch oven is the gold standard for sourdough baking. The 5.5-quart capacity accommodates full-sized loaves, while cast iron’s superior heat retention and steam-trapping properties create that signature crispy, thin crust with interior oven spring. Pre-seasoned and ready to use, it heats evenly and maintains temperature throughout the bake. The tight-fitting lid seals in moisture perfectly. This heirloom-quality piece will outlast your sourdough career.
Check Current Price on Amazon →Ozeri Precision Digital Kitchen Scale
Best for: Beginners wanting accurate measurements without breaking the bank
Accurate to 0.1 ounces and 1 gram, the Ozeri scale handles everything from starter feeding to final dough weights. The compact design fits any kitchen counter, and the removable bowl makes cleanup easy. It reads in ounces, grams, and pounds, letting you work with recipes in any measurement system. At under 25 dollars, it eliminates the guesswork from hydration ratios and gives you the consistency that turns beginner loaves into excellent ones.
Check Current Price on Amazon →Banneton Proofing Basket by Bread & Bake
Best for: Novice bakers who need a user-friendly, forgiving banneton
This round banneton comes in a 9-inch size perfect for 1-pound loaves, with proper depth to support dough during cold proofing without risk of collapse. The natural rattan construction breathes properly and releases dough easily, crucial for beginners still learning handling techniques. It includes a cloth liner and linen cover, protecting your dough from drafts. The affordable price point means you can try this essential tool without significant investment while learning proper shaping technique.
Check Current Price on Amazon →Lame Bread Scoring Tool by Artisan Sourdough
Best for: Bakers who want confident, clean scoring with minimal learning curve
This stainless steel bread lame features a sharp blade holder positioned at the ideal angle for scoring loaves without dragging or tearing dough. The ergonomic handle provides control and reduces hand fatigue. It comes with extra replacement blades, so you always have a sharp blade ready. The laser-sharp edge creates clean openings that expand into beautiful ears, transforming the visual appeal and crust development of your loaves.
Check Current Price on Amazon →Start Your Sourdough Journey Today
Sourdough baking isn’t mysterious once you understand the core principles: building a living starter, controlling fermentation through temperature and time, managing hydration to achieve your desired crumb, and trapping steam to develop a beautiful crust. These fundamentals remain constant whether you’re baking your first loaf or your hundredth. Begin with a reliable Dutch oven and kitchen scale – these two tools eliminate 90 percent of sourdough frustration by controlling steam and enabling precise ratios.
Your first loaf won’t be perfect, and that’s perfectly normal. Sourdough teaches through small adjustments: slightly longer fermentation, a degree warmer temperature, a longer cold proof. Each loaf teaches you about your kitchen’s rhythm and your starter’s personality. Keep notes, stay curious, and in three to six months, you’ll be producing loaves that rival your local bakery. The deep satisfaction of pulling open a warm sourdough loaf with a gorgeous ear, shattering crust, and tangy complex flavor you created entirely by hand makes every early attempt worthwhile.
Frequently Asked Questions
How long does it take to create a sourdough starter from scratch?
A mature, active starter typically takes 5-10 days to develop from flour and water. You’ll feed it daily until it doubles in size within 4-8 hours and smells pleasantly tangy. Patience in this phase pays off with a reliable culture that lasts for years or decades.
Can I skip the cold overnight proof and bake my sourdough the same day?
You can do a same-day bake with a room-temperature final proof (2-4 hours), but you’ll sacrifice the complex tangy flavor that develops during cold fermentation. Most sourdough bakers embrace the overnight proofing schedule because the deeper flavor is worth the wait.
Why do sourdough loaves sometimes collapse or spread too much?
Overfermentation (too much bulk time or too warm temperatures) makes dough too weak to hold structure. Underhydration can make dough difficult to shape properly. Using a scale to verify hydration ratios and watching for visual fermentation cues rather than clock times helps prevent both issues.
What’s the difference between a Dutch oven and a covered baking stone for sourdough?
A Dutch oven traps steam directly around the dough with a sealed lid, while covered baking stones are less effective at steam retention. Dutch ovens provide superior crust development and are the preferred choice for most sourdough bakers.
How do I know when my sourdough is fully baked?
The most reliable indicator is internal temperature – aim for 205-210 degrees Fahrenheit at the loaf’s center using an instant-read thermometer. The crust should be deep golden brown and sound hollow when tapped on the bottom.
As an Amazon Associate, Build & Bloom earns from qualifying purchases. We only recommend products we genuinely think are useful. Prices and availability vary; check Amazon for the latest.
Leave a Reply