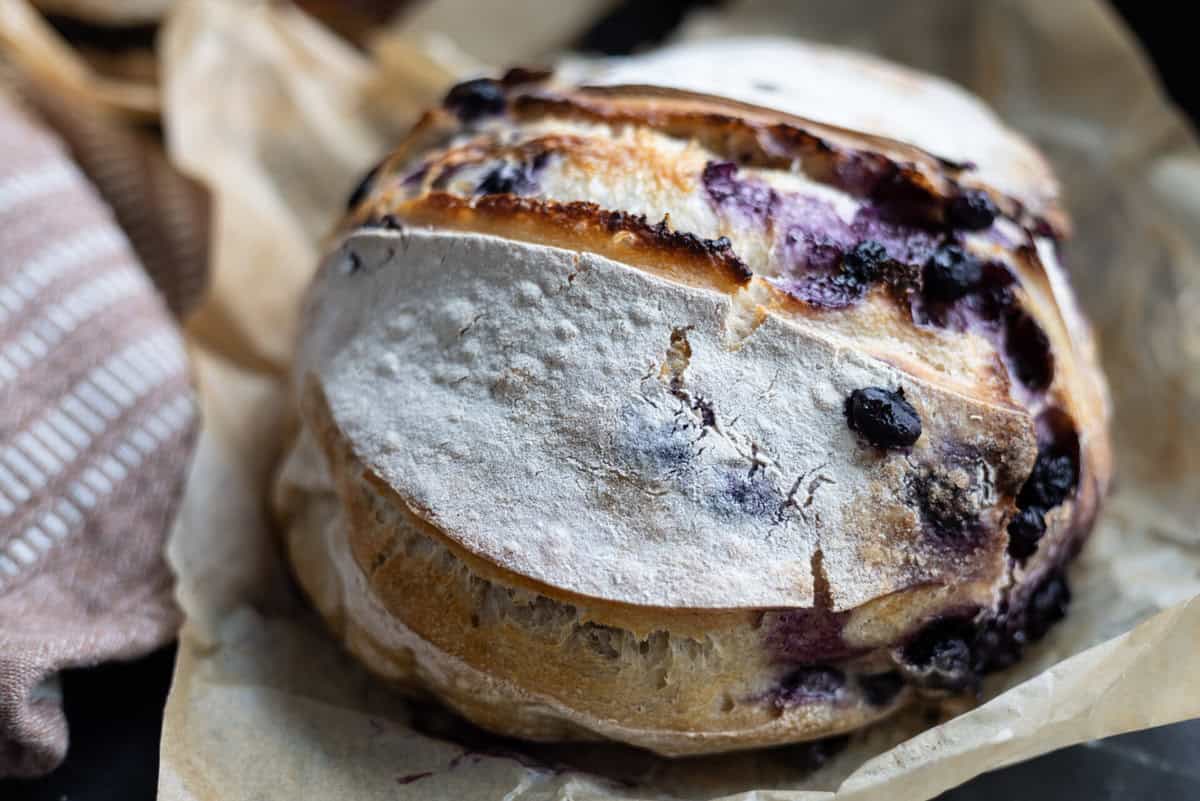

Sourdough baking intimidates many home bakers, but blueberry lemon bread is one of the most forgiving recipes to start with. The fruit adds moisture, the lemon brightens the tangy sourdough flavor, and the long fermentation does most of the work for you. If you’ve been curious about sourdough but worried it’s too complicated, this recipe proves that spectacular homemade bread is absolutely within reach.
How to Make Sourdough Blueberry Lemon Bread
This recipe relies on a slow fermentation process that develops flavor naturally. Plan for about 18-24 hours of mostly hands-off time, with only 15 minutes of active work spread across the day.
Ingredients
- 1 cup active sourdough starter (fed 4-8 hours prior, bubbly and at peak)
- 1.5 cups warm water
- 3.5 cups all-purpose or bread flour
- 1.5 teaspoons salt
- Zest of 2 lemons
- 1.5 cups fresh or frozen blueberries (toss in 1 tablespoon flour if frozen)
Method
Mix dough base
Combine your active starter, warm water, and flour in a large mixing bowl. Stir until there are no dry pockets of flour remaining. This is your autolyse stage. Let it rest for 30 minutes to 1 hour, allowing the flour to fully hydrate. This resting period develops better gluten structure naturally without kneading.
Incorporate salt and lemon
Sprinkle salt and lemon zest over the rested dough. Using wet hands or a dough scraper, fold and squeeze the dough to integrate the salt and zest evenly. Work for about 5 minutes until fully combined. The dough will be sticky and that’s correct. Resist the urge to add more flour.
Execute the bulk fermentation
Cover the bowl loosely and let it sit at room temperature (68-75 degrees Fahrenheit ideally) for 4-5 hours. During this time, perform 4 sets of stretch-and-folds at 30-minute intervals: wet your hand, grab the side of the dough, stretch it up and fold it over itself, rotate the bowl, repeat. This builds strength without aggressive kneading.
Add blueberries and continue fermentation
After the final stretch-and-fold (around hour 4-5), gently fold in your floured blueberries, trying not to break them. Return the dough to its covered bowl and let it ferment for another 2-4 hours until it appears puffy and jiggles slightly when you tap the bowl. The dough shouldn’t quite double, but should noticeably rise.
Shape the dough
Turn the dough onto a lightly floured surface. Gently shape it into a round or oval by folding the edges toward the center, creating surface tension. Work carefully to avoid deflating all the gas bubbles. Place it seam-side up in a floured banneton (proofing basket) or a bowl lined with a floured kitchen towel.
Cold retard overnight
Cover your shaped dough and refrigerate it for 8-16 hours. This slow, cold fermentation develops complex sour flavor and makes the dough easier to score. You can skip this step and do a 2-4 hour room temperature proof, but the cold fermentation produces superior results.
Preheat and prepare
About 30 minutes before baking, place a covered Dutch oven in your oven and preheat to 500 degrees Fahrenheit. The heavy vessel traps steam, creating that crispy crust and open crumb structure that defines artisan bread. Safety note: use thick oven mitts when handling.
Score and bake
Carefully turn your cold dough onto parchment paper. Using a sharp knife or bread lame, score the top with a 1/4-inch deep slash at a 45-degree angle. Transfer to your preheated Dutch oven, cover, and bake 20 minutes at 500 degrees. Remove the lid, reduce heat to 450 degrees, and bake 25-30 minutes more until deep golden brown. Cool completely on a rack before slicing, at least 1 hour.
- If your kitchen is cold, proof your dough in an oven with just the light on, or in a turned-off oven with a bowl of warm water nearby. Temperature control is more important than exact timing.
- Fresh blueberries work beautifully, but frozen unsweetened blueberries are equally good and often less expensive. Toss them in a bit of flour so they don’t sink to the bottom during fermentation.
- Don’t skip the Dutch oven. It’s essential for steam retention. If you don’t own one, you can create a makeshift steam environment by placing a pan of boiling water on the oven floor and baking the bread on a preheated baking stone, but results won’t be identical.
What to Look For in Sourdough Baking Equipment
- Dutch Oven Size and Material: Look for a 5.5- to 7-quart capacity made from enameled cast iron, which handles high heat and retains it evenly. The enamel coating prevents rust and staining from acidic dough. Weight matters too: heavier Dutch ovens distribute heat more consistently and are worth the investment.
- Banneton or Proofing Basket: Choose a round or oval banneton made from rattan or cane, sized to fit your shaped dough with a little room to spare. The basket prevents sticking and creates beautiful ridge patterns on the finished loaf. Food-grade linen liners reduce sticking even further.
- Scoring Tool or Bread Lame: A sharp blade designed specifically for bread scoring creates clean, controlled slashes that guide oven spring. Dull knives tear and compress dough, preventing proper expansion. Stainless steel lames are affordable and last years with proper care.
- Kitchen Scale Accuracy: Sourdough relies on precise hydration ratios for consistency. Choose a digital scale that measures in both grams and ounces, has a tare function, and reads increments of 1 gram or smaller. This removes guesswork from ingredient measurements.
Le Creuset 5.5-Quart Round Enameled Cast Iron Dutch Oven
Best for: Serious sourdough bakers seeking professional results
The gold standard for bread baking. Le Creuset’s enameled cast iron Dutch oven distributes heat evenly, retains steam perfectly, and lasts decades. The 5.5-quart capacity fits most artisan loaves comfortably. Enamel coating in vibrant colors won’t rust or crack. Heavy construction (6.6 lbs) ensures consistent results every time. While premium-priced, this is a one-time investment that becomes a kitchen heirloom.
Check Current Price on Amazon →Tramontina 5.5-Quart Enameled Cast Iron Dutch Oven
Best for: Budget-conscious bakers wanting reliable performance
Tramontina delivers excellent value without sacrificing quality. This 5.5-quart enameled cast iron Dutch oven performs nearly identically to premium brands at half the price. The enamel coating is durable, colors are attractive, and heat retention rivals more expensive options. Perfect for sourdough beginners who want to invest in quality without breaking the bank. Many experienced bakers keep one as their workhorse.
Check Current Price on Amazon →Staub 5.5-Quart Round Cocotte Dutch Oven
Best for: Professional bakers and design-conscious home cooks
Staub’s black matte enamel and distinctive lid knob make this Dutch oven instantly recognizable. Superior heat distribution comes from extra-thick walls and a sand-finished interior enamel that catches moisture beautifully. The 5.5-quart capacity is ideal for standard artisan loaves. Staub combines professional performance with elegant design, making it a showstopper whether on the stovetop or table.
Check Current Price on Amazon →AmazonBasics 5-Quart Enameled Cast Iron Dutch Oven
Best for: First-time bread bakers testing their process
AmazonBasics removes the intimidation factor with affordable, functional equipment. This 5-quart Dutch oven performs the essential job of trapping steam during baking. The enamel coating is adequate for occasional use, and replacement cost is minimal if you decide sourdough isn’t your path. Great for learning before upgrading to premium equipment.
Check Current Price on Amazon →Banneton Proofing Basket 10-Inch Round by Artisan Cask
Best for: Home bakers seeking attractive ridge patterns and consistent results
This 10-inch round banneton is sized perfectly for standard sourdough loaves. Hand-woven from natural rattan with a removable linen liner, it prevents sticking while creating those beautiful flour-dusted ridge patterns on your finished loaf. The deep walls support your dough during cold fermentation. Quality construction means it withstands years of regular use without fraying or warping.
Check Current Price on Amazon →Hario V60 Dough Scraper and Bread Lame Set
Best for: Bakers wanting multi-purpose tools at reasonable cost
This two-in-one set includes a dough scraper for mixing and a sharp bread lame for scoring. The scraper features a comfortable grip and sharp edges for dividing dough and shaping. The lame blade is stainless steel and holds its edge through dozens of scoring sessions. At under 20 dollars, this set represents excellent value for essential bread-baking tools.
Check Current Price on Amazon →Escali Primo Precision Digital Kitchen Scale
Best for: Home bakers who measure all ingredients by weight
The Escali Primo offers professional accuracy in a compact footprint. It reads weights from 0.05 ounces to 11 pounds, covers both grams and ounces, and has a convenient tare function to zero out container weight. The stainless steel platform is easy to clean, and the bright LCD display reads clearly. Perfect for precise sourdough recipes where hydration ratios determine success.
Check Current Price on Amazon →OXO Good Grips 5-Cup Measuring Mixer Bowl
Best for: Space-limited bakers needing a multitasking mixing vessel
This 5-cup mixing bowl combines measuring marks, a pouring spout, and comfortable handles all in one compact design. The soft-grip handles stay comfortable during dough mixing sessions, and the graduated measurements let you track bulk fermentation visually without transferring to another container. Durable plastic resists cracking and is easy to clean.
Check Current Price on Amazon →Start Your Sourdough Journey This Week
Sourdough blueberry lemon bread proves that artisan baking isn’t reserved for professionals or people with inherited family starters. A simple active culture, quality equipment, and patience create extraordinary bread right in your own kitchen. The process seems long, but most of it is waiting while fermentation works its magic. Start your batch in the morning, do a few stretches throughout the day, refrigerate overnight, and bake fresh bread the next afternoon. Your family will be amazed.
The investment in a good Dutch oven is the single most important decision. Everything else in this recipe works around that vessel’s ability to trap steam and create the distinctive crust and open crumb structure that defines sourdough. Once you nail this recipe, you’ll have the confidence to experiment with different fruits, seeds, and flavor combinations. Welcome to the sourdough community.
Frequently Asked Questions
Can I use frozen blueberries instead of fresh?
Yes, frozen blueberries work beautifully and are often cheaper. Toss them in a tablespoon of flour before folding into the dough to prevent them from sinking to the bottom. Keep them frozen until the moment you incorporate them into the dough.
What if I don’t have a Dutch oven?
You can bake on a preheated baking stone or steel with a pan of boiling water on the oven floor to create steam, but your crust won’t be as crispy. Alternatively, cover your loaf loosely with aluminum foil for the first 20 minutes to trap some moisture, though results won’t match a Dutch oven.
How do I know when my sourdough starter is ready to use?
Your starter should be active, bubbly, and at least doubled in volume 4-8 hours after feeding. It should smell pleasantly sour and have a creamy texture with visible bubbles. If it’s sluggish, feed it once more and wait before using.
Can I skip the cold retard overnight?
Yes, you can do a 2-4 hour room temperature bulk fermentation instead. However, the cold retard improves flavor significantly by allowing slow fermentation and gives you flexibility in baking schedule. It’s worth the extra time if possible.
Why does my bread have a gummy interior despite looking done outside?
This usually means underbaking or cooling too quickly. Always bake until deep golden brown (30+ minutes after uncovering), and cool completely on a rack for at least 1 hour before slicing. Slicing early traps steam inside, creating a gummy texture.
As an Amazon Associate, Build & Bloom earns from qualifying purchases. We only recommend products we genuinely think are useful. Prices and availability vary; check Amazon for the latest.
Leave a Reply