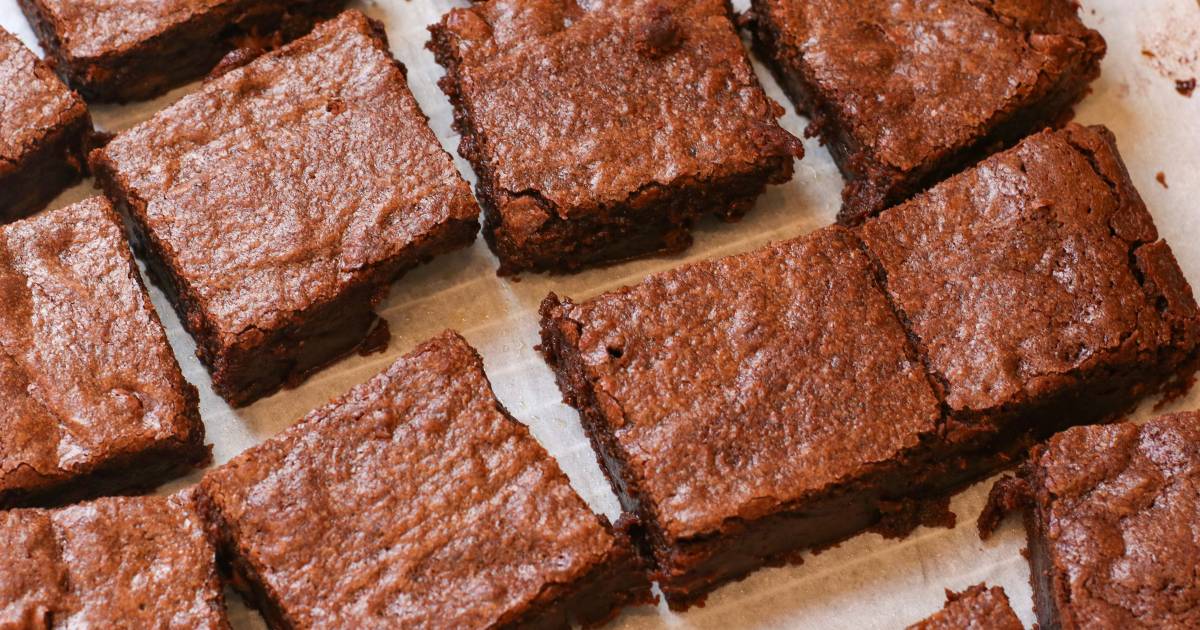

If you’ve got an active sourdough starter, you already have the secret ingredient for incredible brownies. Sourdough starter adds moisture, tang, and a subtle complexity that elevates ordinary brownies into something special. Plus, it’s a fantastic way to use your starter between baking days. Let’s walk through the process of transforming cocoa powder, butter, and eggs into a batch of irresistibly fudgy sourdough brownies.
How to Make Sourdough Brownies
These sourdough brownies combine the rich decadence of chocolate with the unique tang sourdough starter brings to baking. The process is straightforward and uses pantry staples most home bakers already have on hand.
Ingredients
- 1 cup active sourdough starter, fed and bubbly
- 1/2 cup unsalted butter
- 3/4 cup cocoa powder (unsweetened)
- 1 cup granulated sugar
- 2 large eggs
- 3/4 cup all-purpose flour, 1/2 teaspoon salt, 1/2 teaspoon baking powder mixed together
Method
Prepare Your Pan
Line a 9×9-inch square baking pan with parchment paper, leaving slight overhang on two sides for easy removal. This prevents sticking and makes lifting the finished brownies out simple. Preheat your oven to 350F.
Melt Butter and Combine Chocolate
In a heat-safe bowl set over simmering water, melt the butter and cocoa powder together, stirring constantly until completely smooth. This double-boiler method prevents the cocoa from scorching. Remove from heat and let cool for 2-3 minutes.
Incorporate Sugar and Sourdough
Whisk the sugar into the cooled chocolate mixture until well combined. Add your active sourdough starter and stir thoroughly until fully integrated. The batter will be slightly thick and may look grainy–this is normal.
Add Eggs One at a Time
Beat the eggs together in a separate bowl, then add them to the chocolate mixture in two additions, stirring well after each addition. This ensures even distribution and a uniform texture throughout the batter.
Fold in Dry Ingredients
Sprinkle the flour mixture over the wet ingredients and gently fold together using a spatula until just combined. Do not overmix–a few flour streaks are better than overworked gluten development, which can make brownies tough.
Pour and Spread
Pour the batter into your prepared pan and use a spatula to spread it into an even layer. Tap the pan gently on the counter once or twice to release air bubbles and ensure even baking.
Bake Until Set
Bake for 25-30 minutes, until a toothpick inserted in the center comes out with just a few moist crumbs attached. The brownies should look set on the edges but still slightly underdone in the very center for fudgy texture.
Cool and Cut
Allow brownies to cool completely in the pan on a wire rack, then use the parchment overhang to lift them out. Cut into squares with a sharp, clean knife (wiping between cuts helps). The tangy sourdough flavor deepens as they cool and rest overnight.
- Use sourdough starter that’s been fed 4-8 hours prior and is visibly bubbly and active at peak rise for best results and strongest tang
- For extra fudgy brownies, remove them when the toothpick test shows more wet crumbs; for cakey brownies, bake an additional 2-3 minutes
- Store cooled brownies in an airtight container at room temperature for up to 4 days; the sourdough tang actually intensifies slightly over time
What to Look For in Brownie-Baking Equipment
- Metal Mixing Bowls: Heat-safe bowls are essential for melting chocolate and butter over simmering water. Look for stainless steel construction that’s sturdy and won’t react with acidic ingredients like sourdough.
- Square Baking Pan: A 9×9-inch metal baking pan distributes heat evenly for consistent brownie texture. Lighter-colored pans bake more gently than dark ones, giving you better control over doneness.
- Instant-Read Thermometer: While optional, a thermometer takes guesswork out of reaching the right chocolate temperature and can prevent scorching during the melting process.
- Silicone Spatula: A flexible spatula is ideal for folding dry ingredients into wet batter without deflating the mixture or creating overly developed gluten that toughens the final product.
Calphalon Contemporary Nonstick Baking Pan 9×13
Best for: Home bakers seeking reliable brownie pans
This professional-grade 9×9-inch square baking pan features nonstick coating for easy release and even heat distribution. The reinforced steel construction prevents warping, and the smooth surface resists sticking better than seasoned cast iron. Perfect for sourdough brownies and countless other baked goods. Oven-safe to 500F and hand-wash recommended for longevity.
Check Current Price on Amazon →Pyrex Square Glass Baking Dish 9×9
Best for: Budget-conscious bakers and transparent monitoring
Classic glass baking dish allows you to observe brownie doneness from the bottom and sides, eliminating guesswork. Borosilicate glass heats evenly and resists thermal shock. This affordable option lasts for decades and is dishwasher safe. The transparent design lets you verify caramelization and browning without opening the oven door repeatedly.
Check Current Price on Amazon →OXO Good Grips Silicone Baking Mat
Best for: First-time brownie bakers who want foolproof release
Reusable silicone mat eliminates the need for parchment paper while providing superior nonstick performance. Simply line your pan with this flexible mat, pour batter, and brownies release effortlessly after cooling. Dishwasher safe, reduces waste, and works with any pan size. Temperature-rated to 480F for all brownie recipes.
Check Current Price on Amazon →Oxo Good Grips 3-Piece Stainless Steel Mixing Bowl Set
Best for: Bakers who need durable heat-safe bowls for double-boiler melting
This three-piece set includes perfectly-sized bowls for melting chocolate, mixing wet ingredients, and whisking eggs separately. Stainless steel construction resists staining and odor absorption. Bowls nest for efficient storage and feature curved sides for easy whisking. Oven-safe and durable enough for years of sourdough brownie batches.
Check Current Price on Amazon →Final Recommendation
Sourdough brownies are a delicious, easy way to use your active starter while creating a uniquely flavored treat that regular recipes can’t match. The tangy undertone adds sophistication, and the fudgy texture keeps people coming back for seconds. Whether you’re a seasoned sourdough baker or just beginning your fermentation journey, this recipe is forgiving and yields impressive results every single time.
Start with a reliable square baking pan (the Calphalon nonstick option is our top pick), gather your pantry ingredients, and commit to using peak-rise starter for the best outcome. Your first batch will likely disappear within hours, so consider doubling the recipe. Once you taste the magic that active sourdough starter brings to chocolate desserts, you’ll find yourself baking these brownies regularly–and actually looking forward to feeding your starter more often.
Frequently Asked Questions
Can I use sourdough starter that’s just been fed, or does it need to be at peak?
Your starter should be fed 4-8 hours prior and at peak rise (bubbly and domed on top) for best results. Peak starter adds the most moisture and tangy flavor. Using unfed starter will result in dense, less flavorful brownies.
What if I don’t have exactly 1 cup of sourdough starter?
Sourdough starter measurements are somewhat flexible. You can use anywhere from 3/4 cup to 1 1/4 cup. Less starter produces milder tang and denser brownies; more starter creates tangier, slightly fudgier results. Adjust baking time slightly if using significantly different amounts.
How do sourdough brownies taste different from regular brownies?
Sourdough brownies develop a subtle, pleasant tang similar to sourdough bread–not sour enough to be unpleasant, but noticeable enough to add complexity. The starter also adds moisture, resulting in fudgier brownies with better shelf life.
Can I freeze sourdough brownies?
Yes! Wrap cooled brownies individually in plastic wrap and freeze up to 3 months. Thaw at room temperature for 1-2 hours before serving. The sourdough tang actually mellows slightly during freezing, so fresh-baked versions have more pronounced flavor.
My brownies came out cakey instead of fudgy–what went wrong?
Overbaking is the most common culprit. Brownies should look slightly underdone in the center when removed from the oven. They continue cooking as they cool. Also check that your starter wasn’t too thick or under-fed, as this affects moisture content.
As an Amazon Associate, Build & Bloom earns from qualifying purchases. We only recommend products we genuinely think are useful. Prices and availability vary; check Amazon for the latest.
Leave a Reply