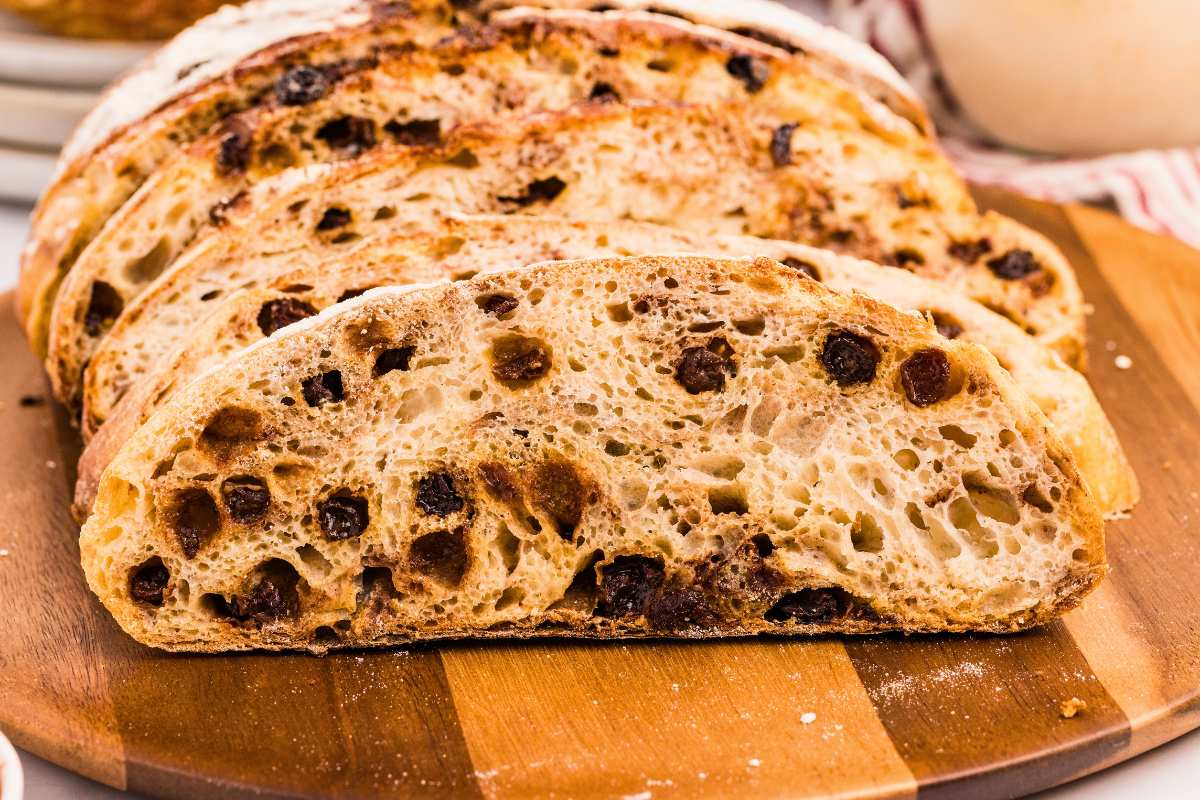

Sourdough cinnamon raisin bread hits that perfect sweet spot between breakfast loaf and artisan bakery staple. If you have an active sourdough starter and a few hours of patience, you can create a stunning boule with deep caramelized crust, tender crumb, and ribbons of cinnamon-sugar throughout. This recipe walks you through every stage, from mixing through the final bake.
How to Bake Sourdough Cinnamon Raisin Bread
This sourdough method uses a long fermentation to develop flavor and structure. Plan for roughly 12-18 hours from start to finish, with most of that being hands-off time.
Ingredients
- 1 cup active sourdough starter (fed 4-8 hours prior, bubbly and peaked)
- 1.5 cups warm water (around 80-90F)
- 3.5 cups bread flour or all-purpose flour
- 1.5 teaspoons salt
- 0.75 cups raisins or dried fruit of choice
- 2-3 tablespoons cinnamon mixed with 3 tablespoons sugar (for filling)
Method
Mix the Dough
Combine your active starter, warm water, and flour in a large mixing bowl. Stir until all flour is hydrated and you have a shaggy mass, with no dry flour visible. Let this rest for 30 minutes to an hour (this is called autolyse). The flour will fully absorb the water during this rest, making the next step easier.
Incorporate Salt and Perform Stretch and Fold
Dissolve salt into a small amount of water, then add to the dough. Perform 4-6 sets of stretch and fold (grab one side of dough, pull it up and fold over itself, rotate bowl, repeat) over the next 2-3 hours, spacing them 30 minutes apart. This builds gluten structure without intensive kneading. The dough will become smoother and more cohesive with each set.
Add Raisins During Bulk Fermentation
Around the midpoint of bulk fermentation (after 3-4 hours total), gently fold in your raisins, distributing them evenly throughout the dough. Continue your remaining stretch and folds as scheduled. Bulk fermentation typically lasts 5-7 hours at room temperature until the dough increases by about 50% and shows some surface bubbles.
Pre-shape and Create Cinnamon Swirl
Turn dough onto a lightly floured surface and gently pre-shape into a round. Rest for 20-30 minutes. Gently flatten the dough into a rectangle, brush lightly with water, and sprinkle the cinnamon-sugar mixture evenly over the surface. Roll tightly from one end, creating a log, then coil into a spiral shape and pinch seams to seal.
Cold Proof Overnight
Place your shaped boule seam-side up into a floured proofing basket or bowl lined with a kitchen towel. Cover loosely and refrigerate for 8-16 hours. The cold fermentation develops flavor and makes scoring easier. You can bake straight from cold, or let it sit at room temperature for 1-2 hours before baking.
Score and Bake
Preheat your oven to 450-475F with a baking vessel (Dutch oven or covered baking sheet) inside for 45 minutes. Turn your cold dough onto parchment, score the top with a sharp blade in your desired pattern, then carefully transfer to your preheated vessel. Bake covered for 20 minutes to trap steam, then uncovered for 25-30 minutes until the crust is deep golden brown.
Cool Before Slicing
Remove bread from oven and turn out onto a cooling rack. Let it rest for at least one hour before cutting. This allows the crumb to set fully and makes for clean slices. Cutting too early will result in a gummy interior.
- Use a kitchen scale for measuring flour and water by weight (not volume) — sourdough bakers swear by this for consistency and reproducibility
- Keep your kitchen at a steady temperature; if your home is cold, fermentation will take longer, which is actually beneficial for flavor development
- Toast your raisins briefly in warm water before adding them to plump them up and intensify their sweetness, which balances the sourdough tang
Essential Equipment for Sourdough Baking
- Dutch Oven or Covered Baking Vessel: Traps steam during baking to create the signature crispy crust and open crumb structure. Look for a 5-7 quart capacity with heat-safe lid that can handle 500F+ temperatures.
- Kitchen Scale: Sourdough requires precision; measuring by weight eliminates variables and ensures consistent results across batches. Digital scales with 0.1-ounce accuracy are ideal.
- Proofing Basket or Banneton: Supports shaped dough during fermentation and resting phases. Prevents spreading and creates the characteristic batard or boule shape before baking.
- Bread Lame or Sharp Scoring Tool: Creates intentional cuts in the dough surface to control oven spring and direct rise. A proper score means better crust development and a professional appearance.
Staub Enameled Cast Iron 5.5-Quart Round Cocotte
Best for: Serious home bakers seeking restaurant-quality results
This heirloom-quality Dutch oven is purpose-built for bread baking. The 5.5-quart capacity accommodates large boules, the enameled interior eliminates rust concerns, and the heavy cast iron distributes heat evenly for perfect crust development. The fitted lid traps steam precisely, creating that coveted crackly exterior and open crumb. Staub’s craftsmanship means this vessel will last generations. Investment-level quality that elevates every loaf.
Check Current Price on Amazon →Cuisinart Chef’s Classic 5.5-Quart Enameled Cast Iron Dutch Oven
Best for: Budget-conscious bakers wanting proven performance
Cuisinart delivers excellent value without compromising function. This 5.5-quart Dutch oven features enameled cast iron construction that rivals premium brands at nearly half the price. The wide base accommodates standard loaves, heat distribution is consistent, and the lid seals effectively to trap steam. Reviews consistently praise its reliability for sourdough baking and everyday cooking. Ideal if you’re testing the hobby before investing premium dollars.
Check Current Price on Amazon →Lodge 5-Quart Enameled Cast Iron Dutch Oven
Best for: First-time bread bakers and budget shoppers
Lodge’s American-made Dutch oven is forgiving and affordable, perfect for learning sourdough basics. The 5-quart capacity fits most home baker loaf sizes, enameled surface eliminates seasoning maintenance, and it heats evenly despite its lower price point. Lodge’s reputation for durability means this oven will handle countless bakes. Not fancy, but absolutely functional and widely recommended in bread-baking communities.
Check Current Price on Amazon →OXO Good Grips Food Scale with Pull-Out Display
Best for: Bakers and home cooks who weigh ingredients constantly
This digital scale combines precision with everyday practicality. Measures up to 11 pounds with 0.1-ounce accuracy, has a pull-out display that doesn’t obstruct your work surface, and features a tare button for quick ingredient switching. The stainless steel platform is durable, the readout is crisp and easy to read, and it’s compact enough for smaller kitchens. OXO’s ergonomic design means it feels natural in the hand and on the counter.
Check Current Price on Amazon →Final Recommendation
Sourdough cinnamon raisin bread is approachable for any baker with a healthy starter and patience for fermentation. The long, slow process develops flavor that no quick bread can match, and the cinnamon-sugar swirl makes each slice feel indulgent. Start with a reliable Dutch oven and digital scale — these two investments alone will elevate your results dramatically. The banneton and scoring tool are luxuries that refine your technique, but not necessities for success.
Your first loaf might not be perfect, and that’s expected. Sourdough teaches you through repetition. Each bake reveals how temperature, hydration, and timing affect your outcome. Within 3-4 attempts, you’ll understand your kitchen’s rhythm and produce loaves that rival bakery versions. The satisfaction of slicing into your own crusty, tangy, cinnamon-swirled boule — still steaming from the oven — makes every hour of fermentation worthwhile.
Frequently Asked Questions
How do I know when my sourdough starter is ready to use?
Your starter should be fed 4-8 hours before mixing and should have risen to its peak, with visible bubbles throughout and a pleasant sour smell. It should double or triple in size after feeding. If it hasn’t peaked yet, it won’t provide enough leavening power for your bread.
Can I skip the overnight cold fermentation?
You can bake the same day, but cold fermentation dramatically improves flavor by allowing acids to develop and makes scoring easier since cold dough is less sticky. If skipping it, do a 2-3 hour room-temperature final proof instead, but expect less complex flavor in the finished loaf.
Why is my crust not crispy?
Lack of steam is the primary culprit. Make sure your Dutch oven is fully preheated for 45 minutes, your loaf is scored deeply so it can expand, and you’re baking covered for the first 20 minutes. Opening the oven too early or using a poorly-fitting lid will let steam escape prematurely.
What’s the ideal hydration level for this recipe?
This recipe is roughly 75% hydration (1.5 cups water to 3.5 cups flour), which is moderate for sourdough. It’s forgiving for beginners but still produces an open crumb. Track your flour and water weight precisely with a scale to adjust hydration if you prefer wetter or drier dough.
Can I use all-purpose flour instead of bread flour?
Yes, all-purpose flour works fine and will produce a slightly softer crumb with less structure. Bread flour has higher protein content (typically 12-14% vs. 10-12%), which builds stronger gluten. Both are valid; bread flour just gives more professional results if you’re invested in the process.
As an Amazon Associate, Build & Bloom earns from qualifying purchases. We only recommend products we genuinely think are useful. Prices and availability vary; check Amazon for the latest.
Leave a Reply