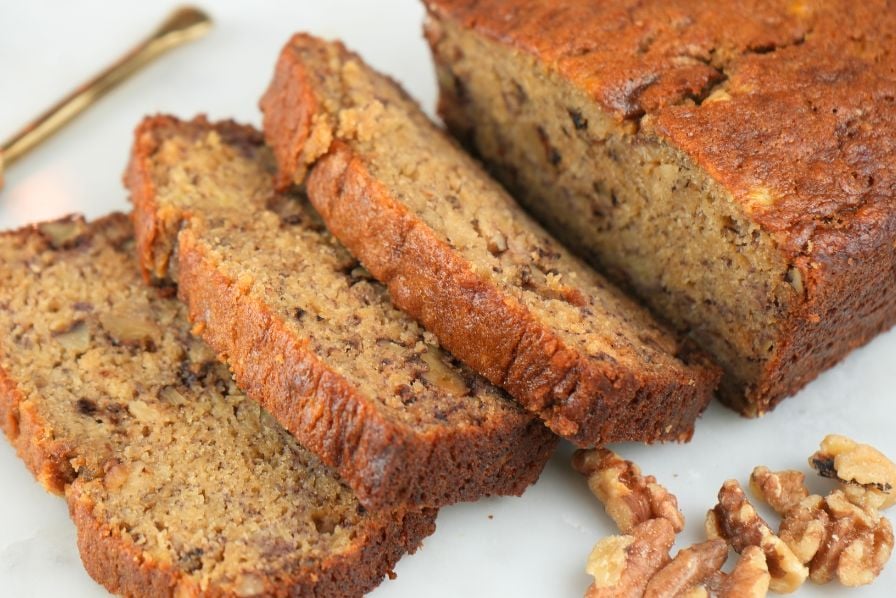

If you maintain a sourdough starter, you know the guilt of discarding that excess culture each feeding cycle. Sourdough discard banana bread transforms that waste into a delicious, naturally leavened treat that’s tangier and more complex than standard banana bread. This recipe yields a perfectly moist crumb that stays fresh for days, making it ideal for using up both overripe bananas and your weekly starter maintenance.
How to Make Sourdough Discard Banana Bread
This simple quick bread requires just one bowl for wet ingredients and one for dry. The sourdough discard replaces some of the leavening and adds subtle fermented depth to the familiar banana bread flavor profile.
Ingredients
- 1 cup active sourdough discard (bubbly starter at peak activity)
- 3-4 very ripe bananas, mashed (about 1.5 cups)
- 1/3 cup melted butter or neutral oil
- 2/3 cup granulated sugar
- 1 large egg, beaten
- 1 teaspoon vanilla extract
- 1.5 cups all-purpose flour
- 1/2 teaspoon baking soda
- 1/4 teaspoon salt
- 1/2 teaspoon ground cinnamon (optional)
Method
Prepare your pans and oven
Preheat your oven to 350 degrees Fahrenheit. Grease a loaf pan generously with butter or cooking spray, including the bottom corners and sides. Line the bottom with parchment paper for easy removal if desired.
Mix the wet ingredients
In a large bowl, whisk together the active sourdough discard, mashed bananas, melted butter, sugar, beaten egg, and vanilla extract. Stir until the mixture is smooth and well combined, about 1 minute. The sourdough starter will begin activating as soon as it mixes with sugar.
Combine the dry ingredients
In a separate bowl, whisk together flour, baking soda, salt, and cinnamon if using. Make sure the baking soda is distributed evenly throughout the flour to prevent streaks of alkaline taste in the finished bread.
Fold the ingredients together
Pour the dry ingredients into the wet mixture and fold gently using a spatula or wooden spoon. Mix just until no streaks of flour remain; overmixing develops gluten and creates a dense, tough loaf. A few small lumps are perfectly fine.
Transfer and bake
Pour the batter into your prepared loaf pan, smoothing the top gently with a spatula. Bake for 50-60 minutes until a toothpick inserted in the center comes out clean or with just a few moist crumbs. If the top browns too quickly, tent loosely with foil.
Cool completely before slicing
Remove the bread from the oven and let it cool in the pan for 10-15 minutes. Turn it out onto a wire cooling rack and allow it to cool completely, at least 1-2 hours, before slicing. This prevents crumbling and allows the crumb structure to set fully.
- Use sourdough discard that’s recently fed and bubbly at peak activity (2-4 hours after feeding). Inactive starter won’t contribute as much lift and fermented flavor.
- Don’t skip the separate mixing step for dry ingredients. This ensures the baking soda distributes evenly and prevents bitter or soapy pockets in your bread.
- Mash bananas in a separate bowl first, then measure. Very ripe bananas are wetter, so the amount of mashed pulp matters more than the number of whole bananas.
What to Look For in Sourdough & Baking Equipment
- Loaf Pan Material: Metal loaf pans conduct heat evenly and produce a light golden crust, while glass pans heat more slowly but retain heat longer. Metal is preferred for most home bakers. Avoid dark nonstick pans if your bread tends to over-brown on the edges.
- Oven Thermometer Accuracy: Most home ovens have temperature variations of 25-50 degrees. An accurate thermometer ensures your 350F setting is actually correct, which is critical for this recipe’s bake time and browning. Look for dial or digital models with clear readability.
- Mixing Bowl Capacity: Your wet ingredient bowl should hold at least 3-4 cups comfortably without overflow when whisking. Stainless steel or glass bowls are easiest to clean and won’t absorb odors from sourdough starter.
- Cooling Rack Design: A sturdy cooling rack elevates your finished bread off the counter, allowing air circulation that prevents the bottom from getting soggy. Look for racks with feet at least 1/2 inch tall and tightly spaced wires.
USA Pan Aluminized Steel Loaf Pan
Best for: Home bakers wanting professional results
USA Pan’s commercial-grade aluminized steel loaf pan is the standard for bakeries and serious home bakers. The 1-pound capacity is perfect for single loaves, and the tapered design makes releasing bread effortless. Heat conducts evenly, producing golden-brown edges without burning. The sturdy construction lasts for decades of heavy use, making it a one-time investment that pays dividends across hundreds of bakes.
Check Current Price on Amazon →AmazonBasics Non-Stick Loaf Pan
Best for: Beginning bakers on a tight budget
AmazonBasics delivers essential baking equipment without the premium price. This non-stick loaf pan prevents sticking issues and cleans up instantly, ideal for kitchen newcomers. The coating is durable for regular home baking, though it won’t last as long as professional pans. At under $10, it’s perfect for testing whether banana bread becomes a regular habit before investing in higher-end equipment.
Check Current Price on Amazon →Le Creuset Heritage Stoneware Loaf Pan
Best for: Bakers who love oven-to-table presentation
Le Creuset’s iconic stoneware loaf pan is as beautiful as it is functional. The ceramic construction distributes heat gently and evenly, producing tender crumb with careful browning. Available in nine signature colors, it transitions seamlessly from oven to table for rustic entertaining. The pan is dishwasher-safe and will outlast metal pans by generations with proper care.
Check Current Price on Amazon →ThermoPro Digital Oven Thermometer
Best for: Bakers frustrated with uneven browning and timing issues
The ThermoPro digital oven thermometer displays temperature to the degree with dual probes for monitoring both oven air and bread internal temperature. The large LCD screen reads from outside the oven, eliminating guesswork about when your bread reaches doneness. Preset alerts notify you the moment your banana bread hits the target internal temperature of 200-210F, preventing over-baking.
Check Current Price on Amazon →Final Recommendation
Sourdough discard banana bread is an elegant solution to starter maintenance that transforms what would be waste into a genuinely delicious treat. The sourdough culture adds subtle complexity and tanginess that elevates banana bread beyond the ordinary, while the natural fermentation keeps it moist for days longer than standard recipes. Whether you’re a sourdough devotee tired of dumping starter or someone seeking richer banana bread flavor, this recipe belongs in your regular rotation.
Invest in a quality loaf pan like the USA Pan aluminized steel and grab an oven thermometer to eliminate variables that trip up home bakers. These two tools are the foundation for consistent results across all your baking projects, not just banana bread. With proper equipment and attention to the folding step, you’ll produce bakery-quality loaves that justify the time spent maintaining your sourdough starter.
Frequently Asked Questions
Can I use inactive or unfed sourdough discard?
Yes, but it won’t contribute as much lift or tangy flavor. Inactive starter still contains the bacteria and acids, so your bread will still taste slightly fermented, but it won’t rise as much. For best results, use discard within a few hours of feeding when it’s visibly bubbly and at peak activity.
What if my banana bread sinks in the middle?
This usually means the oven temperature is too low or the batter was overmixed, creating a dense crumb that collapses as it bakes. Use an oven thermometer to verify your actual temperature, and fold ingredients more gently next time. The sourdough discard provides additional lift, so underbaking is less likely than with standard banana bread.
How long does sourdough discard banana bread stay fresh?
Wrapped tightly at room temperature, it stays moist and good for 3-4 days. The sourdough starter’s natural acids and fermentation actually extend shelf life compared to regular banana bread. For longer storage, wrap and freeze for up to three months, then thaw at room temperature.
Can I add chocolate chips or nuts to the recipe?
Absolutely. Fold in 1/2 to 3/4 cup of chocolate chips, chopped walnuts, or pecans during the final folding step. This adds texture without affecting the bake time, though heavily loaded loaves may need an extra 5-10 minutes in the oven.
Does this recipe work with whole wheat or alternative flours?
You can substitute up to half the all-purpose flour with whole wheat flour, though it will create a denser, earthier crumb. Alternative flours like spelt or einkorn work well but may require slightly more or less liquid depending on absorption rates. Stick to one flour substitution at a time to learn how your specific flour behaves.
As an Amazon Associate, Build & Bloom earns from qualifying purchases. We only recommend products we genuinely think are useful. Prices and availability vary; check Amazon for the latest.
Leave a Reply