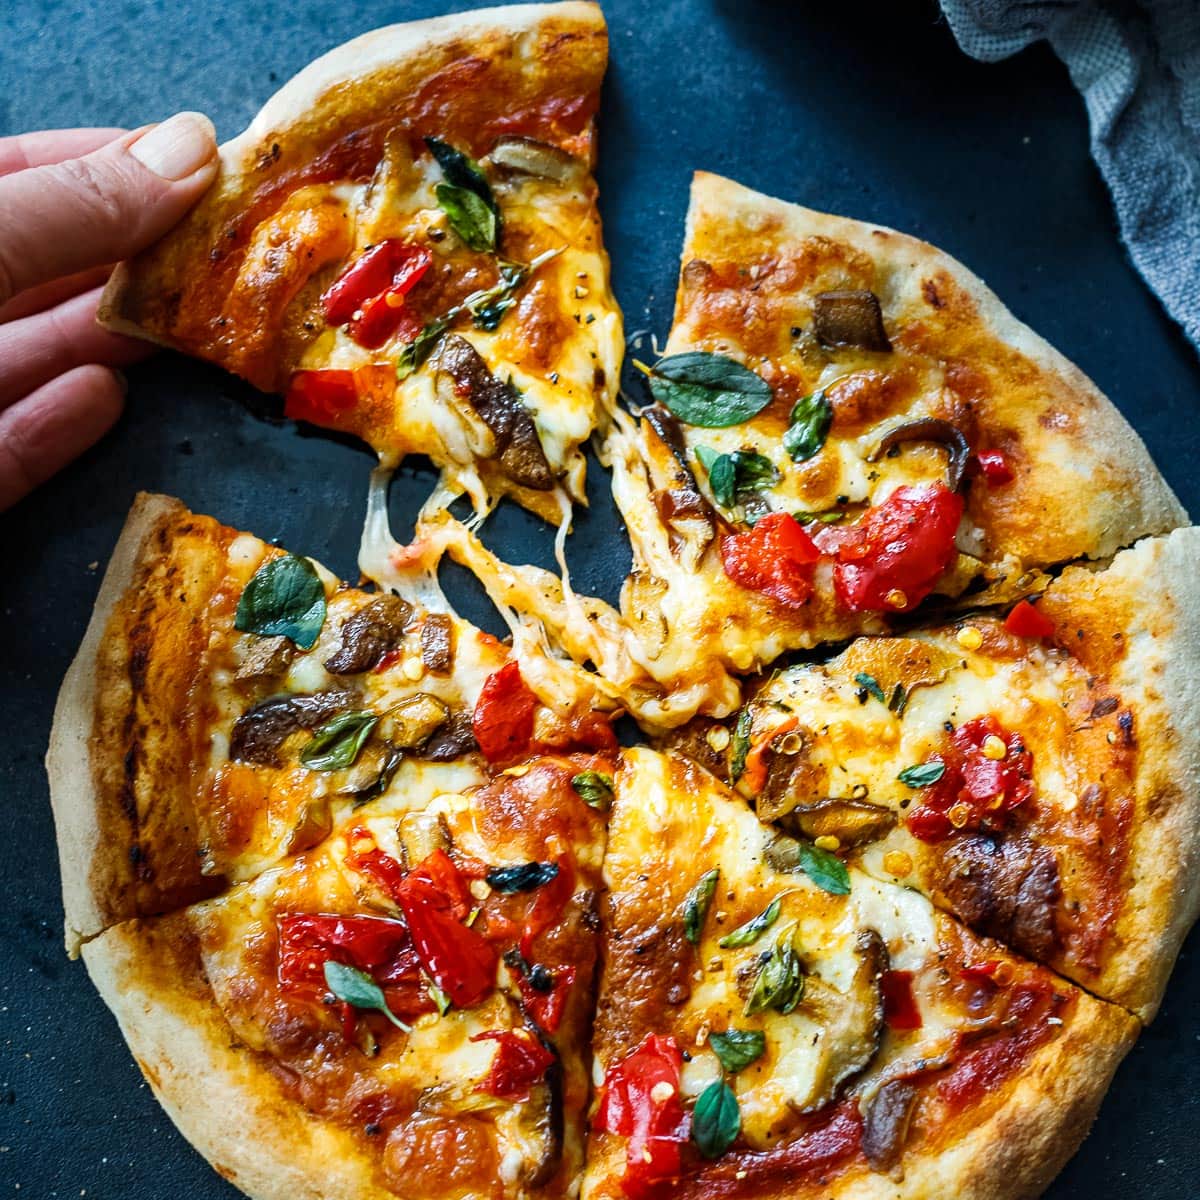

Making sourdough pizza at home is easier than you think, but the key is understanding fermentation timing and shaping technique. Whether you’re a seasoned sourdough baker or trying pizza dough for the first time, this method delivers restaurant-quality results with authentic flavor and texture. The secret lies in using your existing starter, patience with bulk fermentation, and a properly heated baking surface.
How to Make Sourdough Pizza Crust
This recipe creates two generous 12-inch pizzas with a perfectly balanced crumb structure. Total active time is about 20 minutes, with the rest being hands-off fermentation.
Ingredients
- 1 cup active sourdough starter (fed 4-8 hours prior, bubbly and at peak)
- 1.5 cups warm water (around 75-80 degrees F)
- 3.5 cups bread flour or all-purpose flour
- 2 teaspoons fine sea salt
- 2 tablespoons extra virgin olive oil
- Extra flour for dusting and shaping
Method
Mix the dough base
Combine your active starter with warm water in a large mixing bowl, stirring until mostly combined. Add the flour and gently fold together using a wet hand or dough scraper until all dry flour is incorporated and you have a shaggy mass. Let this autolyse (rest undisturbed) for 30 minutes to allow the flour to fully hydrate.
Incorporate salt and oil
After the autolyse rest, sprinkle salt and drizzle olive oil over the dough. Wet your hand and pinch and fold the dough onto itself about 10 times, rotating the bowl, until salt and oil are fully incorporated. The dough will feel smoother and slightly stronger at this stage.
Perform bulk fermentation
Transfer the dough to a clean, lightly oiled bowl. Cover with a damp towel or plastic wrap and let ferment at room temperature (68-72 degrees F is ideal) for 4-6 hours. During this time, perform 4 sets of stretch-and-folds at 30-minute intervals: wet your hand, grab one side of the dough, stretch it up and fold it over the center, rotate the bowl 90 degrees, and repeat 4 times. By the final stretch, the dough should feel noticeably stronger and have increased in volume by roughly 50-75%.
Divide and pre-shape
Turn the dough out onto a lightly floured work surface and divide it into two equal pieces using a bench scraper or knife. Gently pre-shape each piece into a round by folding the edges toward the center and flipping seam-side down. Let these rounds rest on the work surface for 15-20 minutes under a towel to relax the gluten.
Final shape and proof
Place each round seam-side up into a floured banneton basket or bowl lined with a floured towel. You can also use a pizza pan lightly dusted with flour. Cover loosely and refrigerate for 8-24 hours. Cold fermentation develops flavor complexity and makes the dough easier to stretch without springing back.
Preheat your baking surface
About 1 hour before baking, preheat your oven to 475-500 degrees F with a baking stone, steel, or heavy cast iron skillet inside. If using a stone or steel, place it on the lowest rack. The surface must be thoroughly hot to create proper oven spring and a crispy crust.
Shape and top
Remove dough from the cold proof and gently turn it out onto a piece of parchment paper or a pizza peel dusted with semolina flour. Using your fingertips and palms, stretch the round from the center outward to your desired thickness, working from the inside out and letting gravity help. Leave a slightly thicker rim for the crust edge. Top with your preferred sauce, cheese, and toppings.
Bake until golden
Slide the pizza (on parchment if using stone) onto the preheated surface and bake for 12-16 minutes until the crust is deep golden brown and the cheese is bubbling at the edges. Remove with a pizza peel or large spatula and cool for 2-3 minutes before slicing. The crust should sound crispy when tapped and have an airy, open crumb inside.
- Always use a starter that has been fed and is at its peak (doubled or tripled in volume with bubbles throughout). A sluggish starter will extend bulk fermentation time significantly.
- Cold fermentation overnight transforms the flavor profile — the crust develops deeper, tangier notes. If you’re in a hurry, you can skip cold proof and bake after the 15-20 minute rest, though the flavor will be milder.
- Invest in a baking steel or stone and preheat it fully. This is the single most important factor for achieving a crispy, evenly browned crust. Never place cold dough directly on cold stone.
What to Look For in Sourdough Pizza Equipment
- Baking Surface (Steel or Stone): A quality baking steel or ceramic stone is essential for even heat distribution and crust crispness. Look for steel that is at least 1/4-inch thick for superior heat retention. Stones work too but are more fragile; steel is generally more durable for frequent pizza baking.
- Dough Scraper or Bench Knife: A flexible dough scraper with a handle is invaluable for handling sticky dough, performing stretch-and-folds, and dividing portions without deflating. Stainless steel holds up better than plastic and is easier to keep clean.
- Banneton Proofing Baskets: Round or oval wicker baskets designed for final dough proofing prevent sticking and help the dough hold its shape during cold fermentation. A 10-inch round banneton is perfect for pizza dough. Cane construction breathes better than plastic alternatives.
- Kitchen Scale: Sourdough baking is precise. A digital scale that measures in both grams and ounces ensures consistent results, batch to batch. Look for one with 0.1-gram accuracy and a tare function for easy ingredient weighing.
OXO Good Grips 16-Inch Stainless Steel Dough Scraper
Best for: Home bakers performing stretch-and-folds and shaping
This professional-grade dough scraper features a comfortable handle and a sturdy stainless steel blade that flexes just enough to work with wet, sticky dough without tearing it. The 4.5-inch wide blade covers plenty of dough surface in one motion, making stretch-and-fold cycles faster and more effective. Dishwasher safe and built to last through hundreds of bakes. Home bakers consistently praise its balance of flexibility and rigidity.
Check Current Price on Amazon →Artisan Bread Baking Steel 16×14 inch 1/4 inch Thick
Best for: Pizza and bread bakers seeking crispy crusts
A 1/4-inch thick carbon steel baking surface that heats evenly and retains temperature longer than ceramic stones. This 16×14 inch size fits most standard ovens and accommodates two pizzas side-by-side or a large round pie. Pre-seasoning creates a natural non-stick patina that improves with use. Users report dramatically crisper crusts compared to stones, with superior browning on the bottom and edges within 12-16 minutes of baking.
Check Current Price on Amazon →Oxo Good Grips Digital Food Scale with Large Display
Best for: Bakers wanting foolproof ingredient measurements
An easy-to-read digital scale with a 5-pound capacity and 0.1-ounce precision. The extra-large LCD display and intuitive button layout make it beginner-friendly, while the tare function allows you to zero the weight and add ingredients directly into bowls. Measures in grams, ounces, pounds, and kilograms. Runs on four AAA batteries and includes a non-slip mat. Perfect for sourdough where precision matters.
Check Current Price on Amazon →Wayfair Basics Round Banneton Proofing Basket 10-Inch
Best for: Budget-conscious bakers wanting reliable dough proofing
A handwoven cane banneton designed specifically for round pizza and bread dough. The 10-inch diameter is perfect for two-portion pizza batches. Natural cane construction breathes during fermentation and releases dough cleanly when turned out. Comes with a removable linen liner for easy cleaning. At a fraction of premium-brand pricing, this basket delivers the same proofing functionality without the premium markup.
Check Current Price on Amazon →Final Recommendation
Sourdough pizza crust rewards patience and precision. The beauty of this recipe lies in its simplicity: just five ingredients transformed through fermentation into a tangy, crispy foundation for toppings. The key to success is using an active, well-fed starter, respecting bulk fermentation timing (don’t rush it), and investing in at least a baking steel or stone to create the high heat environment your crust needs. Start with a quality dough scraper and digital scale to nail your ingredient ratios, then add a banneton basket once you’re comfortable with shaping.
With these tools and this method, you’ll produce pizzas that rival pizzeria quality within 2-3 bakes. The overnight cold fermentation is non-negotiable for flavor — plan your baking around it. Once you’ve mastered the two-pizza batch, scale up to larger quantities and experiment with toppings knowing your foundation is solid. The investment in equipment (especially a baking steel) pays dividends across hundreds of future bakes, making sourdough pizza an economical choice compared to regular takeout.
Frequently Asked Questions
Can I use regular all-purpose flour instead of bread flour?
Yes. All-purpose flour works perfectly fine and produces a tender, slightly less chewy crust than bread flour. Bread flour (12-14% protein) creates more gluten development and a chewier texture, but all-purpose (10-12% protein) is forgiving for beginners and still delivers great flavor and structure.
What if my sourdough starter isn’t doubling during fermentation?
Your starter may need more frequent feedings to build strength, or your kitchen may be too cool. Sourdough ferments slowly below 68 degrees F. Try feeding your starter twice daily for 3-5 days, or find a warmer spot like the top of the refrigerator for bulk fermentation. A sluggish starter will extend bulk times significantly.
Can I skip the overnight cold fermentation?
You can, but you’ll sacrifice flavor complexity and tang. Cold fermentation develops sour notes and makes dough easier to handle. If rushed, bake after the 15-20 minute bench rest, but expect a milder flavor and dough that springs back more aggressively during shaping.
How do I know when bulk fermentation is done?
The dough should increase 50-75% in volume, feel noticeably airier, and jiggle slightly when you move the bowl. It should also pass the poke test: gently poke it with your finger and the indent should slowly spring back halfway. If it springs back completely, it needs more time. If the indent stays, it may be overproofed.
Why is my crust dense instead of airy with open crumb?
This typically means underproofing (not enough bulk or final fermentation time) or insufficient oven heat. Ensure your baking surface reaches 475-500 degrees F and preheat for a full hour. Also verify your starter is truly active and bubbly at feeding time. Dense crumb also results from degassing the dough too aggressively during shaping.
As an Amazon Associate, Build & Bloom earns from qualifying purchases. We only recommend products we genuinely think are useful. Prices and availability vary; check Amazon for the latest.
Leave a Reply