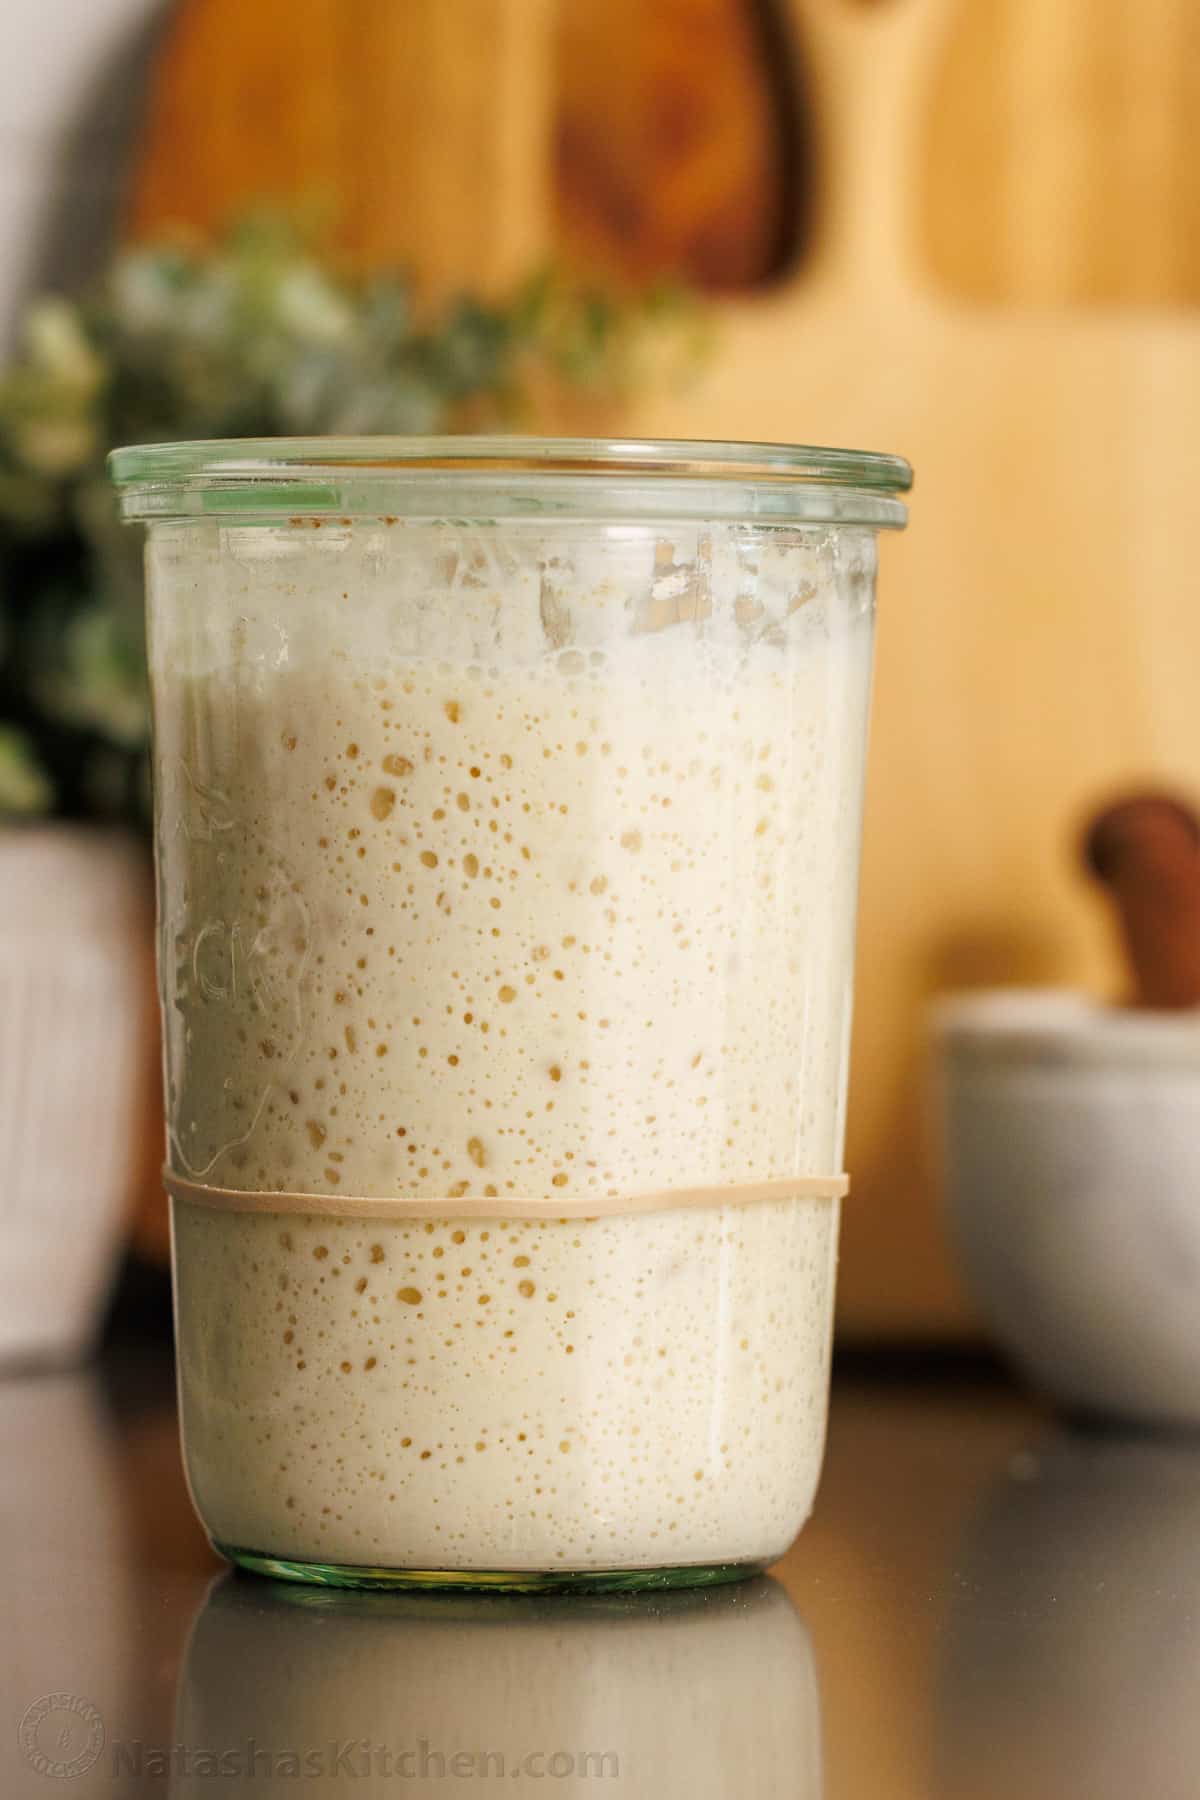

Making sourdough starter at home is simpler than you might think—but it does require patience and consistency. If you’ve been intimidated by sourdough baking, this guide breaks down the exact process into daily steps that anyone can follow. Whether you’re starting your first loaf or expanding your homestead food production, a healthy starter is your foundation for tangy, artisanal bread that rivals the bakery.
How to Make Sourdough Starter from Scratch
Sourdough starter is a living culture of wild yeast and beneficial bacteria that leavens bread naturally. You’ll create it by combining flour and water, then feeding it daily until it’s active and ready to use.
Ingredients
- All-purpose or whole wheat flour (1/2 cup initially, plus 1/4 cup daily)
- Filtered or dechlorinated water (1/2 cup initially, plus 1/4 cup daily)
- A clean glass jar (1-quart or larger)
- A spoon or whisk for stirring
- Cheesecloth or coffee filter (optional, for covering)
Method
Mix your initial culture
Combine 1/2 cup flour and 1/2 cup room-temperature water in a clean jar. Stir well until no dry flour remains. The mixture should resemble thick pancake batter. Cover loosely with cheesecloth, a coffee filter, or a loose lid—the culture needs air exposure to encourage wild yeast colonization.
Wait and observe (Days 1-2)
Leave the jar at room temperature (65-75°F is ideal). You may not see much activity in the first 24-48 hours, and this is completely normal. Some starters show bubbles early; others take longer. Don’t panic if there’s no visible change yet. A dark liquid (hooch) may appear on top—this is just alcohol and is harmless.
Begin daily feedings (Day 3 onward)
Starting on day 3, discard half the starter (about 1/2 cup) and feed with 1/4 cup fresh flour and 1/4 cup water. Stir thoroughly. This feeding removes accumulated waste and provides fresh food for the microorganisms. Repeat this process daily at roughly the same time each day, always discarding before feeding.
Watch for rising activity
Between days 3-5, you should see bubbles forming, rising and falling, and an increasingly pleasant sour smell developing. The starter may still look thin and bubbly rather than thick. This is the wild yeast population establishing itself. If you see mold (fuzzy growth), discard and start over. A gray or pink tint indicates contamination—also discard.
Assess readiness by doubling
Your starter is ready to use when it reliably doubles in volume within 4-8 hours of feeding. It should have a pleasant, yeasty-sour aroma and show lots of bubbles throughout. This typically happens between days 5-7. If it’s not doubling consistently, continue daily feedings for another few days.
Transition to maintenance feeding
Once your starter is active, you can reduce feedings to once daily (or once every 12 hours if keeping it at room temperature). If you plan to bake only occasionally, transfer the starter to the refrigerator and feed once weekly instead. Cold slows fermentation dramatically, extending the time between feedings.
Use your starter in recipes
When ready to bake, remove starter from the fridge 12-24 hours ahead and feed it. Use it in recipes when it’s bubbly and at its peak—usually 4-8 hours after feeding. A good test: it should float a small spoonful in water (the poke test) when fully active.
- Use filtered or boiled-then-cooled water if your tap water is heavily chlorinated, as chlorine can inhibit fermentation.
- Keep your jar in a consistently warm spot (70-75°F). Cooler kitchens will slow the process significantly—a top shelf away from drafts is ideal.
- Don’t throw away your discard! Use it for sourdough pancakes, crackers, or muffins instead of composting it.
What to Look For in Sourdough Starter Equipment
- Jar capacity and material: A 1-quart or larger glass jar prevents overflow as your starter rises. Glass lets you see activity without opening the lid, and it won’t retain odors or stains like plastic can.
- Accurate kitchen scale: Weighing ingredients by grams (rather than cups) produces more consistent results, especially for feeding ratios. This becomes important as you refine your starter maintenance.
- Flour quality: Unbleached, unbromated all-purpose or bread flour ferments more reliably than heavily processed varieties. Whole wheat or rye flour speeds up fermentation due to higher nutrient content for microbes.
- Water quality: Chlorinated tap water can inhibit fermentation. A simple water filter pitcher or letting tap water sit overnight allows chlorine to evaporate, supporting faster starter development.
Bormioli Rocco Fido Glass Jar (2-Liter)
Best for: All sourdough bakers
This classic Italian glass jar is large enough for vigorous fermentation without overflow, features a secure wire bail and rubber gasket closure, and the transparent glass lets you monitor bubbles and rise without opening. The 2-liter capacity provides plenty of room for daily feedings and prevents starter from escaping during peak fermentation. Durable borosilicate glass withstands repeated temperature changes and won’t absorb odors over time. Many professional bakers prefer this exact model for its reliability and longevity.
Check Current Price on Amazon →Ball Wide Mouth Quart Mason Jar (Pack of 12)
Best for: Beginners and budget-conscious bakers
Standard mason jars work perfectly for sourdough starter at a fraction of specialty jar cost. The wide mouth makes feeding and cleaning simple, and the 1-quart size is adequate for starter maintenance. These jars are stackable, affordable, and available everywhere. You’ll have extras for storing discards or maintaining backup cultures. The lids are replaceable if they lose seal, making this a practical long-term investment for any baker.
Check Current Price on Amazon →Escali Primo Digital Kitchen Scale
Best for: First-time starter makers
This affordable digital scale removes guesswork from feeding ratios by measuring flour and water in grams. The 11-pound capacity handles your starter and ingredients easily, and the tare function lets you reset to zero between additions. A backlit display reads clearly, and the compact footprint fits any kitchen counter. Weighing ingredients produces more consistent fermentation than volume measurements, helping new bakers succeed on their first attempt.
Check Current Price on Amazon →Hario Glass Fermentation Jar with Wooden Stand
Best for: Serious bakers and decorative kitchen displays
This Japanese-designed fermentation jar combines aesthetics with function, featuring thick borosilicate glass and a sturdy wooden stand that elevates the jar for easy observation. The wide mouth opening simplifies daily feedings, and the graduated volume markers on the side let you track rise precisely. The included cloth cover protects from dust while allowing airflow. This jar is beautiful enough to display on your counter, making it ideal for bakers who want functional equipment that looks intentional.
Check Current Price on Amazon →Start Your Sourdough Journey Today
Making sourdough starter is one of the most rewarding kitchen projects you can undertake on your homestead. With just flour, water, and consistency, you’ll cultivate a living culture that produces legendary bread for years. The process requires minimal equipment and teaches you to work with natural fermentation—a skill that deepens your connection to the food you make. Your first loaf, born from a starter you created with your own hands, tastes incomparably better than anything store-bought.
The key to success is patience and routine. Feed your starter at roughly the same time each day, keep it warm, and resist the urge to rush. By day 5 or 6, you’ll see reliable doubling and smell the unmistakable sour aroma that signals readiness. Once you have an active starter, a world of baking opens up—not just bread, but pancakes, crackers, cakes, and recipes your family will clamor for. Invest in a quality jar and a simple scale, then commit to seven days of daily care. That’s all it takes to become a sourdough baker.
Frequently Asked Questions
How long does it actually take to have a usable sourdough starter?
Most starters become active and ready to bake with between 5-7 days of daily feeding. However, some may take up to 10 days depending on kitchen temperature and flour quality. Warmer kitchens (70-75°F) accelerate development, while cooler spaces slow it down. Patience during this window is essential—you’ll know it’s ready when it doubles reliably within 4-8 hours of feeding.
What if my starter smells bad or looks moldy?
A pleasant sour or yeasty smell is normal and desirable. However, pink, orange, or fuzzy mold growth indicates contamination and means you should discard and restart. A gray liquid layer (hooch) is harmless alcohol and can be stirred back in or poured off. Trust your instincts—if it looks or smells genuinely off-putting (not just sour), it’s safer to begin again.
Can I use tap water, or do I need filtered water?
Tap water works if your local supply is lightly chlorinated. However, heavily chlorinated water can inhibit fermentation. An easy test: let tap water sit in an open jar for 24 hours to allow chlorine to evaporate, then use it. A simple water filter pitcher is a small investment that dramatically improves results and removes guesswork.
What should I do with my sourdough discard?
Don’t compost it! Sourdough discard (the portion you remove before each feeding) is full of flavor and works beautifully in pancakes, waffles, muffins, crackers, or even pizza dough. Many bakers save discard in a separate container and use it weekly for quick breakfast recipes, making excellent use of what would otherwise go to waste.
How often should I feed my starter once it’s active?
If you bake weekly and keep your starter at room temperature, daily feedings work well. For occasional bakers, refrigerate your starter and feed just once per week—cold dramatically slows fermentation. Before baking, remove it from the fridge 12-24 hours early and resume daily feedings to reactivate it fully.
As an Amazon Associate, Build & Bloom earns from qualifying purchases. We only recommend products we genuinely think are useful. Prices and availability vary; check Amazon for the latest.
Leave a Reply