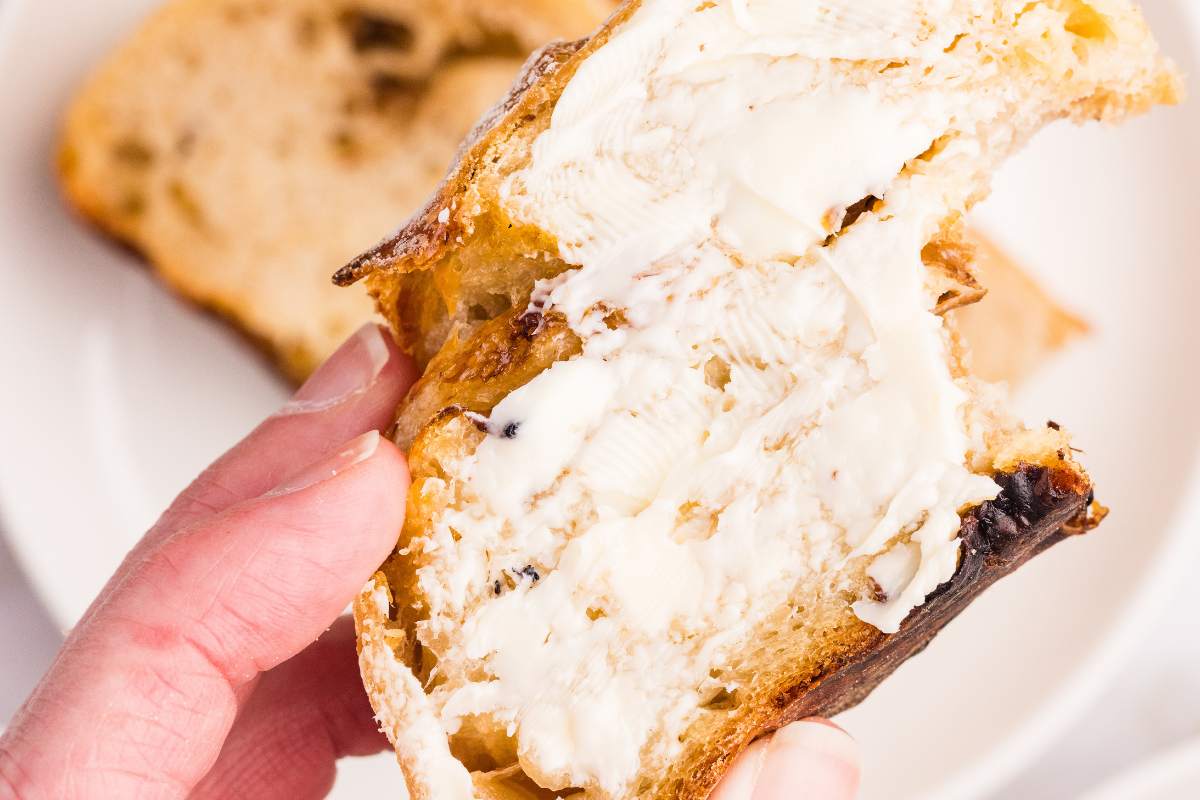

If you’ve mastered basic sourdough but want to elevate your game with savory, sophisticated flavors, this gruyere and caramelized onion variation delivers restaurant-quality results at home. The nutty, melting gruyere combined with deeply caramelized onions transforms ordinary sourdough into a showstopping loaf that pairs beautifully with soups, charcuterie, or simply good butter. This method takes advantage of cold fermentation to develop complex flavor while the cheese and onions integrate seamlessly into the crumb.
How to Make Sourdough with Gruyere and Caramelized Onions
This recipe combines classic sourdough technique with savory fillings to create a sophisticated artisan loaf. Plan for about 24 hours total, with most time spent on passive fermentation.
Ingredients
- 500g bread flour
- 350ml water
- 100g active sourdough starter (fed 4-8 hours prior)
- 10g salt
- 2 large onions, thinly sliced
- 150g gruyere cheese, shredded or cut into small pieces
Method
Prepare Your Caramelized Onions
Slice onions into thin, even pieces. Heat a heavy pan over medium-low heat and cook the onions slowly, stirring every 5-10 minutes. This process takes 35-45 minutes and requires patience. The onions should turn deep golden brown and become sweet and jammy. They’re done when they’ve reduced significantly in volume and develop a rich caramel color. Cool completely before using.
Mix Your Dough
Combine flour and water in a large bowl, let rest for 30 minutes (autolyse). Add your active starter and salt, mixing until fully incorporated. The dough should feel shaggy and cohesive. Do not add the cheese or onions yet; they will be incorporated during lamination.
Bulk Fermentation and Lamination
Over 4 hours, perform 4-5 sets of stretch-and-folds at 30-minute intervals. After the second set of stretches, perform a lamination: wet your work surface, gently stretch the dough thin, distribute the cooled caramelized onions evenly across the surface, sprinkle the shredded gruyere over them, then carefully roll and shape the dough into a round. Return to the bowl for remaining stretches.
Shape Your Boule
After bulk fermentation (4 hours total), turn the dough onto a lightly floured surface. Using a gentle hand, create surface tension by folding the edges toward the center and then rolling toward you, creating a taut round. The fillings should be distributed throughout but not visible on the surface. Place seam-side up into a well-floured banneton basket.
Cold Fermentation Overnight
Cover the banneton loosely and refrigerate for 12-16 hours. This extended cold fermentation develops acidity and flavor while making the dough easier to score. The dough is ready when it holds an indent when you press it gently but springs back slightly.
Preheat Your Dutch Oven
About 1 hour before baking, place your Dutch oven in the oven and preheat to 450F (230C). A preheated, covered vessel traps steam during the first part of baking, which creates that beautiful, crackling crust sourdough is known for.
Score and Bake
Carefully turn the cold dough out onto parchment paper. Using a sharp knife or lame, score the top with a single deep slash or your preferred pattern. Transfer the parchment with dough into the preheated Dutch oven. Bake covered for 20 minutes, then remove the lid and bake for 25-30 additional minutes until the crust is deep golden brown.
Cool Before Slicing
Remove the bread from the Dutch oven and cool on a wire rack for at least 1 hour before slicing. This allows the interior crumb to finish setting. Cutting too early will result in a gummy texture. The finished loaf should have a crispy, burnished crust and a tender, open crumb with visible pockets of cheese and onion throughout.
- Make your caramelized onions a day or two ahead and store them in the refrigerator. This removes one time-sensitive task on baking day and actually improves their flavor as they continue to meld.
- Use a bench scraper for all handling of cold dough. The dough will be less sticky than at room temperature, but a scraper prevents unnecessary flour additions that would toughen your crust.
- Listen for an audible ‘thunk’ when you tap the bottom of your cooled loaf. A hollow sound indicates proper baking; a dull thud means it needs a few more minutes in the oven.
What to Look For in Sourdough Baking Equipment
- Dutch Oven Quality and Material: Choose enameled cast iron or ceramic with a tight-fitting lid. The vessel must distribute heat evenly and retain it during the baking cycle. Look for models that fit a standard loaf comfortably without excessive headspace.
- Proofing Basket Design: Banneton baskets come in round or oval shapes with spiral or ring patterns. The ridges help support the shaped dough. Round baskets (8-9 inches) work best for 500g doughs. Ensure adequate depth to prevent the dough from bulging over the sides.
- Scoring Tools and Sharpness: A sharp blade is non-negotiable for creating clean scores that expand properly during oven spring. Dedicated lames offer precision, but a fresh razor blade also works. Dull blades drag rather than cut, deflating your dough.
- Scale Accuracy for Consistency: Sourdough baking relies on precise hydration ratios. A digital scale accurate to at least 1 gram (ideally 0.1g) ensures consistency. Look for models with a tare function and capacity of at least 2kg for ingredient weighing.
Le Creuset Enameled Cast Iron Dutch Oven, 5.5 Quart
Best for: Serious sourdough bakers seeking heirloom-quality equipment
The gold standard for sourdough baking. Le Creuset’s enameled cast iron retains heat exceptionally well and distributes it evenly, creating the perfect steam environment for dramatic oven spring and a thick, crackling crust. The 5.5-quart capacity accommodates standard artisan boules with room for expansion. Its heavy construction and superior enamel coating withstand years of high-heat baking. The snug-fitting lid traps steam effectively. While premium-priced, this piece becomes better with age and passes down through generations of bakers.
Check Current Price on Amazon →Tramontina Enameled Cast Iron Dutch Oven, 6 Quart
Best for: Budget-conscious home bakers new to sourdough
Tramontina delivers excellent heat retention and performance at a fraction of premium prices. The 6-quart capacity is generous, and the enamel coating is durable for regular baking use. Heats evenly and produces professional-quality crust and oven spring comparable to much more expensive alternatives. Perfect for bakers experimenting with sourdough before investing in high-end equipment. While it may show minor surface wear over time, functionality remains excellent.
Check Current Price on Amazon →Staub Enameled Cast Iron Cocotte Round, 5.5L Black
Best for: Bakers who appreciate European craftsmanship and aesthetics
Staub’s matte black interior (unlike Le Creuset’s shiny enamel) provides superior heat absorption for darker, more caramelized crusts. The lid’s interior features small spikes that trap and redistribute condensation for perfect steam circulation. French-made with exceptional quality control. The 5.5L capacity is ideal for standard sourdough. Its elegant design makes it worthy of tabletop presentation. Investment-level pricing reflects superior engineering and design refinement.
Check Current Price on Amazon →Lodge Enameled Cast Iron Dutch Oven, 5 Quart
Best for: Practical bakers seeking American-made quality without premium pricing
Lodge’s American-made Dutch oven offers solid performance for sourdough baking at mid-range pricing. The 5-quart capacity fits standard loaves well. While it takes slightly longer to preheat than premium options and enamel shows wear patterns over time, the baking results are excellent. Lodge’s warranty and customer service are outstanding. This oven performs reliably for years of weekly baking and represents genuine value.
Check Current Price on Amazon →Final Recommendation
Sourdough with gruyere and caramelized onions represents an accessible next step for bakers ready to move beyond basic loaves. The technique is fundamentally sound sourdough baking with the satisfying addition of sophisticated, complementary flavors. The 24-hour timeline fits naturally into weekend baking rhythms, and success hinges more on attention to fermentation signals than on any single piece of equipment.
Invest first in a quality Dutch oven and banneton, as these directly impact your results. A reliable scale ensures consistent hydration. Most importantly, taste your caramelized onions as they cook and don’t rush this step—it’s where the magic happens. Your first loaf may not be perfect, but each bake teaches you how your specific dough, kitchen temperature, and equipment interact. Within 2-3 attempts, you’ll understand the dough’s rhythm and produce loaves worthy of a farmers market stand.
Frequently Asked Questions
Can I make this sourdough without caramelizing onions separately?
Technically yes, but the result suffers. Raw onions release moisture and remain sharp-tasting. Caramelizing (35-45 minutes) develops deep sweetness and concentrates flavors. Many bakers prep onions the day before to save time. This extra step is worth the effort.
What hydration percentage is this recipe?
This dough is 70% hydration (350g water to 500g flour), which is moderate for sourdough. It handles easily for beginners while developing good extensibility. If you add the cheese and onions by weight, account for roughly 200g additional ingredient, raising effective hydration slightly.
Can I use a different cheese besides gruyere?
Yes, though gruyere is ideal. Aged cheddar or Emmental work similarly. Avoid fresh cheeses like mozzarella or ricotta, as they melt inconsistently and create oily pockets. Choose cheeses that brown well and won’t entirely disappear during baking.
How do I score my dough without deflating it?
Use a sharp blade held at a shallow 30-degree angle. Score decisively in one smooth motion without hesitation or multiple passes. A dull blade drags and deflates; a sharp one cuts cleanly. Score cold dough directly from the refrigerator, as it’s less puffy than room-temperature dough.
What’s the minimum cold fermentation time, and can I extend it?
Minimum is 8-10 hours, though 12-16 hours is ideal for flavor development. You can extend to 18-20 hours without problems, though the dough becomes more delicate to handle. Beyond 20 hours, the dough structure weakens and may not have enough oven spring.
As an Amazon Associate, Build & Bloom earns from qualifying purchases. We only recommend products we genuinely think are useful. Prices and availability vary; check Amazon for the latest.
Leave a Reply