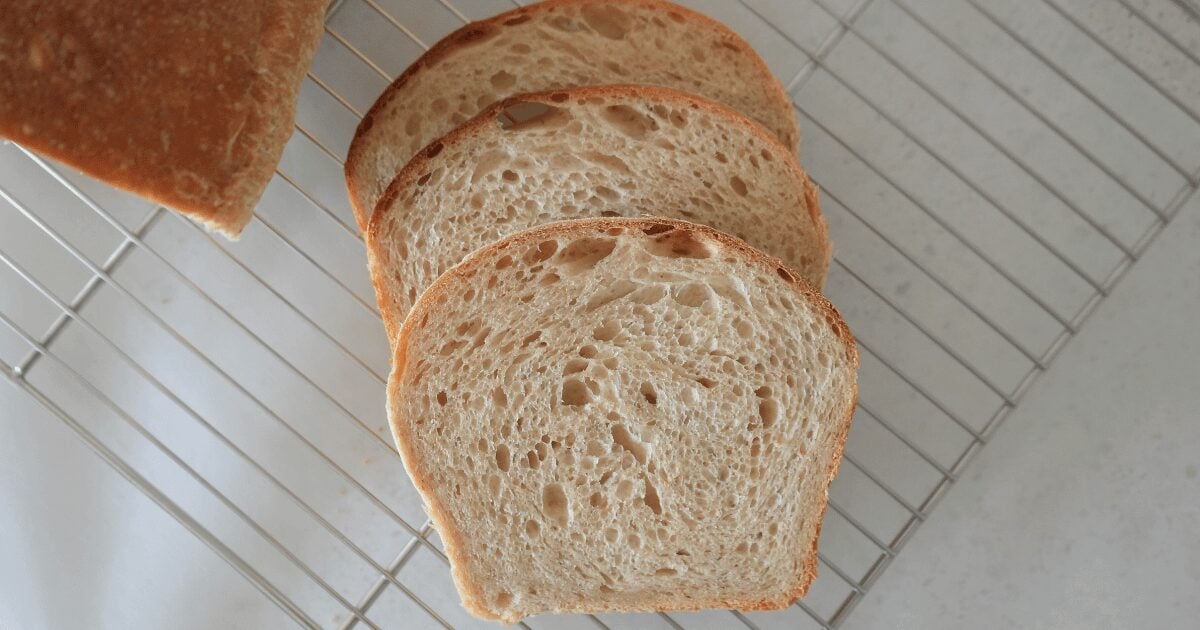

If you’ve been intimidated by sourdough baking, sandwich bread is actually the perfect entry point—it’s more forgiving than artisan loaves and rewards patience over precision. Unlike store-bought bread filled with additives, homemade sourdough develops complex flavor through slow fermentation while creating a tender crumb that stays fresh for days. This guide walks you through the exact process to create a bakery-quality loaf with just four ingredients.
How to Make Sourdough Sandwich Bread
This recipe uses a simple autolyse and bulk fermentation method, perfect for beginners. Total time from start to finish is about 36 hours, but most of that is passive fermentation while you go about your day.
Ingredients
- Active sourdough starter – fed 4-8 hours prior, bubbly and at peak (100g or about 1/2 cup)
- Bread flour – high protein content helps develop gluten (500g or about 3.5 cups)
- Water – filtered or tap, room temperature (350ml or about 1.5 cups)
- Sea salt – fine grain, not iodized (10g or about 1.5 teaspoons)
Method
Mix flour and water (autolyse)
Combine bread flour and water in a large bowl, stirring until all flour is hydrated and no dry bits remain. This 30-minute rest develops gluten naturally before adding salt, making the dough easier to work with and improving final texture.
Add starter and salt
After the autolyse rest, add your bubbly starter and salt to the dough. Mix thoroughly by hand or with a dough whisk until everything is evenly incorporated. The dough will feel slightly sticky and shaggy at this stage.
Perform bulk fermentation (4-6 hours)
Cover the bowl loosely and let it sit at room temperature. Every 30 minutes for the first 2 hours, perform a stretch-and-fold: wet your hand, grab one side of the dough, stretch it up and fold it over the center, rotate the bowl, repeat four times. After 2 hours, let the dough rest undisturbed. It should increase in volume by 30-50% and show visible bubbles.
Shape the dough
Turn the dough onto a lightly floured surface and gently pre-shape it into a round. Let it rest for 20 minutes, then shape it into a tight oval by folding the top third down, pressing gently, folding the bottom third up, then rolling it away from you. Tension in the shaping helps the bread rise upward rather than sideways in the oven.
Cold proof overnight (12-18 hours)
Place your shaped dough seam-side up into a floured banneton basket or a bowl lined with a well-floured kitchen towel. Cover with a plastic bag and refrigerate overnight. This cold fermentation develops deeper flavor and makes the dough easier to score without deflating.
Preheat your oven and baking vessel
Remove dough from the fridge about 30 minutes before baking. Preheat your oven to 450F (230C) with a covered baking vessel (Dutch oven or similar) inside for 45 minutes. The trapped steam during the first 20 minutes of baking creates the signature crispy crust.
Score and bake covered
Carefully turn your dough out onto parchment paper. Using a sharp blade or lame, make a single slash or a cross pattern about 1/4 inch deep across the top. Transfer to the hot baking vessel, cover, and bake for 20 minutes. The scoring guides where the bread expands and helps it rise dramatically.
Finish baking uncovered
Remove the cover and bake for another 25-30 minutes until the crust is deep golden brown. The internal temperature should reach 205-210F when measured with an instant-read thermometer inserted into the center. Let cool completely on a wire rack before slicing, at least 1 hour.
- If your starter is sluggish, dissolve it in the water before mixing with flour—this activates it and ensures even fermentation throughout the dough.
- The dough should pass the poke test: gently poke it with a floured finger after bulk fermentation. If the indentation springs back halfway, it’s ready to shape. If it springs back completely, it needs more time.
- A kitchen scale is invaluable for sourdough—measuring by weight eliminates variables and produces consistent results every batch.
What to Look For in Sourdough Baking Equipment
- Dutch Oven or Covered Baking Vessel: Essential for trapping steam during the first phase of baking, which creates the crispy crust sourdough is famous for. Look for enameled cast iron or ceramic that can handle 500F+ temperatures and has a heavy-fitting lid.
- Digital Kitchen Scale: Sourdough relies on precise ratios of ingredients. A scale measuring in grams removes guesswork and ensures your loaves turn out consistently. Choose one with accuracy to 1 gram and a tare function.
- Banneton Proofing Basket: These floured baskets support your shaped dough during cold fermentation without sticking. They’re more convenient than improvising with bowls and towels, and they help the dough maintain its shape and tension.
- Bread Lame or Sharp Scoring Blade: A clean, sharp blade ensures proper scoring without dragging or tearing the dough. Professional bread lames are inexpensive and far superior to trying to score with a regular knife, which compresses the surface.
Le Creuset 5.5 Qt Round Enameled Cast Iron Dutch Oven
Best for: Serious home bakers who want pro results
The gold standard for sourdough baking. Le Creuset’s enameled cast iron provides superior heat retention and distribution, while the self-basting lid ensures perfect steam circulation for an exceptional crust. The 5.5-quart capacity comfortably fits a standard loaf shape. While premium-priced, it’s a lifetime investment that works for bread, stews, braises, and more. The heavy construction and high-quality enamel resist chipping and staining far better than competitors.
Check Current Price on Amazon →Cuisinart 5.5 Qt Enameled Cast Iron Dutch Oven
Best for: Budget-conscious bakers new to sourdough
Delivers the essential performance of a Dutch oven at half the price of premium brands. The 5.5-quart size and thick enamel coating perform nearly identically to luxury competitors for sourdough baking. The heavy lid seals steam effectively, and the cast iron core heats evenly. While the enamel may show wear faster than Le Creuset, it’s excellent value for someone testing their sourdough commitment before investing more.
Check Current Price on Amazon →Etekcity Digital Kitchen Scale EK6015
Best for: First-time bakers who want affordability and simplicity
An incredibly popular entry-level scale that measures reliably to 1 gram across 11-pound capacity. The LCD display is bright and easy to read, tare function is responsive, and it switches between grams, ounces, and other units instantly. No-frills design means fewer buttons to confuse, and it includes batteries. Thousands of sourdough enthusiasts rely on this exact model because accuracy doesn’t require expense.
Check Current Price on Amazon →Hario V60 Precision Digital Scale VST-2000S
Best for: Precision-focused bakers and coffee enthusiasts
This Japanese-engineered scale offers accuracy to 0.1 grams and a timer function that syncs with the scale readout—ideal for recipes requiring exact hydration percentages and timing. The compact design fits on small counters, and the response time is nearly instantaneous. While more expensive than basic models, the precision appeals to bakers who experiment with different hydration levels and want data-driven results.
Check Current Price on Amazon →Start Your Sourdough Journey Today
Making sourdough sandwich bread is less about following rigid rules and more about understanding the fermentation process. Once you’ve completed one successful bake, you’ll develop intuition about how your starter behaves, how temperature affects timing, and when your dough is ready to shape. Many bakers report that their second and third loaves are noticeably better than their first simply because they’re no longer anxious about the process—they trust it.
Invest in a quality Dutch oven and a reliable kitchen scale, give yourself grace during your learning curve, and enjoy the incredible flavor and texture you’re creating. There’s something deeply satisfying about pulling a golden-brown loaf from your own oven, hearing it crackle as it cools, and cutting into that complex, tangy crumb. Welcome to the sourdough baker’s club.
Frequently Asked Questions
How do I know if my sourdough starter is ready to use?
Your starter should be fed 4-8 hours before mixing dough, then used when it’s at ‘peak’—bubbly on top and bottom with a pleasant sour aroma. It should roughly double in volume after feeding. If it’s sluggish, feed it daily for 3-5 days until it becomes reliably vigorous.
What’s the difference between sourdough sandwich bread and artisan loaves?
Sandwich bread uses slightly higher hydration for a softer crumb and is shaped tighter to rise mostly upward rather than spread outward. Artisan loaves are often lower hydration with more open crumb structure. Sandwich bread also typically bakes in a covered vessel longer to create a softer crust suitable for slicing and eating with toppings.
Can I bake sourdough without a Dutch oven?
Yes, though results won’t be identical. Place a baking stone or steel on the middle rack and preheat it. Put a pan of boiling water on the lowest rack to generate steam, then bake your loaf directly on the stone. You’ll lose some crust definition but can still create decent bread. A Dutch oven simply guarantees consistent steam.
Why does my sourdough turn out dense instead of fluffy?
The most common causes are using a weak starter, not fermenting long enough, or shaping too tightly. Ensure your starter doubles reliably after feeding, conduct longer bulk fermentation (aiming for 30-50% volume increase), and use gentle handling to preserve gas bubbles when shaping.
How long does homemade sourdough stay fresh?
Properly baked sourdough stays fresh for 3-4 days at room temperature in a paper bag or linen cloth. After day two, slice and toast it or freeze wrapped slices in portions. The acidity from fermentation acts as a natural preservative, extending shelf life well beyond commercial yeasted bread.
As an Amazon Associate, Build & Bloom earns from qualifying purchases. We only recommend products we genuinely think are useful. Prices and availability vary; check Amazon for the latest.
Leave a Reply