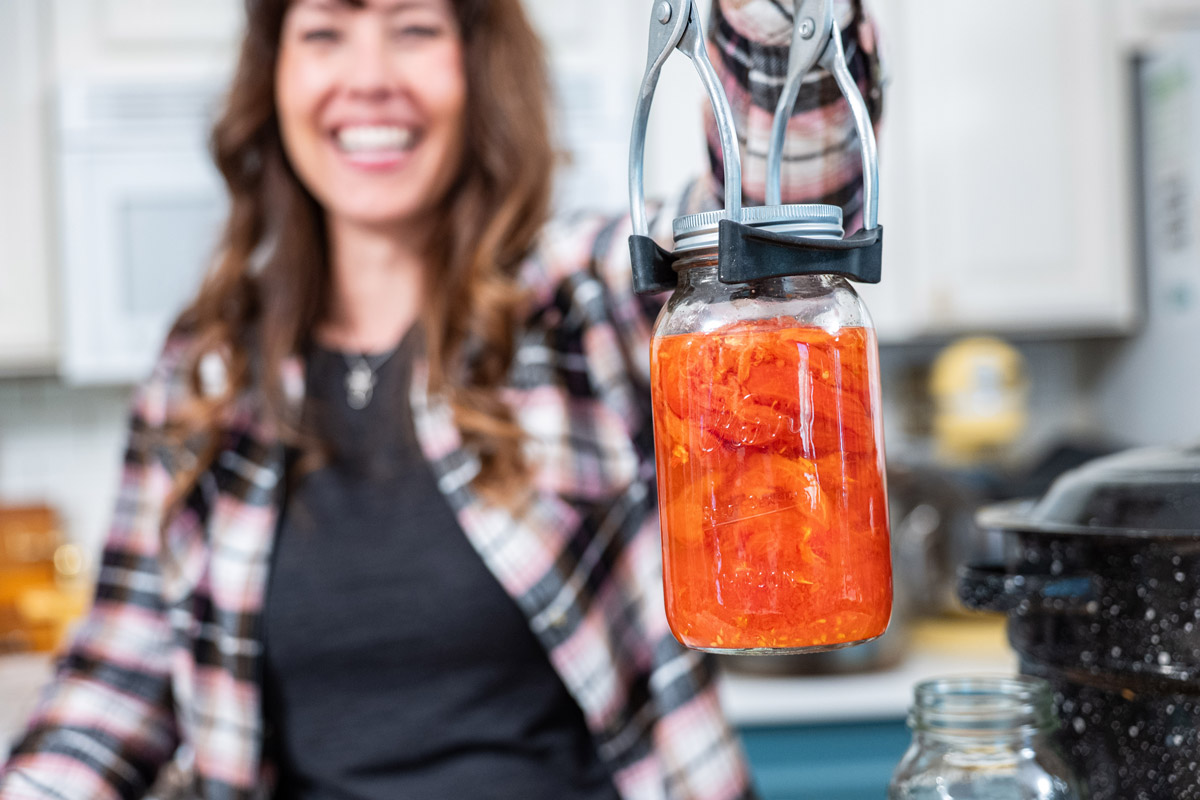

If you’ve grown vegetables, made jam, or want to preserve your garden harvest, water bath canning is the most beginner-friendly preservation method available. Unlike pressure canning, which requires specialized equipment and intimidates most first-timers, water bath canning uses simple equipment you likely already own. This guide walks you through every step so you can confidently preserve pickles, jams, jellies, and sauces at home.
How to Water Bath Can Food: Complete Step-by-Step Process
Water bath canning preserves high-acid foods (pH below 4.6) by processing filled jars in boiling water. This creates a vacuum seal as jars cool, preventing spoilage.
What You Will Need
- Large pot or canning kettle with rack insert (at least 10 quarts capacity)
- Clean glass jars with two-piece lid system (flat lids and screw bands)
- Jar lifter tool for safely removing hot jars
- Wide-mouth funnel for filling jars without spillage
- Bubble remover or non-metallic spatula for releasing trapped air
- Clean kitchen towels and a reliable thermometer
Steps
Prepare Your Equipment
Fill your large canning pot halfway with water and bring it to a simmer. Place the rack insert in the bottom. Wash all jars, lids, and screw bands thoroughly in hot soapy water, then rinse completely. Keep everything hot by placing jars in the simmering water bath until you’re ready to fill them. Hot jars prevent thermal shock when filled with hot food.
Prepare Your Recipe
Follow a tested canning recipe precisely, using the exact ingredients and proportions specified. Measure acid content carefully if the recipe calls for vinegar or lemon juice. Cook your food (jam, pickles, sauce, etc.) to the temperature and consistency your recipe requires. Have everything ready in a pot nearby, as timing is critical once you begin filling jars.
Fill Jars with Hot Food
Using your wide-mouth funnel, carefully ladle hot food into hot jars, leaving the headspace specified in your recipe (typically 1/4 to 1/2 inch from the jar rim). Use your bubble remover to gently slide along the inside edges, releasing trapped air pockets that could prevent proper sealing. Never skip this step, as air bubbles compromise the seal.
Clean Jar Rims and Apply Lids
Wipe the outer rim of each filled jar with a clean, damp cloth to remove any drips or food residue. Place a flat lid (which has a sealing compound) on top of each jar, then screw on the band until it’s snug but not overly tight. If you over-tighten, steam cannot escape during processing and the seal will fail.
Process Jars in Boiling Water
Using your jar lifter, carefully place filled jars into the simmering water bath, ensuring they are covered by at least 1 inch of water. Once all jars are submerged, bring the water to a rolling boil. Start your timer only after the water reaches a full boil. Processing time depends on your recipe and jar size, typically ranging from 10 to 30 minutes.
Remove and Cool Completely
When processing time is complete, use your jar lifter to remove jars from the boiling water and place them on a towel-lined counter, leaving at least 1 inch of space between jars. Do not tighten the screw bands or move the jars for at least 12 hours. As jars cool, the sealing compound on the lids creates a vacuum, and you’ll hear a distinctive ‘ping’ sound as each jar seals.
Test Seals and Store
After 12-24 hours, press the center of each lid. A properly sealed lid will be concave (curved downward) and won’t flex when pressed. If any jars didn’t seal, refrigerate and use that product within 3 weeks. Remove screw bands, label jars with contents and date, then store in a cool, dark place. Properly sealed canned goods remain safe for 1-2 years.
- Always use new, unused flat lids for canning, as the sealing compound deteriorates after one use. Screw bands and jars can be reused indefinitely.
- Never double-stack jars in your water bath or attempt to process more than one batch simultaneously, as uneven heating compromises sealing success.
- Keep a detailed log of your recipes, processing times, and results so you can troubleshoot and improve your technique with each batch.
What to Look For in Water Bath Canning Equipment
- Canning Pot Capacity: Choose a pot with at least 10-quart capacity to accommodate multiple jars and allow water to cover them fully. The pot should have a removable rack insert to keep jars off the bottom and prevent breakage from direct heat contact.
- Jar and Lid Quality: Purchase jars specifically designed for canning with proper threading and glass thickness. Food-grade jars ensure durability under heat and pressure. Replace flat lids annually and source them from reputable canning suppliers to ensure reliable sealing compounds.
- Tool Ergonomics and Safety: Invest in a proper jar lifter with secure grips designed to safely hold hot jars without slipping. A wide-mouth funnel prevents spills and food waste. These tools protect your hands and improve accuracy when processing multiple jars.
- Thermometer Accuracy: A reliable thermometer is essential for monitoring water temperature and ensuring proper processing conditions. Dial or digital thermometers designed for canning provide accurate readings critical to food safety and successful sealing.
Granite Ware Water Bath Canning Kettle with Rack
Best for: Serious beginners and experienced home canners
This 21.5-quart porcelain-coated steel kettle is the industry standard for water bath canning. The integrated removable rack keeps jars elevated and stable during processing, while the generous capacity accommodates up to 7 quart-sized jars. The sturdy construction distributes heat evenly, ensuring consistent results. The wide mouth opening makes jar handling simple, and the graduated size markings help you monitor water levels accurately.
Check Current Price on Amazon →Ball Wide Mouth Canning Jar Lifter
Best for: First-time canners prioritizing safety
This specialized tool removes hot jars from boiling water without risk of dropping or scalding. The jar lifter features non-slip handles and adjustable grips that securely hold both regular and wide-mouth jars. At just 9 inches long with a comfortable grip, it provides excellent leverage and control. Every beginner kit should include this essential safety tool to prevent burns and broken jars.
Check Current Price on Amazon →Ball Mason Jars Quart Size Dozen Pack
Best for: Budget-conscious canners making multiple batches
This dozen-pack of clear glass quart jars comes ready to use for most canning projects. The consistent threading and sturdy glass construction ensure reliable sealing when used with proper two-piece lids. Quart jars are versatile for jams, pickles, sauces, and compotes. At this price point, buying in bulk makes economic sense for serious preservers who process multiple batches seasonally.
Check Current Price on Amazon →Victorio Wide Mouth Canning Funnel
Best for: Canners wanting to minimize spills and waste
This stainless steel wide-mouth funnel fits perfectly into standard and wide-mouth jars, guiding food directly into containers without mess. The broad opening accommodates chunky mixtures like pickles and fruit pieces. The sturdy construction resists warping, and the compact design stores easily in any drawer. Using a funnel dramatically reduces cleanup time and prevents hot food from splashing during the filling process.
Check Current Price on Amazon →Ball Two-Piece Canning Lids Standard Size
Best for: Canners requiring reliable sealing performance
These official Ball canning lids feature a proven sealing compound that creates reliable vacuum seals consistently. Each box contains 12 flat lids and matching screw bands. Always purchase fresh lids annually rather than reusing old ones, as the sealing compound deteriorates. These lids work with standard mason jars and are the most trusted option in home canning for reliable results.
Check Current Price on Amazon →Presto 01755 Canning Supplies Starter Kit
Best for: Complete beginners wanting everything in one package
This comprehensive starter kit includes a 21.5-quart kettle, jar lifter, wide-mouth funnel, bubble remover, headspace measuring tool, and jar grabber. All pieces are color-coded for easy identification. The complete set eliminates guesswork about which tools to purchase separately. While premium-priced, the kit provides excellent value by bundling essential items and ensuring compatibility across all components.
Check Current Price on Amazon →Mavea Digital Instant-Read Thermometer
Best for: Canners who need precise temperature monitoring
This digital thermometer displays water temperature within seconds, helping you maintain the rolling boil required for safe processing. The waterproof probe withstands repeated immersion in boiling water, and the large LCD screen is readable even in steamy kitchen conditions. Fast response time ensures you never overshoot or undershoot your target temperature, improving canning consistency.
Check Current Price on Amazon →All American Model 920 Pressure Canner
Best for: Canners wanting to expand into low-acid foods later
While a pressure canner isn’t necessary for water bath canning, this heavy-duty option bridges the gap if you later want to can vegetables, meats, or other low-acid foods. The aluminum construction distributes heat evenly, and the American-made quality ensures decades of reliable use. Investing in a dual-purpose canner future-proofs your preserving hobby as your skills advance.
Check Current Price on Amazon →Start Your Canning Journey Today
Water bath canning is an accessible, rewarding way to preserve your garden harvest and create homemade gifts. Begin with a tested recipe for something you love to eat, invest in quality equipment, and follow each step carefully. The learning curve is gentle when you focus on high-acid foods like pickles, jams, and chutneys, which are the most forgiving for beginners.
Your first batch might feel intimidating, but that first ‘ping’ sound of a successful seal is genuinely thrilling. Within a few canning sessions, the process becomes automatic, and you’ll confidently fill your pantry with shelf-stable preserves. Start simple, master the fundamentals, and then expand to more ambitious recipes as your confidence grows. Happy canning!
Frequently Asked Questions
How do I know if my jars sealed properly?
After 12-24 hours of cooling, press the center of each lid. A properly sealed lid feels firm and concave (curves downward). If the lid flexes or pops when pressed, it didn’t seal. Refrigerate unsealed jars and use the contents within 3 weeks, or reprocess immediately with a new flat lid.
Can I reuse canning lids?
No, never reuse flat lids. The sealing compound deteriorates after one use and won’t create a reliable seal. Screw bands and jars can be reused indefinitely as long as they’re in good condition with no chips or cracks.
What’s the difference between water bath and pressure canning?
Water bath canning uses boiling water (212 degrees) and is safe only for high-acid foods like pickles and jams. Pressure canning reaches higher temperatures (240+ degrees) and is required for low-acid foods like vegetables and meats. Always follow tested recipes exactly regarding which method to use.
How long do canned foods stay safe to eat?
Properly sealed and stored canned goods remain safe to eat for 1-2 years. While they may remain edible longer, quality and nutritional value decline. Store jars in a cool, dark place away from direct sunlight, and discard any jars showing signs of leakage, mold, or bulging lids.
Why didn’t my jars seal, and what should I do?
Common causes include using old lids, overfilled jars, air bubbles, or insufficient processing time. If jars didn’t seal within 12 hours, refrigerate and use within 3 weeks, or reprocess immediately with fresh lids and proper timing. Never serve unsealed canned foods at room temperature.
As an Amazon Associate, Build & Bloom earns from qualifying purchases. We only recommend products we genuinely think are useful. Prices and availability vary; check Amazon for the latest.
Leave a Reply