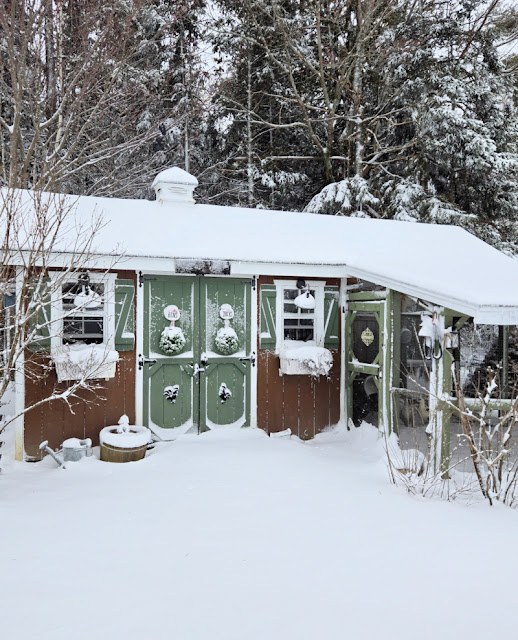

Winter can be tough on backyard chickens, but you don’t need an expensive heat lamp to keep them comfortable and safe. Chickens are remarkably cold-hardy when their coop is properly prepared. By making strategic improvements to ventilation, insulation, and bedding before temperatures drop, you’ll create a cozy microclimate that protects your flock from frost, frostbite, and illness while reducing your energy costs.
How to Winterize Your Chicken Coop Without a Heat Lamp
Proper winterization relies on three core principles: managing moisture through ventilation, retaining body heat through insulation and deep bedding, and maintaining consistent access to unfrozen water. Follow these steps to prepare your coop before winter arrives.
What You Will Need
- Bedding material (pine shavings, straw, or leaves) – plan for 4-6 inches initially
- Insulation panels or boards (cardboard, rigid foam, or wooden planks)
- Roofing materials (tarps, corrugated panels, or wood shingles) for weather protection
- Caulk or weatherstripping for sealing gaps and cracks
- Heated waterer or heat tape for water lines
- Thermometer to monitor interior coop temperature
Steps
Assess and Improve Ventilation
Inspect your coop for air gaps and vents located high on the walls, above head height where roosting chickens sleep. These upper vents allow warm, moist air to escape while keeping cold drafts away from the birds. Clear any blockages and ensure vents can be opened and closed seasonally. Proper airflow prevents dangerous moisture buildup that leads to frostbite and respiratory disease.
Seal Lower Gaps and Cracks
Walk around your coop and identify any openings near ground level or nesting boxes where cold drafts enter. Seal these gaps using caulk, weatherstripping, or wooden boards, but leave upper vents open for air circulation. Pay special attention to corners, door frames, and where equipment attaches to walls. This balance prevents drafts while maintaining the upper ventilation you need.
Add Deep Bedding Layer
Spread 4-6 inches of bedding material across the coop floor, then add additional layers as soiled bedding accumulates throughout winter. This creates a natural compost pile that generates warmth through decomposition. The chickens will scratch and work the bedding, turning it and releasing more heat. Fresh bedding should be added regularly without completely removing the old layer until spring.
Insulate Walls and Roof
Install insulation panels on the interior walls and roof, particularly on north-facing sides and any exposed surfaces. Use cardboard, rigid foam boards, or wooden panels that won’t trap moisture or create fire hazards. Ensure insulation doesn’t block your upper ventilation vents. This reduces heat loss from the coop’s interior while maintaining the airflow necessary to prevent condensation.
Protect the Roof from Snow and Ice
Add a weatherproof covering to the roof using tarps, corrugated panels, or shingles to prevent snow and ice accumulation. Heavy snow loads can collapse roofs and damage ventilation, while ice damming traps moisture inside. The goal is water runoff, not sealed protection that prevents air exchange at peak vents.
Install a Heated Waterer
Switch from open water containers to a heated waterer designed for poultry, or wrap existing waterers with heat tape. Chickens need consistent access to unfrozen water year-round, and dehydration is a major winter health issue. Check waterers daily, even with heating, as extremely cold temperatures can overwhelm heating elements.
Add Roosting Bars and Nesting Boxes
Ensure roosting bars are positioned higher than nesting boxes so chickens roost comfortably for the night. Chickens cluster together on roosting bars for warmth and huddle in nesting boxes if needed. Position bars parallel to walls to minimize drafts and provide space for birds to tuck under wings while roosting.
- Monitor coop interior temperature with a simple thermometer; most cold-hardy breeds stay healthy between 0-40 F without heat lamps
- Replace bedding when it becomes wet or compacted, as moisture reduces insulation value and increases disease risk
- Let chickens out on sunny winter days even for short periods, as natural light exposure and activity reduce stress and illness
What to Look For in Chicken Coop Winterization Supplies
- Bedding Material Quality: Choose dust-free, absorbent bedding that won’t compact easily. Pine shavings and straw are reliable options, though leaves are free if available. Avoid cedar and treated wood products, which can be toxic to poultry.
- Insulation Type: Select insulation that resists moisture and won’t degrade when wet. Rigid foam and cardboard work well for temporary seasonal application. Ensure materials are non-toxic and won’t create ammonia buildup.
- Waterer Heating: Heated waterers for poultry are specifically designed for coop use. Look for models with thermostat control to prevent water from boiling and models that hold sufficient volume for your flock size.
- Weatherproofing Durability: Roof coverings should withstand wind, snow load, and UV exposure without deteriorating quickly. Tarps and corrugated panels offer budget-friendly protection, while shingles provide long-term durability.
Farm Innovators Heated Waterer for Poultry
Best for: Backyard chicken keepers in cold climates
This electric heated waterer maintains liquid water in temperatures as low as -20 F, with a 3-gallon capacity suitable for small to medium flocks. The thermostat control automatically activates heating only when needed, reducing electricity costs. The design prevents algae growth and includes a simple fill mechanism for daily refilling. Highly reliable and built specifically for poultry needs.
Check Current Price on Amazon →Suet Heat Lamp Bulb Alternative – Deep Litter Method
Best for: Homesteaders wanting to skip heat lamps entirely
By implementing the deep litter method with quality pine shavings, many keepers skip electric heaters altogether. These premium pine shavings are kiln-dried, dust-free, and absorb moisture effectively while generating natural compost heat. One bag covers approximately 100 square feet at 4-inch depth. An economical foundation for the winterization process that reduces long-term heating costs.
Check Current Price on Amazon →Thermwell Products Frost King Weatherstripping Tape
Best for: First-time winterizers sealing coop gaps
This adhesive-backed foam weatherstripping seals gaps around doors, vents, and wall cracks without tools or fasteners. It compresses to fill irregular spaces and remains flexible in cold temperatures. Comes in 17-foot rolls that cover multiple coop entry points. Perfect for beginners because installation requires no drilling, cutting, or special skills–simply clean the surface and apply.
Check Current Price on Amazon →Owens Corning Insulation Rigid Foam Board
Best for: DIYers insulating coop walls and roofs
Two-inch rigid foam boards provide excellent R-value insulation while remaining moisture-resistant and lightweight for easy installation on coop interiors. Each 4×8 board covers significant surface area with minimal fastening required. Cuts easily with a utility knife for custom sizing around vents and openings. Offers superior insulation performance compared to cardboard at a competitive price point.
Check Current Price on Amazon →Winterize Smart, Not Expensive
Winterizing your chicken coop without a heat lamp is not only possible–it’s actually the healthier, more sustainable approach for most backyard flocks. By focusing on the fundamentals of insulation, ventilation, deep bedding, and reliable water access, you’ll create conditions where chickens naturally stay warm and comfortable. The initial investment in these supplies pays dividends through lower electricity costs and reduced disease pressure over multiple winters.
Start your winterization project 4-6 weeks before the first hard freeze, giving yourself time to monitor improvements and make adjustments before extreme cold arrives. Begin with ventilation assessment and gap sealing, add your deep bedding layer, then tackle insulation and weatherproofing. Keep a simple thermometer inside to verify that your efforts are maintaining reasonable temperatures. Most keepers find that their flocks thrive without artificial heat once these natural methods are properly implemented, leading them to ask why they ever considered a heat lamp in the first place.
Frequently Asked Questions
Do chickens really need heat lamps in winter?
Most cold-hardy chicken breeds don’t need heat lamps if the coop is properly ventilated, insulated, and has adequate deep bedding. Heat lamps create fire hazards and can actually cause problems by making chickens dependent on artificial warmth. Chicks and thin-feathered breeds may need supplemental heat, but adult birds in well-prepared coops stay healthy in freezing temperatures.
How often should I change the bedding in winter?
The deep litter method means you’re adding fresh bedding on top rather than replacing everything regularly. Add fresh material when the top layer becomes visibly soiled, typically every 1-2 weeks depending on flock size. Only completely clean and replace bedding once yearly, usually in spring, when the composted layer has done its job generating warmth.
What temperature is too cold for chickens?
Most adult chickens tolerate temperatures well below zero Fahrenheit if the coop is properly prepared. Extreme danger occurs when humidity gets too high (causing frostbite) or when water freezes. Monitor your specific flock for signs of distress, but properly winterized coops maintain survivable conditions even in harsh winters.
Can I use straw instead of pine shavings for deep bedding?
Yes, straw works well for deep litter systems and may actually provide slightly better insulation than shavings. However, straw compacts more easily and can harbor mites if not managed carefully. A mix of straw and pine shavings often provides the best balance of insulation, moisture absorption, and decomposition heat.
Will insulating the coop make it too humid?
Only if ventilation isn’t adequate. Upper vents allow moist air to escape, while insulation prevents drafts. This balance maintains dryness without cold. If you seal the coop completely, humidity becomes dangerous. Trust that properly designed upper ventilation removes moisture while lower insulation prevents drafts–they work together.
As an Amazon Associate, Build & Bloom earns from qualifying purchases. We only recommend products we genuinely think are useful. Prices and availability vary; check Amazon for the latest.
Leave a Reply