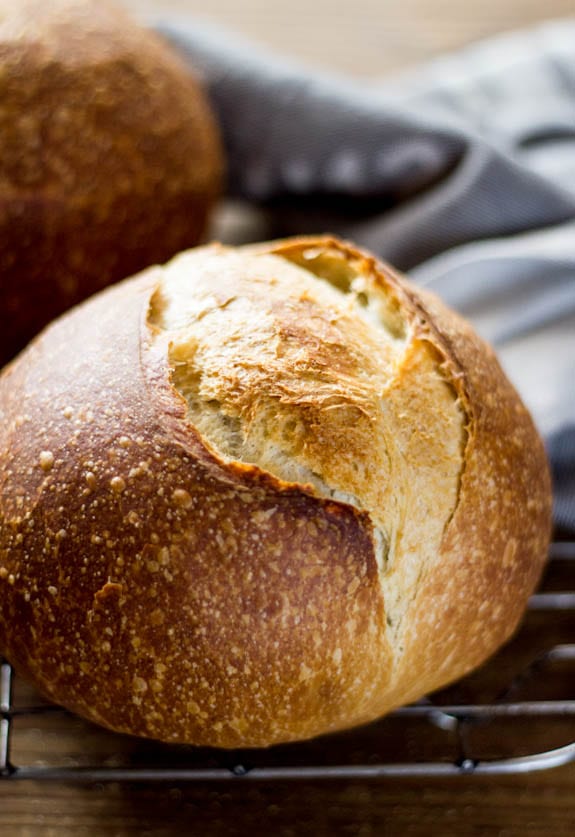

Starting sourdough feels intimidating, but the no-knead method removes the biggest barrier to entry: you don’t need strong arms, special equipment, or bread-making experience. All you need is time, basic ingredients, and a container. This approach lets natural fermentation do the heavy lifting while you go about your day, making it perfect for beginners who want authentic, tangy sourdough without the fuss.
How to Make No-Knead Sourdough Bread
This method relies on a long, cool fermentation to develop flavor and structure. Total hands-on time is under 15 minutes spread across two days, with the dough doing most of the work itself.
Ingredients
- 3 cups bread flour or all-purpose flour
- 1.5 teaspoons salt
- 0.5 cup active sourdough starter (fed 4-8 hours prior, bubbly and peaked)
- 1.25 cups filtered water at room temperature
Method
Mix your dough
Combine flour, salt, and water in a large mixing bowl. Stir until shaggy and all flour is hydrated. Add your active starter and fold it in thoroughly using a spatula or your hand, making sure no dry flour remains. The dough will be sticky and loose, which is exactly right.
Bulk fermentation (12-18 hours)
Cover your bowl loosely with a kitchen towel or plastic wrap. Leave it at room temperature (68-72F is ideal). You’re looking for the dough to rise 50-75% in volume and show visible bubbles throughout. You don’t need to fold or punch it down during this stage; the long fermentation does all the work.
Pre-shape your dough
Turn the dough out onto a lightly floured surface. Gently fold the edges toward the center to create surface tension, rotating the dough as you go. This takes about 30 seconds and helps create a rounded shape. Let it rest for 20-30 minutes on the counter.
Final shape and rise
Flip the dough seam-side down. Using a bench scraper or your hands, pull the dough toward you in a gentle rolling motion to create tension on the surface. Place it seam-side up in a floured banneton basket or a bowl lined with a floured kitchen towel. Cover and refrigerate for 8-16 hours, or let it rise at room temperature for 2-4 hours until puffy.
Preheat your Dutch oven
Place a covered Dutch oven in your oven and heat to 500F for 45 minutes. This creates the steamy environment that gives sourdough its crispy crust and open crumb structure. Do not skip this step.
Score and bake covered
Turn your dough out onto parchment paper. Using a sharp blade or bread lame, make a single diagonal slash across the top. Carefully transfer the dough (still on parchment) into the preheated Dutch oven. Cover and bake for 20 minutes at 500F.
Uncover and finish baking
Remove the Dutch oven lid and reduce heat to 450F. Bake for another 20-30 minutes until the crust is deep golden brown. The loaf should sound hollow when tapped on the bottom. Transfer to a cooling rack.
Cool completely before slicing
Wait at least 1 hour before cutting into your bread. The interior continues to set as it cools, and cutting too early will result in gummy crumb. This is the hardest step, but it’s worth the patience.
- Your sourdough starter is the star–make sure it’s been fed 4-8 hours before mixing and is visibly bubbly and at peak or just past peak when you add it. A weak starter means weak bread.
- Keep your dough cool during bulk fermentation (65-72F ideal). Warmer temperatures speed fermentation but can lead to over-fermented, flat bread. If your kitchen is warm, reduce fermentation time to 8-12 hours.
- Don’t skip the Dutch oven. The trapped steam is what creates that crackling crust and open, airy crumb. A standard 5-6 quart size works perfectly for this recipe.
What to Look For in Sourdough Baking Equipment
- Dutch Oven Size and Material: A 5-6 quart enameled cast iron Dutch oven is ideal for sourdough. The heavy lid traps steam during the first part of baking, creating the signature crackling crust. Avoid glass lids, which can shatter from temperature changes.
- Bread Lame or Scoring Tool: A sharp blade for scoring your dough before baking controls how the bread expands. A proper bread lame has a razor blade at an angle; a clean serrated knife works in a pinch, but won’t produce as clean a score.
- Banneton Proofing Basket: A woven or fabric-lined basket holds dough during its final rise and prevents it from spreading too wide. The basket also helps create the characteristic rings on the crust. Round baskets work best for round loaves.
- Kitchen Scale for Precision: Sourdough baking is much more reliable with weight measurements (grams) than volume. A basic digital scale ensures consistent ratios of flour to water to starter, which directly impacts your results.
Le Creuset Enameled Cast Iron Dutch Oven 5.5-Quart
Best for: Home bakers who want a workhorse that lasts decades
The gold standard for sourdough baking. Le Creuset’s 5.5-quart Dutch oven has heavy cast iron walls that distribute heat evenly and retain it perfectly during the two-stage bake. The enamel coating eliminates seasoning concerns, and the tight-fitting lid creates a perfect steam seal. This oven will outlast you and works for bread, braised dishes, and Dutch-oven cooking of all kinds.
Check Current Price on Amazon →Tramontina Enameled Cast Iron Dutch Oven 6-Quart
Best for: Budget-conscious beginners who want reliability without the premium price
Tramontina delivers excellent heat retention and lid seal at a fraction of Le Creuset’s cost. The 6-quart capacity is slightly larger, giving you room for bigger loaves. The enamel coating is durable and food-safe, and countless home bakers have produced gorgeous sourdough in this oven. It’s a smart choice if you’re testing the hobby before investing heavily.
Check Current Price on Amazon →Staub Enameled Cast Iron Dutch Oven 5.5-Quart
Best for: Bakers who want premium quality at a mid-range price point
Staub sits between budget and luxury. The enameled cast iron construction is as heavy and reliable as Le Creuset, with superior heat retention. The black matte interior hides stains better than bright enamel. The self-basting lid design (with small spikes) actually benefits sourdough baking by distributing condensation evenly across the dough.
Check Current Price on Amazon →Lame Bread Lame with 10 Single-Edge Razor Blades
Best for: First-time sourdough bakers who need clean, professional scores
Scoring intimidates many beginners, but a proper lame removes the guesswork. This tool features a razor-sharp blade at the optimal 45-degree angle, letting you make confident slashes that control how the bread expands in the oven. The set includes 10 replacement blades so you always have a sharp edge. Produces dramatically better oven spring than using a knife.
Check Current Price on Amazon →Start Your Sourdough Journey This Week
No-knead sourdough proves that great bread doesn’t require kneading, fancy techniques, or expensive equipment. It requires three things: an active starter, time, and a Dutch oven. Mix your dough on day one, let fermentation do the work overnight, bake on day two, and you’ll have bakery-quality bread that tastes infinitely better than store-bought. Your first loaf might not be perfect–that’s normal. Each loaf teaches you about your kitchen’s temperature, your starter’s strength, and your timing. By loaf three or four, you’ll be producing bread you’re genuinely proud of.
The equipment matters less than consistency. A basic Dutch oven, a kitchen scale, and a banneton are all you need to start. Splurge on a good Dutch oven because it will outlast every other tool you buy, and the heavy cast iron makes a measurable difference in your crust. A bench scraper and bread lame come next as you gain confidence. Invest slowly, learn thoroughly, and trust the process. Sourdough is forgiving once you understand that fermentation is doing the work, not you.
Frequently Asked Questions
Why didn’t my sourdough rise during bulk fermentation?
Your starter wasn’t active enough when you mixed it. Always feed your starter 4-8 hours before baking, when it’s visibly bubbly and at its peak (or just past). A weak or recently-fed starter won’t produce enough gas. Also check your kitchen temperature–below 65F dramatically slows fermentation.
My sourdough turned out dense and gummy inside. What went wrong?
You likely cut into it too soon after baking. Sourdough needs at least 1 hour to cool completely; the interior sets as it cools. If the crumb is consistently dense, your bulk fermentation was too short. Aim for 50-75% volume increase and visible bubbles throughout the dough before shaping.
Can I skip the Dutch oven and bake on a pizza stone instead?
You’ll lose the crucial steam that creates a crispy, crackling crust. Without trapped steam, your bread will have a pale, thick crust and tighter crumb. A Dutch oven is not optional for professional-quality sourdough. If you don’t have one, it’s the single best investment you can make.
How often should I feed my sourdough starter?
If you bake weekly, keep your starter on the counter and feed it once daily. If you bake less frequently, store it in the fridge and feed it once weekly. Always feed your starter 4-8 hours before using it in dough so it reaches peak activity.
Can I make this recipe with all-purpose flour instead of bread flour?
Yes. Bread flour produces slightly more open crumb and better oven spring due to higher gluten content, but all-purpose flour works fine for beginners. You may get a marginally tighter crumb, but the bread will still taste delicious and have good texture.
As an Amazon Associate, Build & Bloom earns from qualifying purchases. We only recommend products we genuinely think are useful. Prices and availability vary; check Amazon for the latest.
Leave a Reply